Let’s see how to change Wi-Fi network priority in Windows 10. The transition from the Classic Control Panel to the modern Settings application was generally a good exception for the convenience of working with popular system settings. Unfortunately, the settings migration process has been going on for six years now, and many controls are still buried in the bowels of Windows 7.
Moreover, some utilities disappeared somewhere halfway. One of these is the ability to easily change the priority of Wi-Fi networks. For some reason, Microsoft did not transfer it from Windows 7 to Windows 10, which is why the only way to change the priority of wireless networks is to use the netsh command in the Command Prompt (excluding third-party applications). With the netsh command, you can assign additional priority to all known networks without using extra software. Here’s how to do it.
In Windows 10, the only way to change a WiFi network priority without using third party tools is the console tool netsh. Using netsh, you can change the connection order for all registered wireless networks. Here is how it can be done.
How to change Wi-Fi network priority in Windows 10
- Open a command prompt as Admin.
- Type or copy-paste the following command:
netsh wlan show profiles. Press Enter, after which a list of Wi-Fi networks known to the computer will appear on the screen.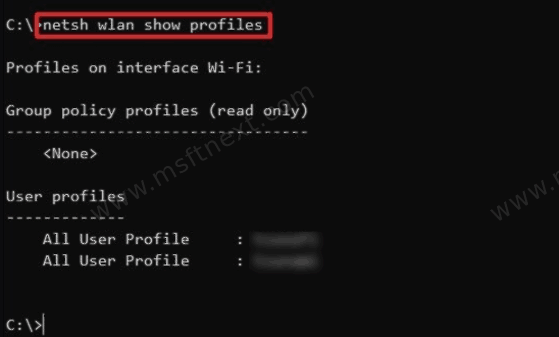
- Write down or remember the names of the networks you want to assign new priority.
- Now enter the command
netsh wlan set profileorder name = "NETWORK NAME" interface = "Wi-Fi" priority = 1.
netsh wlan set profileorder name="some other network" interface="Wi-Fi" priority=2. - Reissue the command specifying the appropriate priorities for the remaining networks.Now if you run
netsh wlan show profilesagain, you will see that the list is reordered. If you want Windows 10 to always prefer a specific network profile, set it to priority 1 and don’t change the priorities of other networks.


