You can change the screen off time in Windows 11 if you are not happy with the default idle time of 30 minutes. Idle means no input or mouse interaction by the user. This parameter can be personalized and adjusted to meet specific needs. For example, reduce it to save battery on your laptop.
Change the screen off time on Windows 11
There are three ways to change the monitor power off timeout in Windows 11: Using the Power and Sleep options in Settings app, using the Control Panel, or using the Windows Terminal.
Change the screen off time on Windows 11 with the Settings app
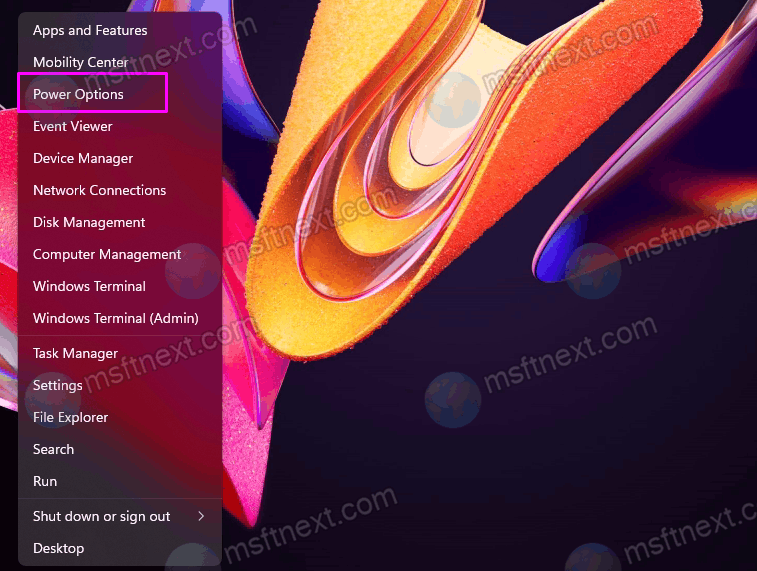
- Press ⊞ Win + X or right-click on the ‘Start’ button. Select ‘Power Options’. Alternatively, press ⊞ Win + I and go to System> Power and battery.
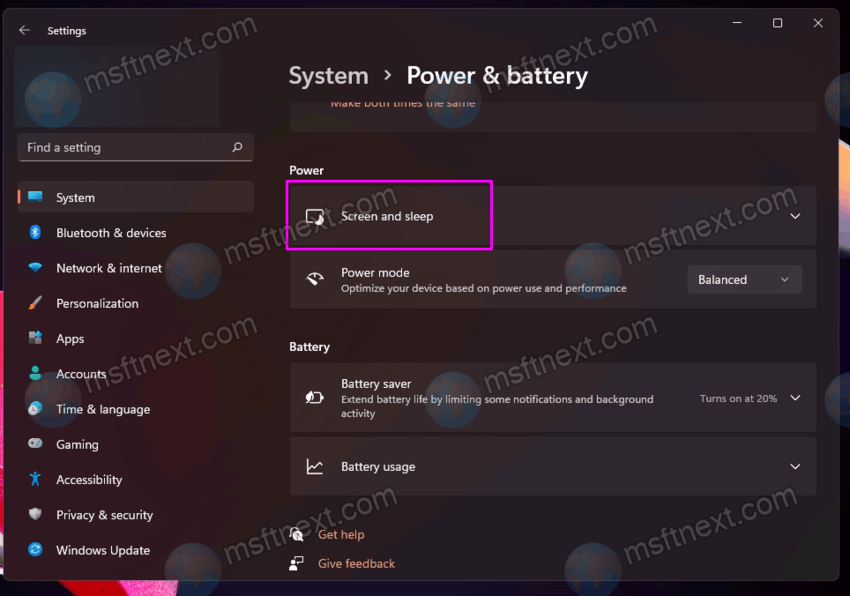
- Find and expand the ‘Screen & sleep’ option.
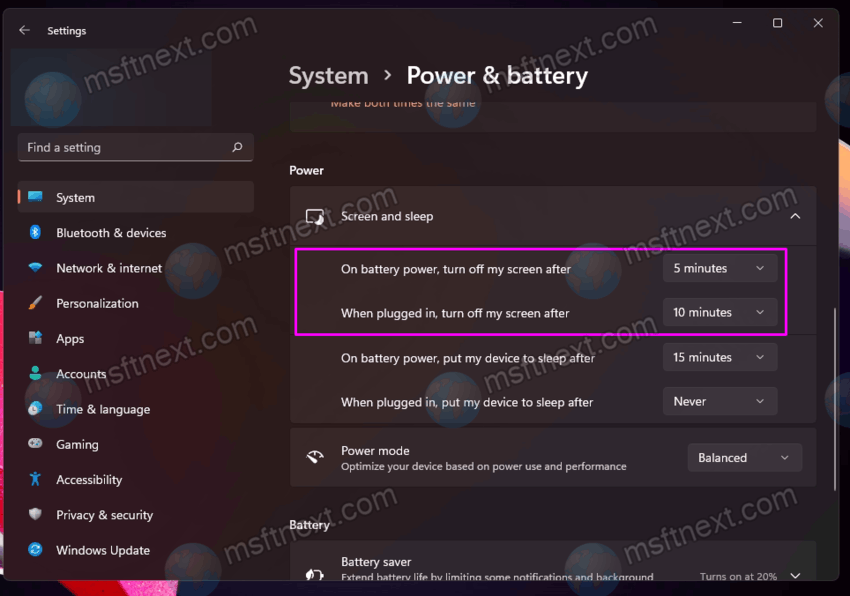
- Select the time after which the computer will turn off the monitor using the ‘When plugged in, turn off my screen after‘ option. Repeat this step for battery power (if you have a laptop or tablet).
- Close the Settings app.


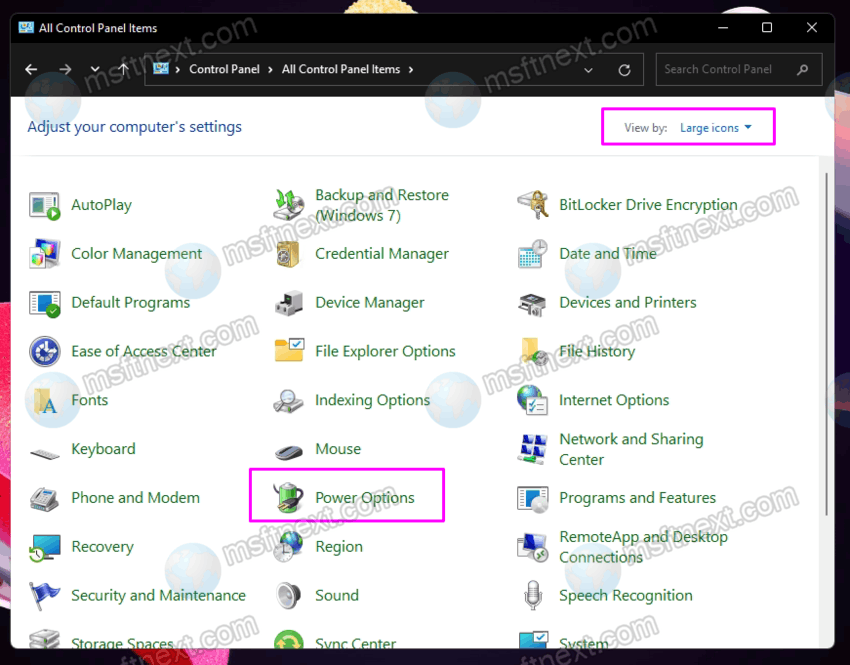
Change the turn off the monitor timeout in the Control Panel
- Press ⊞ Win + R and enter
controlto launch the classic Control Panel.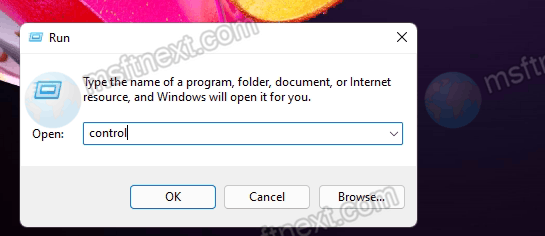
- Switch the view mode to large or small icons, and then open the ‘Power Options‘ section.
- Click on the ‘Choose when to turn off the display‘ link on the left side of the window.
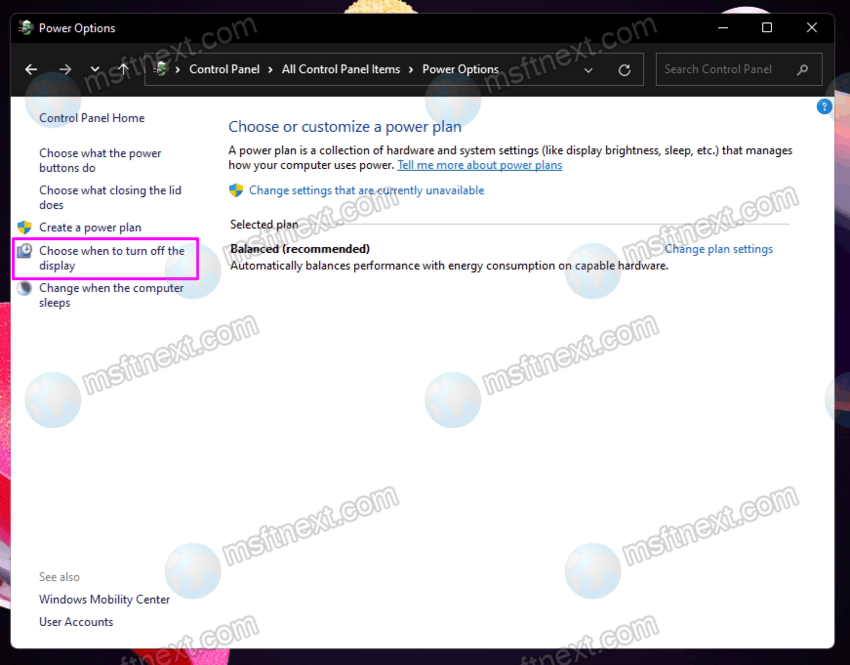
- Now, click on ‘Change settings are currently unavailable‘ link.

- On the next window, select a new time next to the ‘Turn off the display‘ item.
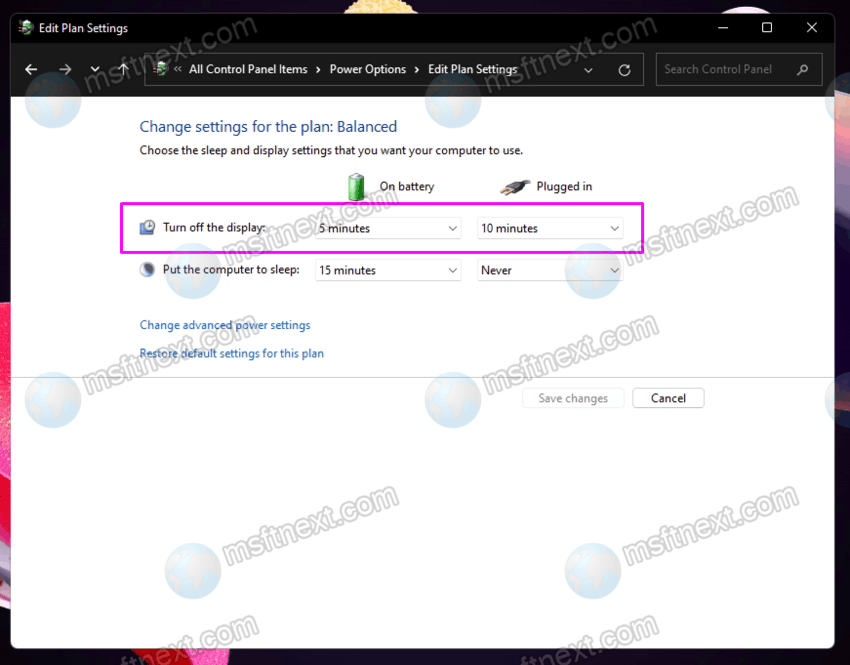
- Save your changes by clicking on the corresponding button below.


Please note that you can specify different timeouts for different power plans. For example, turn off the monitor after 2 minutes in battery saver mode, and never turn off the screen in maximum performance mode.
Apart from the two ways above, you can change the time when the monitor turns off in Windows 11 in Terminal. There is a special command that can be used in various automation scenarios.
How to change the display turn off timeout in Windows 11 from Terminal
Finally, let’s take a look at the option to change the time to turn off the monitor in Windows 11 using a relatively simple command in the Windows Terminal.
To change the screen off time in Windows 11 from Terminal, follow the steps below.
- Press ⊞ Win + X or right-click on the ‘Start’ button.
- Select ‘Windows Terminal‘. Please note that the below steps do not require you to run it as Administrator.

- If you want to change the time to turn off the screen while plugged in, use the command
powercfg -change -monitor-timeout-dc X. ReplaceXwith the time in minutes you want. For example,powercfg -change -monitor-timeout-dc 10. This command will cause Windows to turn off the screen after 10 minutes of inactivity.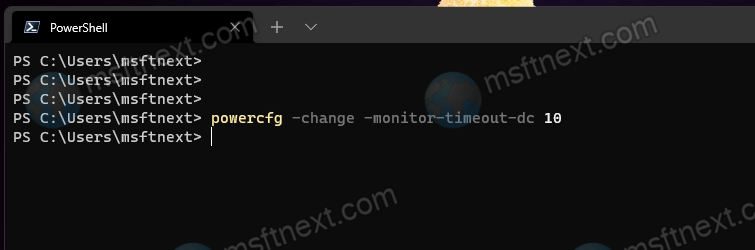
- If you need to change the monitor timeout on battery power, use a different command:
powercfg -change -monitor-timeout-ac X. Again, replaceXwith the desired time in minutes.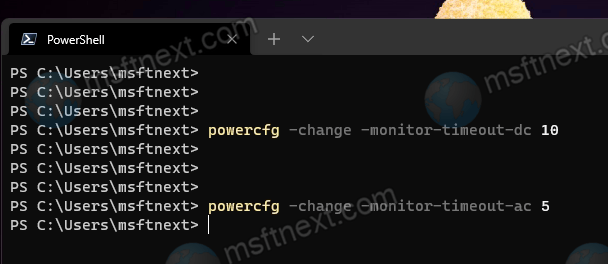
- Press ↵ Enter to execute the command. Please note that the Terminal will not display messages about the successful execution of the command.
- Now you can close Terminal.


Done. Now you know how to change the time after which Windows 11 turns off the monitor.
