

How to Turn On or Off Transparency Effects in Windows 10
Windows 10 allows having transparency effects enabled or disabled for the taskbar, Start, and Action center. Disabling the semi-transparent areas will also disable acrylic Fluent Design effects for Store apps, the Settings app, and the Start menu.
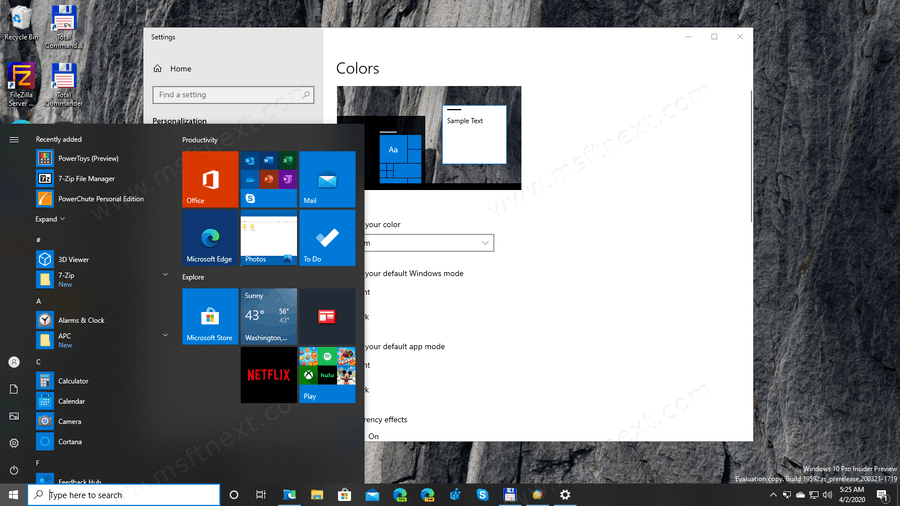
By default, transparency effects are enabled in Windows 10. When you open the Start menu, it appears semi-transparent with the blur effect behind it.
Transparency Effects are enabled:

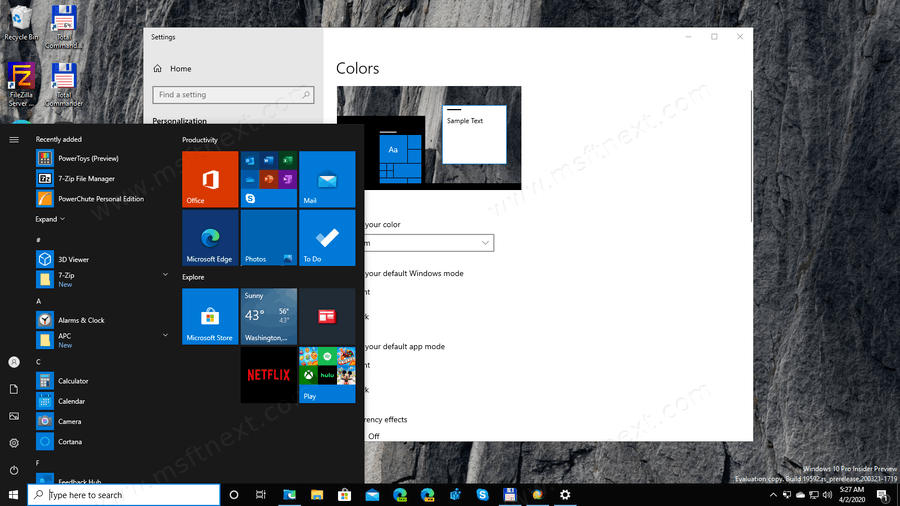
Transparency Effects are disabled:
Blur will be significantly reduced for the Tablet mode UI, making the desktop wallpaper visible behind it.
This post will show you how to turn on or off transparency effects in Windows 10. Three different methods can be used for that.
To Turn On or Off Transparency Effects in Windows 10,
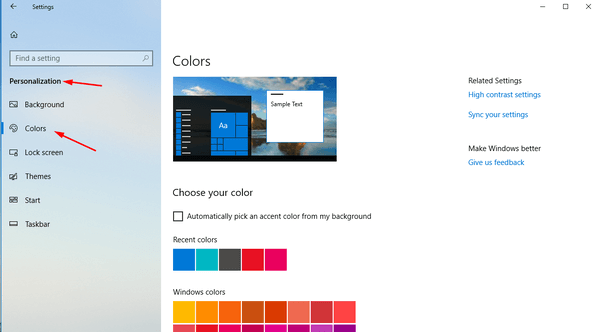
- Open the Settings app.
- Browse to Personalization > Colors on the left.
- Turn off or on the toggle option Transparency effects in the right page.
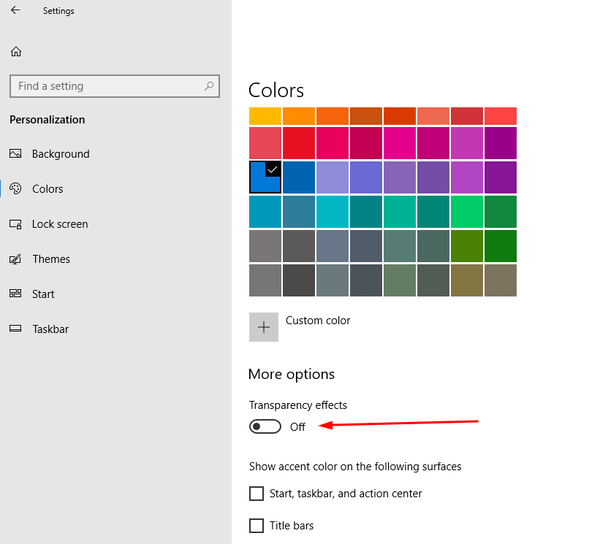
- You are done.


Note: You can open the Colors page of Settings directly. Press the Win + R shortcut keys together on your keyboard and type the following in the Run box: ms-settings:colors. For the list of ms-settings commands available in Windows 10, refer to the following post: ms-settings Commands in Windows 10.
If you disable the Transparency effects option, transparency effects will be disabled for the taskbar, Start menu, and Action center, along with the blur effect on the sign-in screen.
Alternatively, transparency effects can be disabled in Ease of Access settings.
Turn On or Off Transparency Effects in Ease of Access Settings
- Open the Settings app.
- Navigate to Ease of Access > Display on the left.
- Turn off or on the toggle option Show transparency in Windows on the right side, under Simplify and personalize Windows.
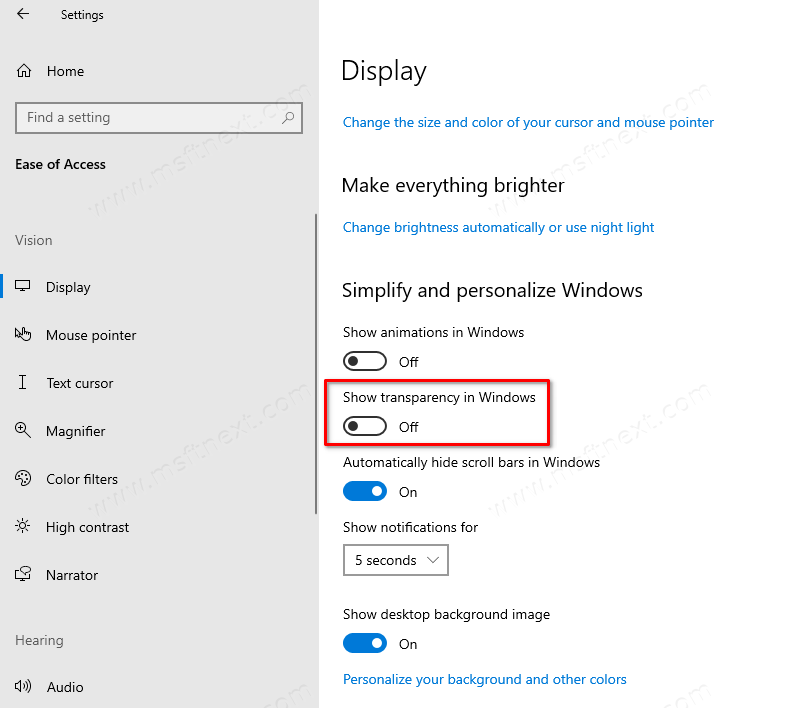
- You are done.

Finally, you can turn off or on transparency effects with a Registry tweak.
Turn On or Off Transparency Effects in Registry
- Open the Registry Editor app.
- Go to the following Registry key.
HKEY_CURRENT_USER\SOFTWARE\Microsoft\Windows\CurrentVersion\Themes\Personalize. - On the right, modify or create a new 32-Bit DWORD value
EnableTransparency. Note: Even if you are running 64-bit Windows you must still create a 32-bit DWORD value. - Set its value to 1 to
enabletransparency effects. - Set its value data to 0 to
disabletransparency effects. - To make the changes done by the Registry tweak take effect, you need to sign out and sign in to your user account.
