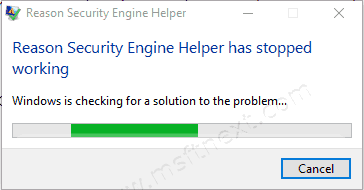
This tutorial will explain what is Error Reporting and how to disable Error Reporting on Windows 10. When an app or program crashes due to some error, Windows automatically registers this event. The the OS launches the standard Windows Error Reporting utility to generate a report. After that, it offers to send it to Microsoft servers. The log is not sent automatically. Moreover, most users prefer not to share information about software errors and would not mind disabling this function altogether.

In Windows 7 and 8.1, this could be done through the graphical user interface of the system in the Control Panel. But in Windows 10, the “Problem Reporting Options” option has been removed from the classic Action Center.
To disable Windows Error Reporting in Windows 10, you need to edit one key in the registry. There is also a universal method that is suitable for all versions of Windows, including Windows 10 Pro and Home by disabling a service.
Disable Error Reporting on Windows 10
- Open the Registry editor. For that, press Win + R and enter
regeditinto the Run window. - Browse the left pane down to the key
HKEY_LOCAL_MACHINE\SOFTWARE\Microsoft\Windows\Windows Error Reporting. - Create a new DWORD parameter on the right, name it Disabled, and set it to
1.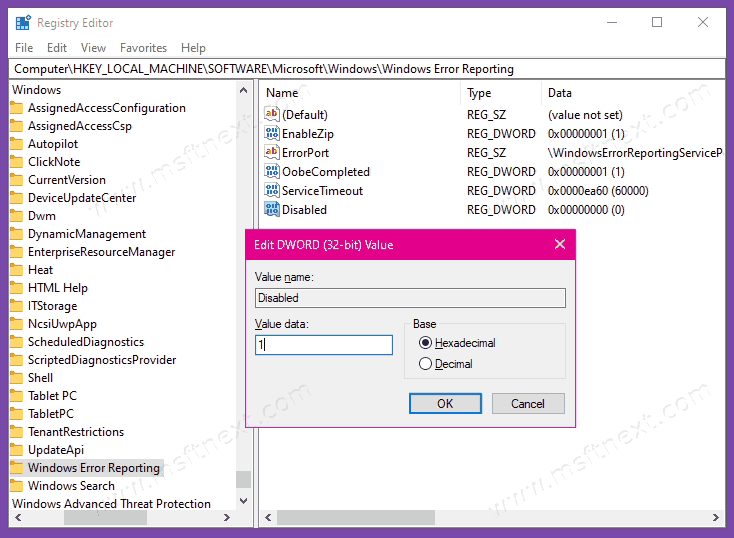
- Now restart Windows 10 to apply the change.

Also, there is a method that applies not only to Windows 10, but also to Windows 8 and Windows 7. The idea is to disable the corresponding service, so Windows 10 won’t be able to handle app errors and crashes.
Disable the Windows Error Reporting Service
- Press Win + R and enter
services.mscinto the Run window.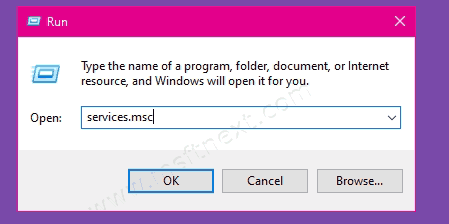
- In the list of services, locate the one named Windows Error Reporting Service.

- Double click it and select Disabled from the Startup type drop menu.
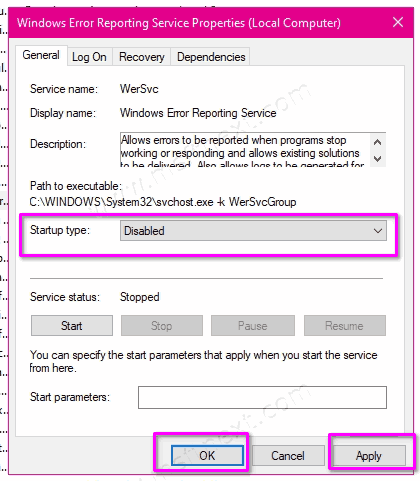
- You can now close the Services window if you want.


Finally, fans of the command prompt can disable it through the console.
Turn off the Windows Error Reporting Service in console
- Launch Command Prompt as administrator.
- Run this command in it:
sc config wersvc start= disabled.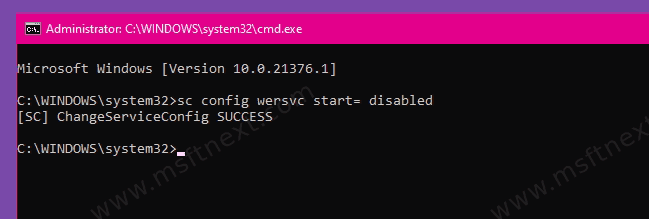
- Restart Windows 10 to apply the change.

The service is now disabled. It can be re-enabled on demand by running the undo command sc config wersvc start= demand.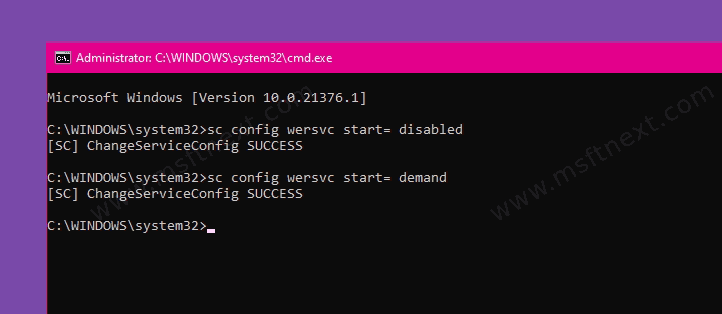

In addition to the method reviewed in this chapter, PowerShell can be used to manage Windows Error Reporting. It includes three wrappers for the task to complete.
Disable Windows Error Reporting in PowerShell
- Open PowerShell as administrator.
- Type
Get-WindowsErrorReportingand press the Enter key.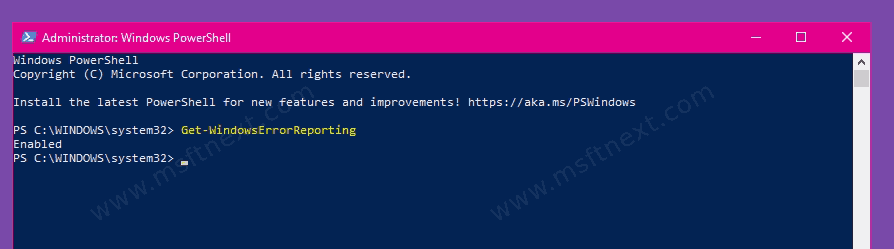
- The command will report the state of the WER feature, either enabled or disabled.
- To disable Windows Reporting Service, execute the command
Disable-WindowsErrorReporting.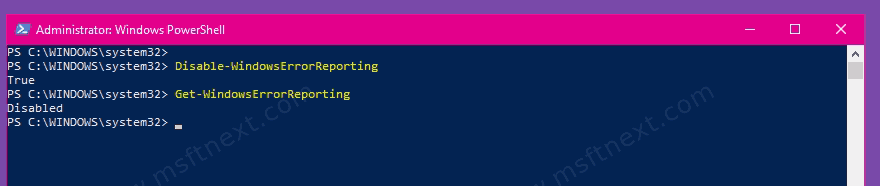
- To enable it at any moment later, use the command
Enable-WindowsErrorReporting.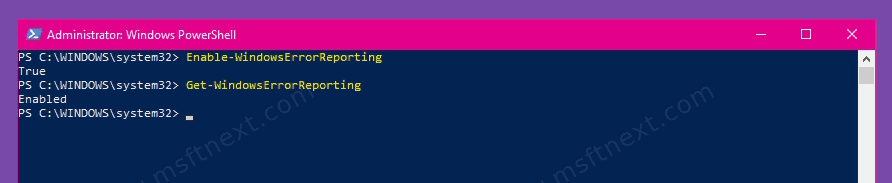


That’s all about the topic.
