During the final steps of setting up Windows 10 or 11 on contemporary computers with TPM 2.0 compatibility, BitLocker can automatically encrypt the hard drive, which includes both the primary system and user partitions. This feature is commonly found on newer laptop models and is designed to enhance the security of user data. In the event that the drive is accessed by unauthorized individuals, a BitLocker recovery key will be required to view the files.
Encryption does not affect the operation of the system in any way, but in some cases it may cause some inconvenience due to the need to enter a recovery key. For example, when reinstalling the system or using a Microsoft account . In general, if encryption is not something you need, you can disable it during the Windows installation process .
This can be done in at least two ways.
Rufus program
The first is to use the Rufus program to burn the installation flash drive .
The latest versions of this tool have a built-in feature that allows you to modify Windows distributions by adding a command to disable automatic encryption.
Everything is very simple here: after you specify the path to the flash drive and ISO image and click “Start” , the “Windows Experience” window will appear.
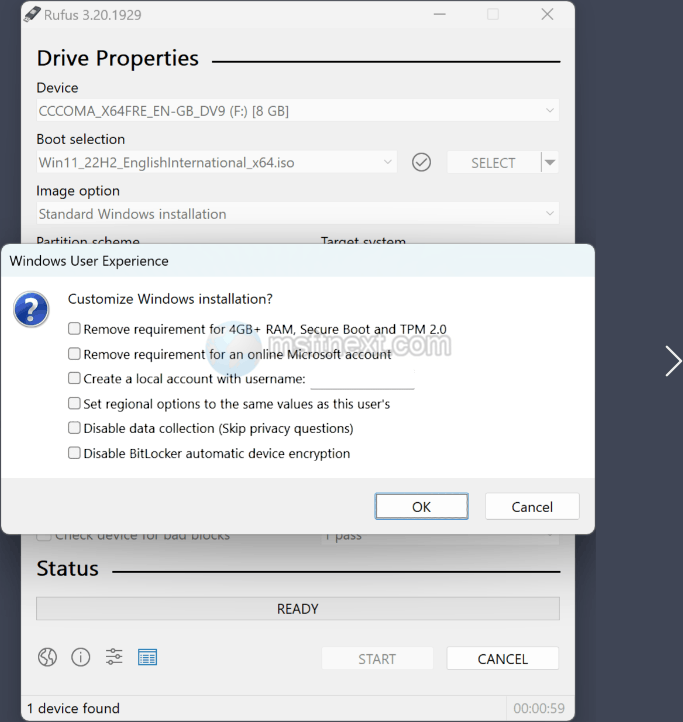
Check the “Disable automatic BitLocker device encryption” checkbox.
You can then continue recording as usual.
Editing the registry
You can also disable auto-encryption directly during the installation of the operating system.
Once Windows installation reaches its final stages, an OOBE screen will appear asking you to select a country or region.
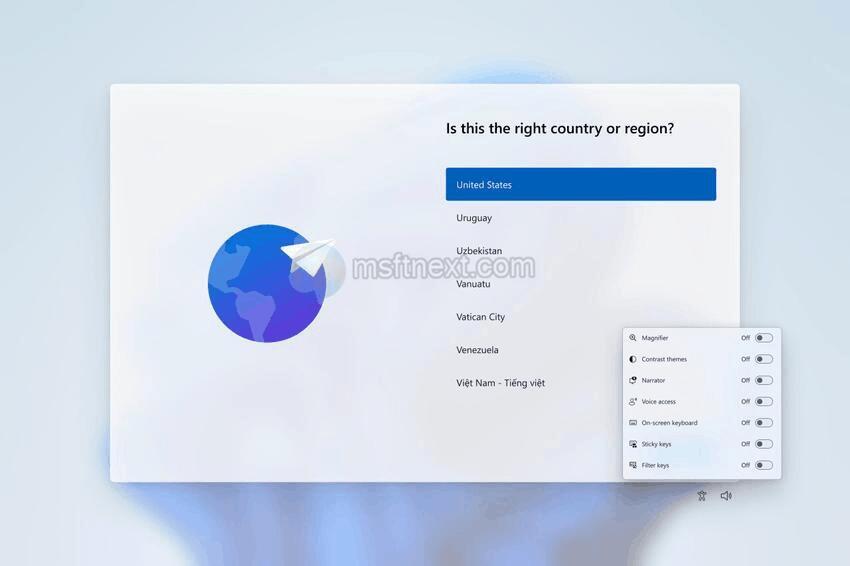
At this point, press ⇧ Shift + F10 on your keyboard F10to bring up the command prompt.
Run the command in it:
reg add HKLM\SYSTEM\CurrentControlSet\Control\BitLocker /v PreventDeviceEncryption /t REG_DWORD /d 1

Done, you can close the console and continue installing Windows as usual.
Alternatively, you can open the registry editor in the console with the regedit command, go to the key:
HKLM\SYSTEM\CurrentControlSet\Control\BitLocker
And manually create a PreventDeviceEncryption DWORD parameter with the value 1 in the last subkey.
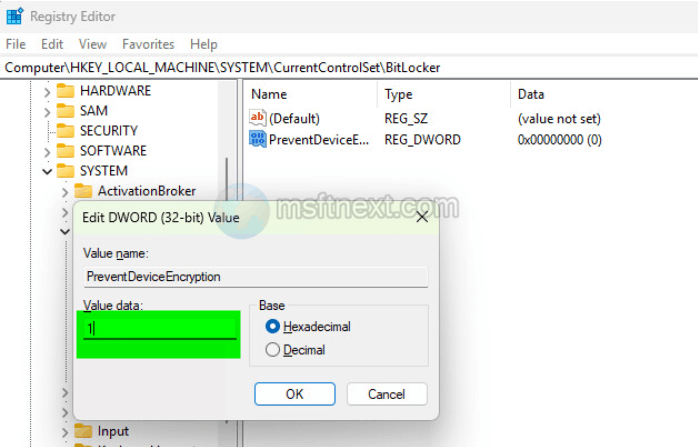
The result will be the same as using the reg add command .
Finally, you can disable encryption after installing the system.
To do this, use the manage-bde -status and manage-bde -off Drive Letter: commands.
The first command shows encryption information, the second disables encryption on the specified disk partition.