How to Change Notification Timeout in Windows 10 and Make It Last Longer
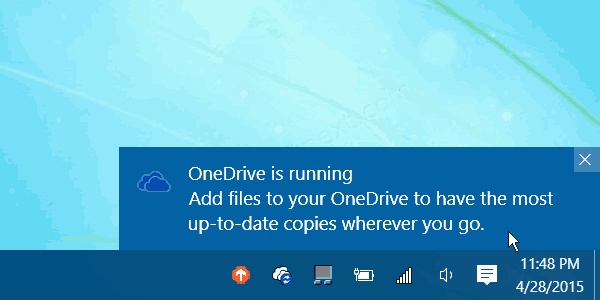
The Action Center has been updated in Windows 10, featuring a new notification system. Windows 10 has replaced all kinds of notifications including the classic balloon tooltips with flat toast notifications. They appear for all events and activities you do on your PC, e.g. when you insert a flash drive. By default, notifications are visible for 5 seconds before they hide into the Action Center. Here is how to change the notification timeout to make notifications last longer.
The notification timeout settings are located in the Ease of Access section of the Settings app.
The Settings app is a modern replacement for the classic Control Panel folder. It now holds all the options you need to tune up and customize the operating system. The options are organized by categories and pages. Also, it has the search option, and comes with an adaptive layout, that allows you to use Settings regardless of the screen size of your device, and with touch screen.
To Change Notification Timeout in Windows 10,
- Press Win + I on the keyboard to open Settings.
- Alternatively, click on the gear icon in Start, or right-click the Start button and pick Settings from the context menu.
- In Settings, go to Ease of Access > Display.
- Select the drop-down menu of the option
Show notifications forand choose the amount of time you want the notification to stay.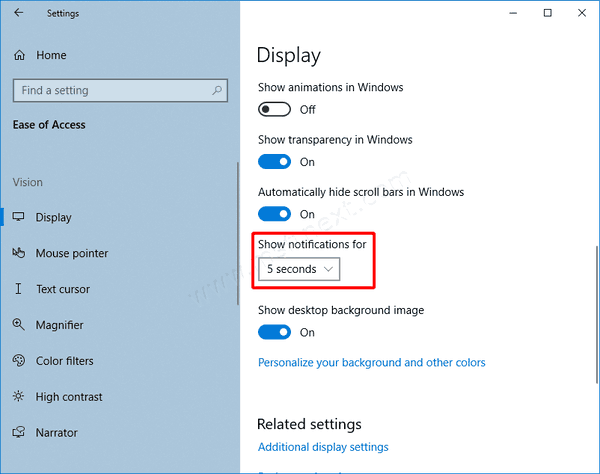
- You can choose of from 5 seconds to 5 minutes.
If required, you can change this option in Registry. Here’s a registry tweak for that.
Change Notification Timeout in Registry
- Press Win + R and type
regeditin theRunbox. - In Registry Editor, go to
HKEY_CURRENT_USER\Control Panel\Accessibility. - Modify the 32-bit DWORD value named MessageDuration. If you do not have such a value, then just create it.
- Enter its value data in decimals.
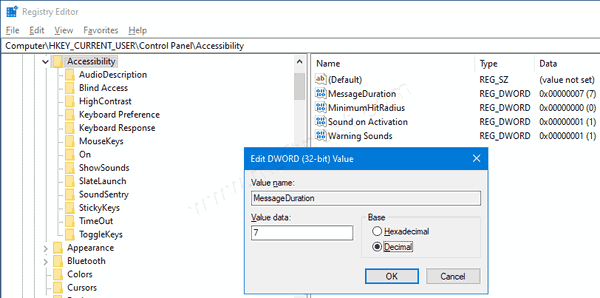
- You should specify the new value in seconds. The default value is 5 seconds, and you cannot specify the timeout value lower than 5, otherwise Windows will ignore it and still use 5 seconds.
- Sign out from your account and sign in back for the change to take effect.
That’s all about the notification timeout options in Windows 10.
Thanks for the above, which is true in case of 1 notification at the time only.
However, when there are two subsequent notifications, then the first one will disappear in a split second.
For example: when mounting a password protect virtual drive, the pop-up ‘Decide what to do..’ will stay on for 0,1-0,2 s and then be followed by a notification that the virtual drive has been mounted.
Clicking on the ‘Decide what to do..’ notification (which is indeed really a matter of exact timing), will produce the ‘Bitlocker – Enter password’ pop-up.
This is slightly faster/more convenient way then launching Explorer, r-click the drive and select Unlock.
Anyway, thanks for the article.