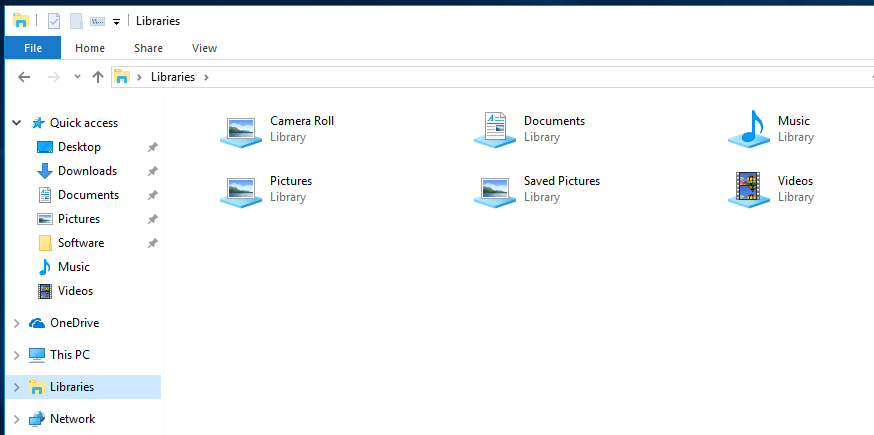
Libraries is a special folder in File Explorer. It allows the user to create libraries – collections of folders which can aggregate files from different locations on the drive and show their contents under a single, unified view. A library is an indexed location, so when you search for a file in a library, the search will be completed instantly.
In Windows 10, the Libraries folder is hidden by default in File Explorer and doesn’t appear in the navigation pane (the left side of the File Explorer window). If you use Libraries frequently, you might want to make them visible.
Enable Libraries in Windows 10
- Open File Explorer.
- In the left pane, right click the empty space.
- In the menu, click on the Libraries item.
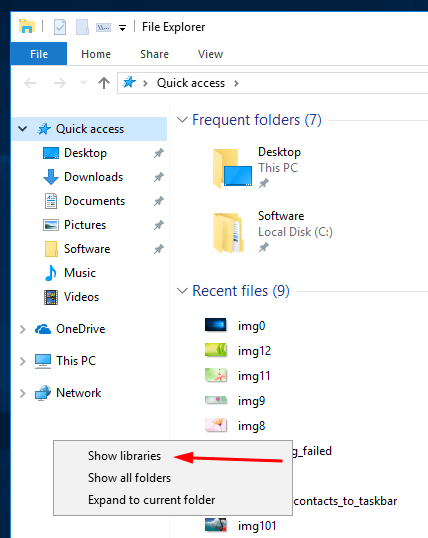
- The Libraries folder will appear in the Navigation pane.
Additionally, you can open Libraries from the Run dialog with a shell command. Press the Win + R keys and type the following in the Run box:
shell:Libraries
There are a couple of alternative methods you can use.
Enable Libraries in File Explorer Options
- Open File Explorer.
- In the Ribbon UI, click/tap on the ‘View’ tab.
- Click/tap on the button ‘Options’.

- In File Explorer options, click/tap on the ‘View’ tab.
- Check (turn off) the ‘Show libraries’ option in the ‘Advanced Settings’ list, and click/tap on the ‘OK’ button.

Enable Libraries directly in the Ribbon UI
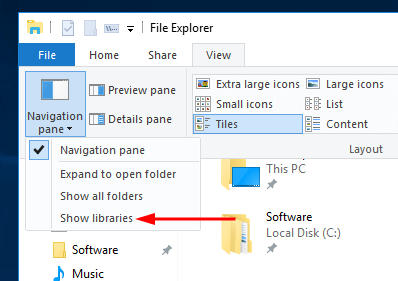
- Open File Explorer.
- In the Ribbon UI, click on the ‘View’ tab.
- Click on the ‘Navigation Pane’ button.
- In its drop-down menu, click on the command ‘Show libraries’.
Finally, you can show or hide Libraries in File Explorer using a Registry tweak. The ready to use files can be downloaded below.
Registry tweak
- Download these files: Enable Libraries In Windows 10
- Extract them to any folder you want.
- Double-click the file ‘Show_Libraries_in_Navigation_Pane.reg’.
- If prompted, click/tap on Run, Yes (UAC), Yes, and OK to approve the merge.
- Reopen File Explorer to apply the changes.
The undo tweak is also included.
The Registry tweak modifies the System.IsPinnedToNameSpaceTree 32bit DWORD value under the key HKEY_CURRENT_USER\Software\Classes\CLSID\{031E4825-7B94-4dc3-B131-E946B44C8DD5}.
Its value data can be set to the following values.
0 = Hide Libraries
1 = Show Libraries
It is up to you which method to use to enable the Libraries in Windows 10.