How to Navigate Apps by Alphabet in Windows 10 Start menu
Windows 10 Start provides a new way to navigate your installed apps. With a single click you can activate the navigation by alphabet! This method is very fast and convenient.
With Windows 10, Microsoft introduced a new Start menu, with a number of great improvements. The Start menu now combines app icons with live tiles, it has an adaptive layout, can be opened fullscreen, and allows organizing pinned app icons and tiles into groups. It has a nice semi-translucent background with a blur effect.
One of the improvements the Windows 10 Start menu subsequently received is the ability to browse installed apps organized in groups alphabetically. The app list on the Windows 10 Start menu is presented alphabetically, and grouped by letter. If you have lots of apps installed, the alphabet navigation is a killer feature for you.
- Open the Start menu (Press Win on the keyboard).
- Click the empty space near any letter:

- The Start menu will show the UI with alphabet navigation:
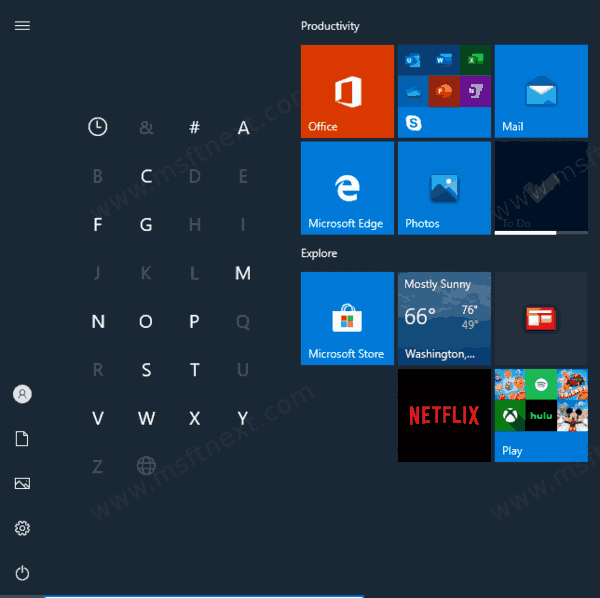
- Click a letter to quickly jump to applications whose names begin with that letter.
It’s like a dial pad that you can use to quickly jump to the letter your app’s name begins with.
Note: If you look closely, you can see that some letters appear brighter than others. The ones that are dimmed out indicate that there are no apps installed for that letter. The ones that are brighter and bolder have apps listed under them.
This alphabetical letter grid minimizes app list scrolling for mouse and touch screen devices. Of course, the user must know the beginning letter of that app that he wants to launch and then tap it or click it. Nevertheless, it is an interesting way to minimize vertically scrolling a long list of apps.
The feature is also very useful if you’re using a mobile device with a touch screen.