Windows 11 includes two ways to make Command Prompt and PowerShell always run as Administrator. By default, Windows launches PowerShell, Command Prompt, and Windows Terminal without elevated privileges. If an app, script, or command requires an Administrator access level, the user needs to close Command Prompt and relaunch it with elevated privileges.
In this tutorial, we will show you how to make Command Prompt and PowerShell always run with elevated privileges, regardless of how you open the app.
However, we don’t recommend you running the console as Administrator unless an app, script, or command requires it. This article is primarily for those who frequently need Command Prompt with elevated privileges.
When you run Windows Terminal with elevated privileges, the app displays a shield icon in the upper-left corner of the window.
Always run Command Prompt as Administrator in Windows 11
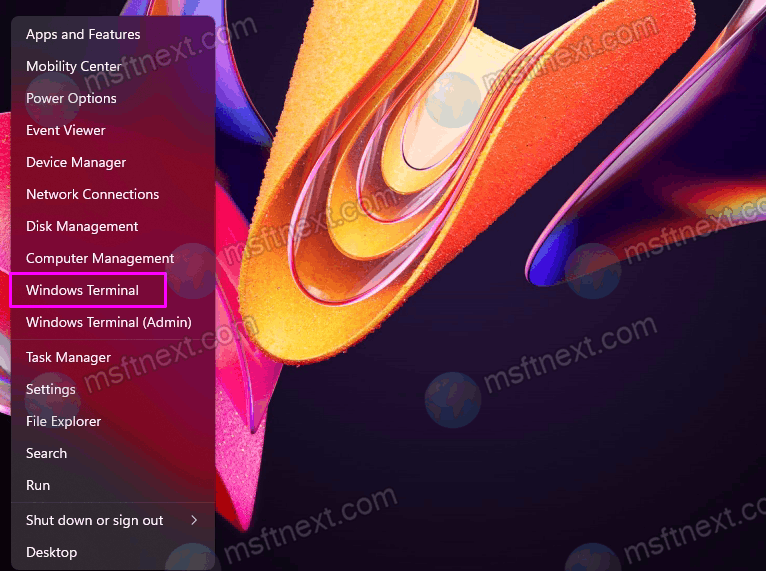
- Right-click the Start menu icon in the taskbar and select “Windows Terminal”.
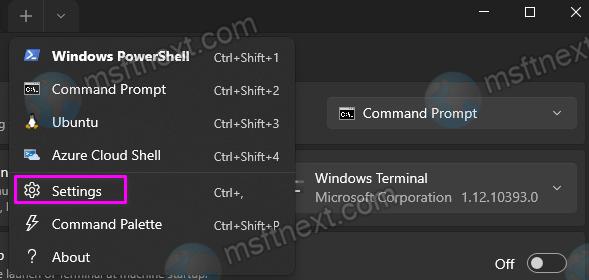
- Click the arrow-down menu button next to tabs and select “Settings”(Ctrl + , ).
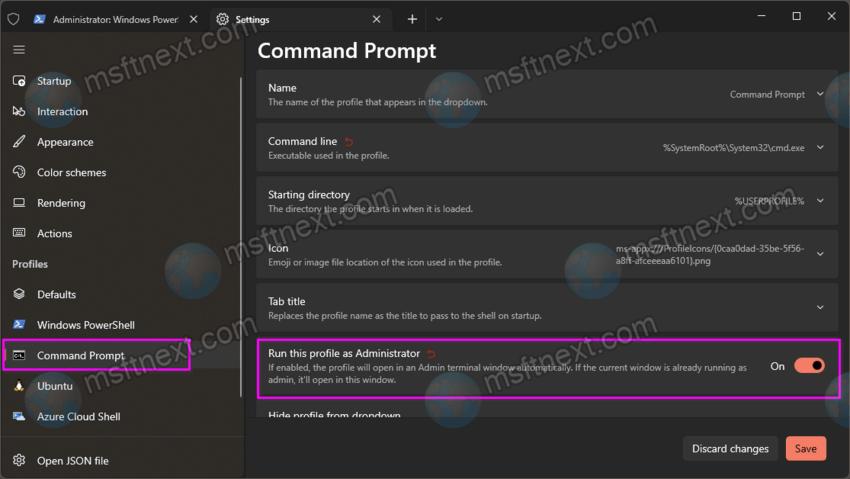
- Click “Command Prompt” on the left.
- On the right panel, look for the “Run this profile as Administrator” option and enable it.
- Click “Save” to apply changes.
If you prefer changing Terminal options in the JSON file, you need to add one “elevated” value to the Command Prompt profile.
The JSON option
- Run Windows Terminal and open its settings.
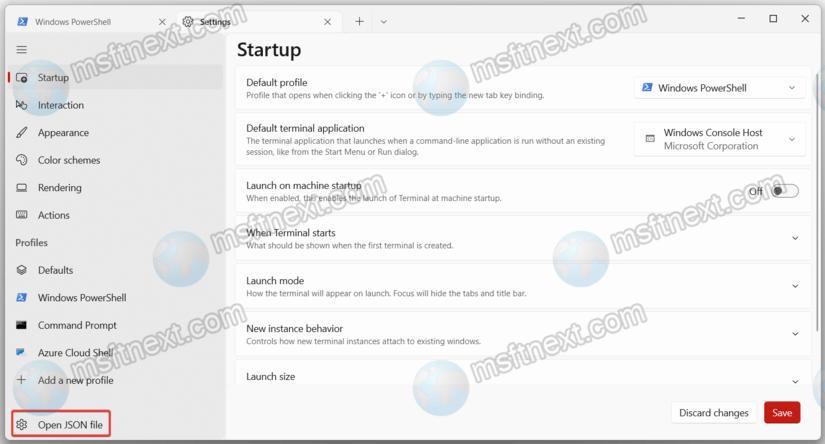
- Click the “Open JSON file” button at the bottom left.
- Find “Command Prompt” in the list of profiles.
- Add
"elevate": true,to the profile body between the curly brackets. Don’t forget to end the line with a comma.
- Save the changes and close Notepad(or any other text editor that opens).
Now you may want to use your modified Command Prompt profile as the default Windows Terminal profile. That will ensure Terminal launches as Command Prompt.
Set modified profile as default Terminal Profile
- Open your Windows Terminal settings.
- Select the “Startup” tab in the left panel.
- Find the “Default profile” option and change it to your edited “Command Prompt”.
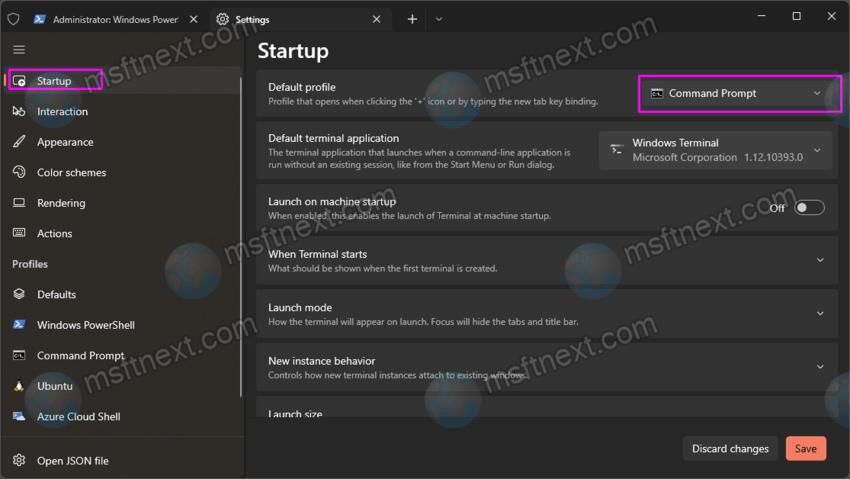
- Click “Save” to apply the changes.
From now, Windows Terminal will always open to the elevated command prompt.
Always run PowerShell as Administrator
The idea here is exactly the same as we used for the command prompt. After you modify the profile for PowerShell, set it as your default profile.
To always run PowerShell as Administrator in Windows 11, do the steps below.
- Open settings in Windows Terminal, and select PowerShell on the left.
- Enable the “Run this profile as Administrator” option on the right.
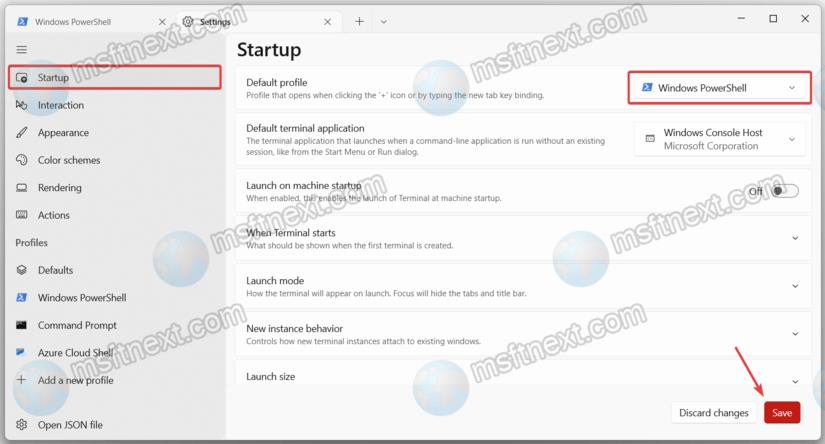
- Click Save to apply the change.
- Now, return to the settings and select “Startup” in the left panel.
- Select “PowerShell” as your default Windows Terminal profile.
- Alternatively, open the JSON file by clicking the appropriate button in Terminal Settings, and add
"elevate": true,similar to the Command Prompt profile reviewed earlier.
From now, every time you launch Windows Terminal, it will open to the elevated PowerShell. It will also show a User Account Control prompt which you need to confirm by clicking Yes.
Method 2 – A desktop shortcut
A shortcut with extra settings is yet another method to always open Command Prompt or PowerShell as Administrator in Windows 11. Here is how to create such a shortcut.
- Right-click the desktop select “New > Shortcut” from the menu.
- In the “Create Shortcut” dialog, enter
powershell.exein the “Type the location…” box, and click Next. - For a Command Prompt shortcut, type
cmd.exein the “Type the location…” box; then click Next.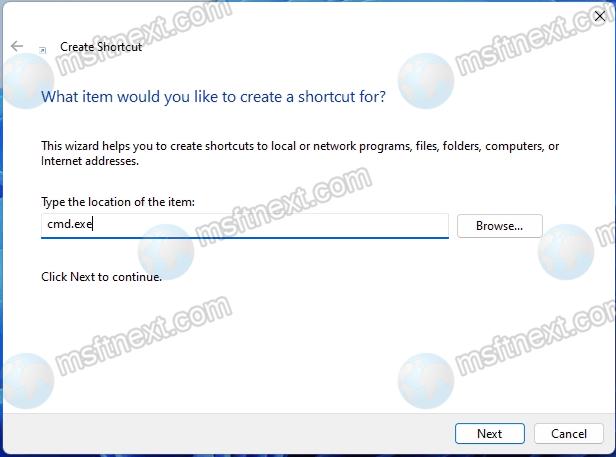
- Give your shortcut a proper name like “PowerShell (Administrator)” or “Command Prompt (Administrator)”.
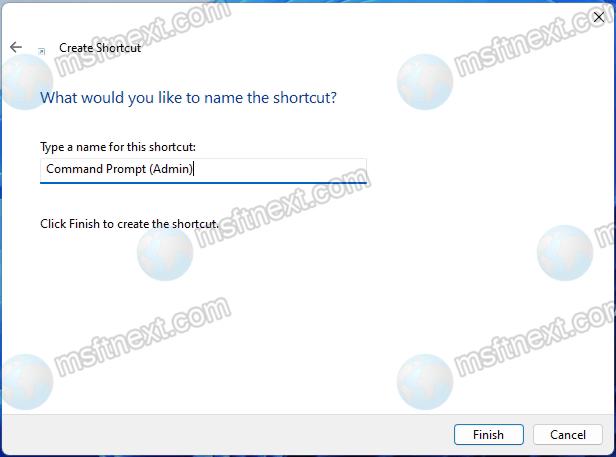
- Finally click on the “Finish” button.
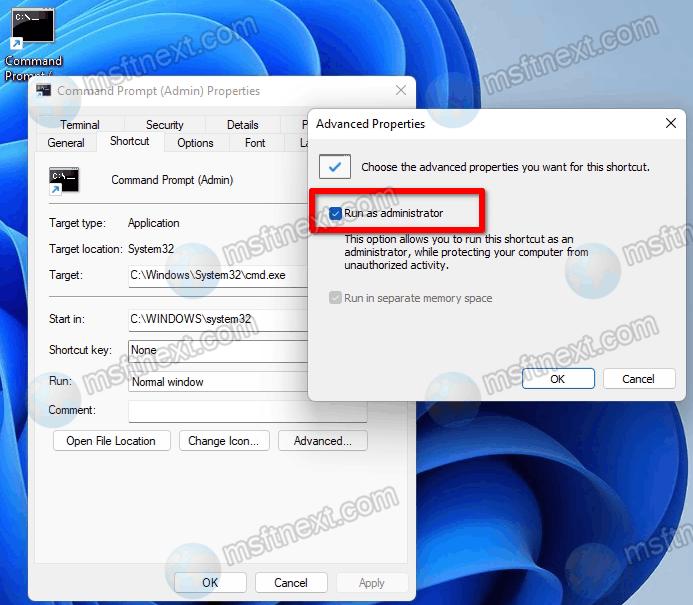
- Now right-click the shortcut you just created and select “Properties.”.
- Click the “Advanced” button on the “Shortcut” tab.
- In the “Advanced properties” box, enable the the “Run as Administrator” setting and click “OK” in every open dialog.
You can now open PowerShell or Command Prompt as Administrator in Windows 11 with a single click on the desktop shortcut. You can pin such shortcut to the taskbar or Start menu for even faster access.