This post explain how to add the Hibernate option to the power button menu in the Start menu. The command can be used to put your computer to hibernation instead of shut down.
Windows 10 comes with the Fast Startup feature which performs a hybrid shutdown of your PC by logging you out of your user account and then hibernating the PC when you click Shut Down. Because fast startup is essentially logoff+hibernation, the regular Hibernate option which turned off the PC without logging out is hidden and disabled by default.
Using the Hibernate option in the Start menu in Windows 10, you can easily use hibernation instead of the shut down command and your PC will still be powered off. The hibernation mode in Windows is very useful and time-saving as you don’t have to close your open documents and apps before powering off the system. You can resume your work the next time exactly where you stopped.
The command can be added as follows.
Add Hibernate To Start Menu in Windows 10
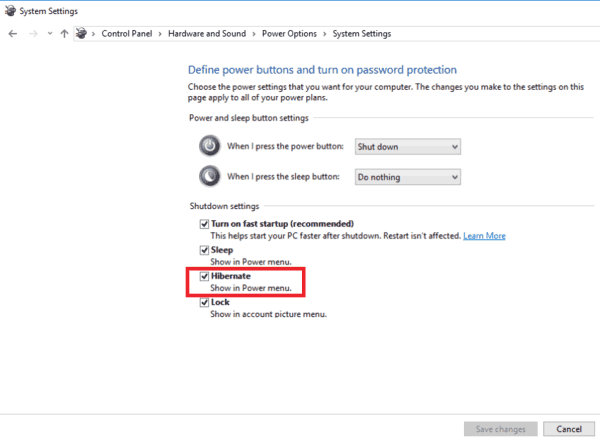
- Open the Control Panel.
- Go to Hardware and Sound\Power Options.
- On the left, click “Choose what the power buttons do”.
- Click the Change Settings that are currently unavailable link. The Shutdown options will become editable.
- Turn on the option Hibernate (Show in Power menu).
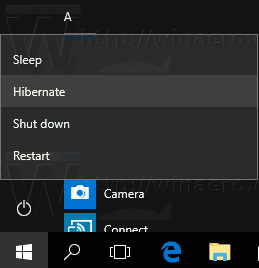
Now the Start menu will contain the Hibernate option in the power menu.
To hide the Hibernate option from the Shutdown menu of the Start Menu on Windows 10, just turn off the same checkbox.
I hope this helps.