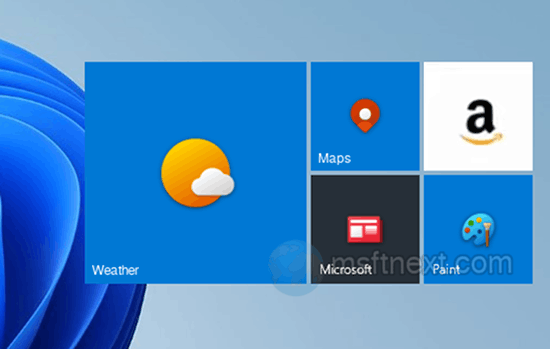
While Microsoft abandoned this concept, you still can add Live Tiles to Windows 11. Microsoft has replaced them in the Start menu with regular icons. Sadly, there is no way to modify the Windows 11 start menu by restoring “live” tiles in it. But you can create them and bring them to your desktop using the ‘Live Tiles Anywhere’ program.
The program was originally created for Windows 10, but it also works in Windows 11. Live Tiles Anywhere is a universal application, you can find and install it from the Microsoft Store.
The Live Tiles Anywhere window has four tabs: CUSTOM TILES, ALL APPS, SETTINGS, and ABOUT LTA.
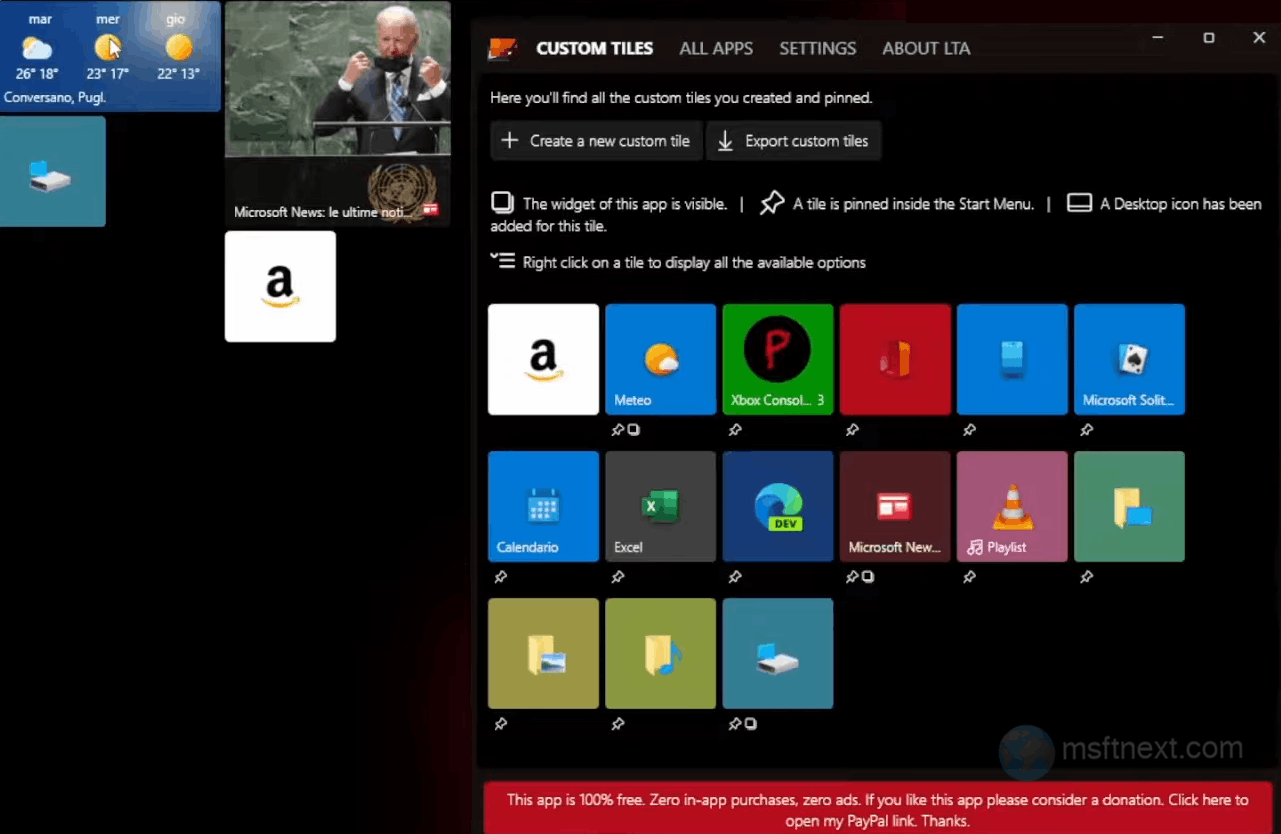
The first contains “live” tiles that the user has already created, modified, or placed on the desktop. The second tab contains a set of ready-made “live” tiles available for editing and pinning to the desktop or Start menu (for Windows 10).
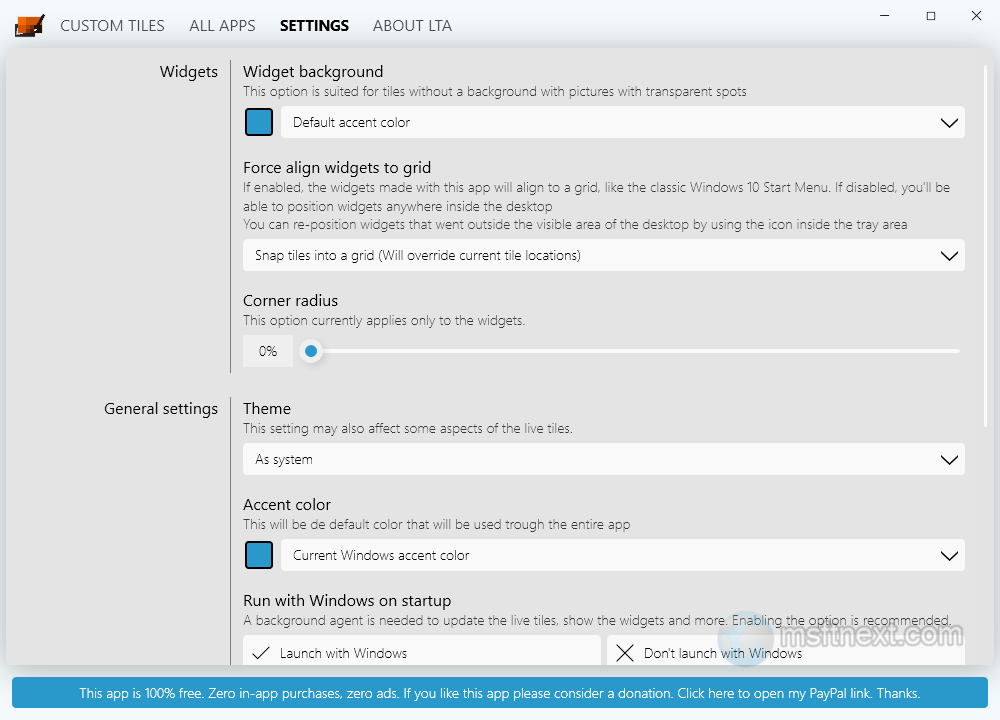
By switching to the SETTINGS tab, you can change some basic settings. For example, you can set the default background color of the tiles, add the effect of rounding corners, and change the appearance of the app itself.
Add Live Tiles to the Windows 11 desktop
- Run the app and switch to the “ALL APPS” tab. See if the tiles of the programs you want are listed there.
- If the app is available, right-click on the tile and select the “Create a widget” option from the context menu.

- This will immediately create the tile on the desktop. By default, the tile will appear in the upper left corner of the desktop, but you can drag it to another location.
- Right-click the tile to launch the application or create a shortcut on the desktop.
To change the tile, select the “Create a copy and customize” option from the menu.
The built-in editor will open, allowing you to set and configure various tile settings, from the background to the click action of the edited tile.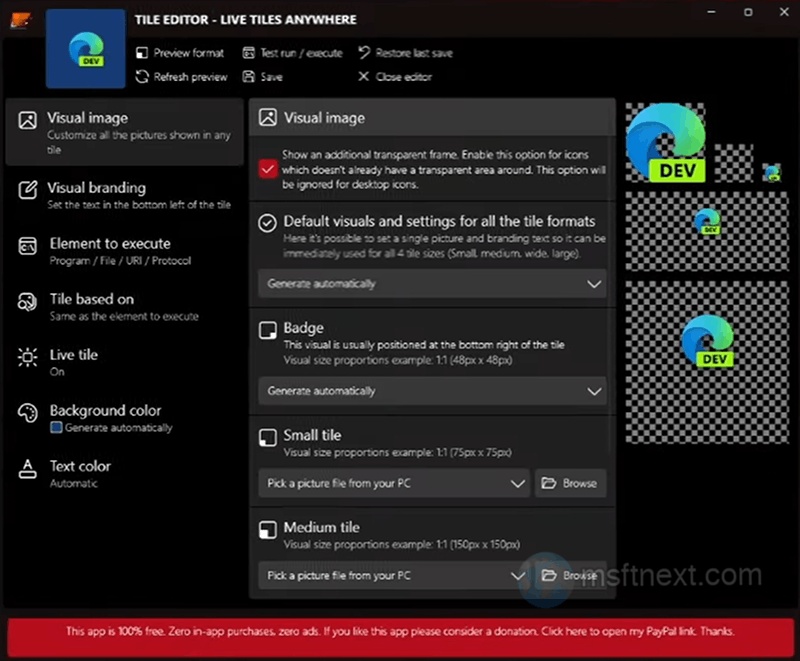
Once you finish, the modified tile will appear in the “CUSTOM TILES” section, from where you can pin it, delete it, re-edit it, and so on.
Create a custom live tile
To create your own custom tile, click “Create a new custom tile” in the “CUSTOM TILES” tab. In the built-in editor, the following options will be available.
- Visual image – setting the image on the tile.
- Visual branding – changing the position of the text on the tile.
- Element to execute – command or path to the application’s executable files, select an installed program from the list.
- Tile based on is the same as Element to execute.
- Live tile – enable and disable the “live” tile.
- Background color – change the background of the tile.
- Text color – change the color of the text on the tile.
Obviously, in order for the tiles pinned to the desktop to be updated all the time, the related program must be running in the background. Unfortunately, this increases the resource consumption of Live Tiles Anywhere.
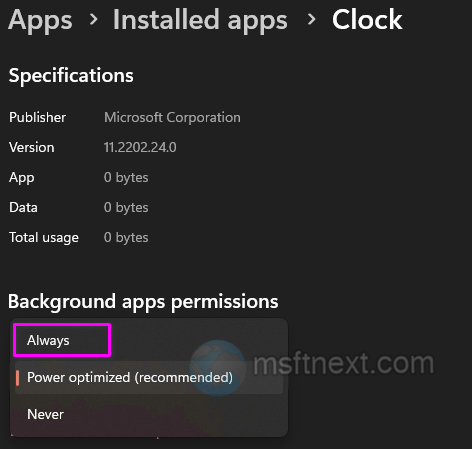
Also, in Windows 11, the application may not work quite correctly, for example, after some time the dynamic content of “live” tiles disappears. You can fix this in the system Settings app by going to the “Apps > Installed apps” section and opening additional options for the problematic application.
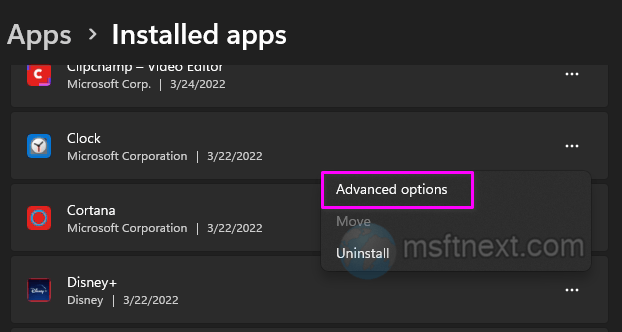
There, select the “Always” option in the “Permissions for background applications” item.
In addition to live tiles, you may want to learn how to set individual wallpapers for each monitor in Windows 11.