Do you want to remove Print to PDF in Windows 10? This tutorial will show you how it can be done. Windows 10 comes with a preinstalled PDF printer that allows the user to make PDFs with a couple of clicks. There is a virtual printer named “Microsoft Print to PDF”so you can create PDF files by “printing” them.
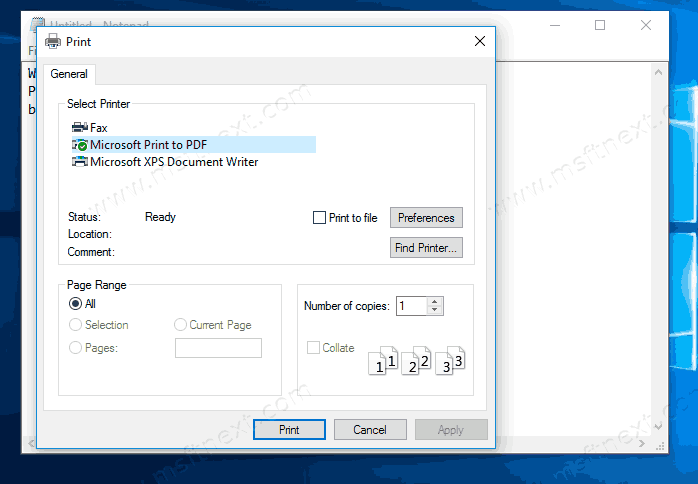
This is how the software looks in the list of printers.
Some of us never use it and not going to use. You may be using some other app which offers better features, or you might have no need in creating such PDF files. Having an extra printer can be really annoying in this case.
Remove Print to PDF in Windows 10
There are a few methods to delete the built-in PDF printer. It is up to you to choose which one to use – all of them do the same. You can either use Command Prompt, PowerShell, or Settings.
To remove the Print to PDF printer in Windows 10
- Open a new command prompt.
- Type or copy & paste the following command:
printui.exe /dl /n "Microsoft Print to PDF".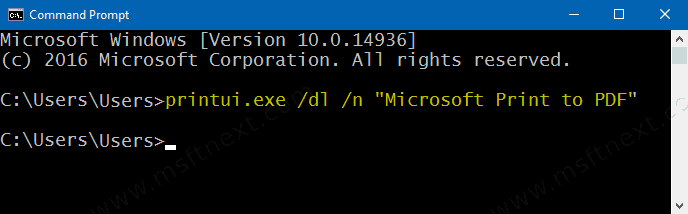
- The command silently removes the printer and shows no prompt or other output.
So, the command instantly removes the printer. Once you execute it, it will remove the “Microsoft Print to PDF” printer without any additional prompt, dialog or confirmation.
You can also use PowerShell for the same.
Remove the Print to PDF printer in PowerShell
- Open a new PowerShell window.
- Type this command:
Remove-Printer -Name "Microsoft Print to PDF". - Hit Enter.

- The code will silently uninstall the printer.
This will instantly delete the Print to PDF virtual printer.
Now that’s enough console tools. You can also use Windows 10 Settings and remove the printer with a few mouse clicks.
Remove the Print to PDF printer from Windows 10 in Settings
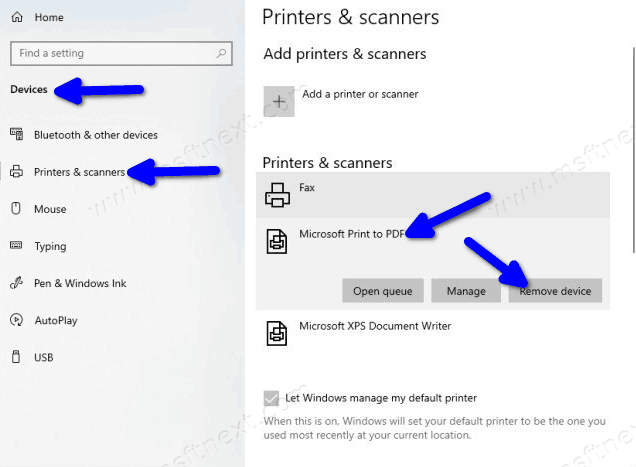
- Open Windows 10 Settings.
- Open the page Devices > Printers & Scanners.
- Click on the Microsoft Print to PDF printer in the right panel.
- Click on the Remove device button below the printer’s name.
This is all about the virtual PDF printer removal. Once removed, it won’t appear in the printer list.
If you need to add it back to Windows 10, it is easy to do by following this instruction. Here is how to restore the removed PDF printer.
How to Add the Print to PDF printer to Windows 10
- Right-click the Start button and select the Run command.
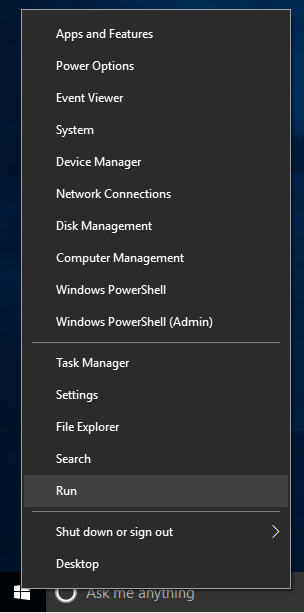
- Type
optionalfeaturesin the Run box.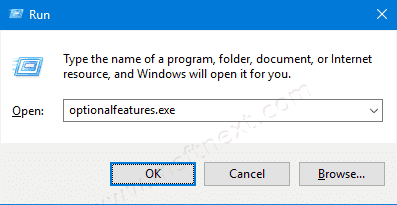
- If the Microsoft Print to PDF entry is selected in the Windows Features app, uncheck it and click the OK button.
- Relaunch the Windows Features app and select the Microsoft Print to PDF item. Click OK.
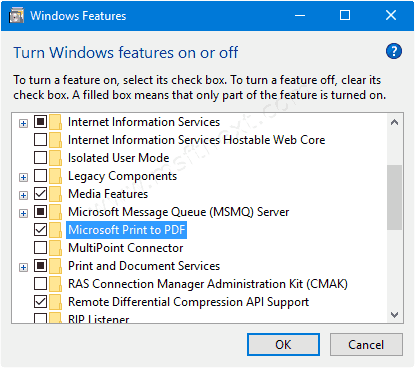
We do the above because in the Windows Features dialog the ‘Microsoft Print to PDF’ entry may appear selected even when the printer is actually removed. Deselecting it and selecting back triggers Windows 10 to restore the deleted printer.
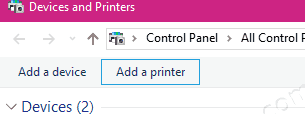
Alternatively, you can add the printer back using the “Devices and Printers” tool.
Reinstall Print to PDF in Devices and Printers
- Open the Control panel.
- Successively click on Hardware and Sound, and Devices and Printers.
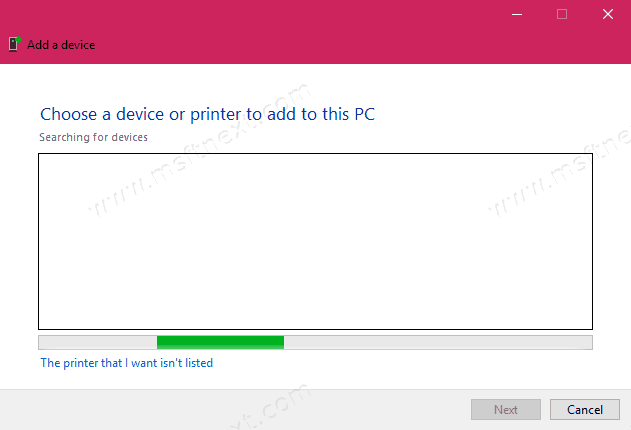
- Click the Add a printer button in the toolbar.
- On the next page, click on The printer that I want isn’t listed.
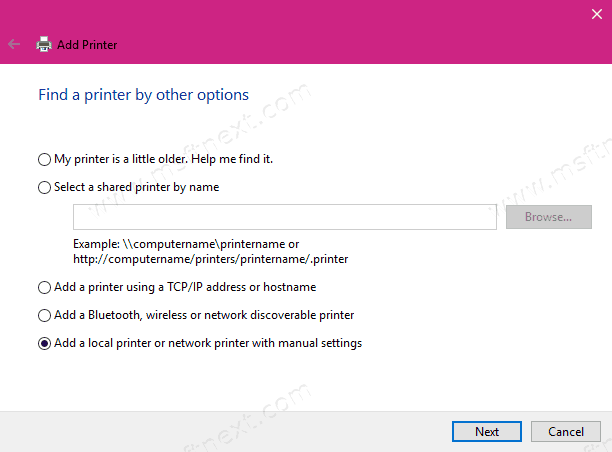
- On the Find a printer by other options page, select Add a local printer or network printer with manual settings.
- On the next page select Use an existing port on the left, and PORTPROMPT: (Local Port) from the drop-down menu next to it.

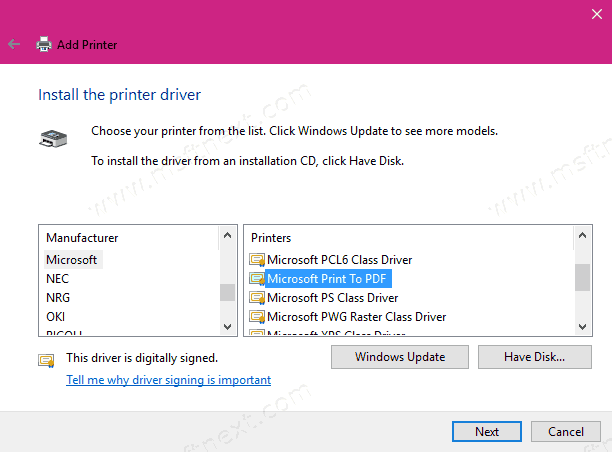
- Select Microsoft in the Manufacturer list.
- Click the item Microsoft Print to PDF in the Printers list.
- Select the Use the driver that is currently installed value on the next page.
- Just click Next on the last two pages .
Finally the printer is added to Windows 10. Now you can use it to create PDF files from any app.
Additionally, you can use PowerShell to restore the printer.
Add Microsoft Print to PDF to Windows 10 with PowerShell
- Open PowerShell as Administrator.
- Type to disable the PDF printer feature:
Disable-WindowsOptionalFeature -online -FeatureName Printing-PrintToPDFServices-Features -All. - Now type this to re-enable it.
Enable-WindowsOptionalFeature -online -FeatureName Printing-PrintToPDFServices-Features -All.
- The last command will add Print To PDF to the list of your installed printers.
That’s all about the topic.