To change the network adapter priority in Windows 11, you need to open the Network connections folder, and open the adapter properties. Then click advanced properties for TCP/IP, and specify the wanted priority. Let’s review these steps in detail.
Almost all modern computers have at least two network adapters – wired Ethernet and wireless Wi-Fi. In addition, you may see virtual network adapters created by virtual machines and VPN clients. Each such device automatically receives its own network priority value.
The priority is based on its network metric – a special numerical value that determines the route in the network. By default, Windows itself sets the priorities of network adapters. It works without issues, but sometimes you may need to manually change the priorities of network adapters.
You may wonder in what cases you might need to change it? For example, you’re using two connections at the same time, Ethernet and Wi-Fi. You may want to prioritize Wi-Fi over LAN, while Windows’ default is to prioritize a wired connection.
There are two ways to change the adapter priority: through the properties of the network device and using the PowerShell console. Let’s say you want to give the Wi-Fi adapter the highest priority.
Change Network Adapter Priority in Windows 11
- Press ⊞ Win + R and enter the
ncpa.cplcommand to open your network connections.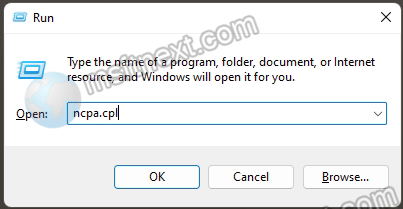
- Select the network adapter whose priority you want to change, and open its properties.

- Find “IP version 4 (TCP/IPv4)” in the list of components and double-click on it to open its properties.
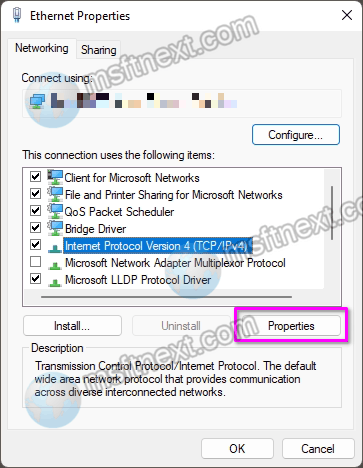
- In the protocol properties window, click “Advanced”.
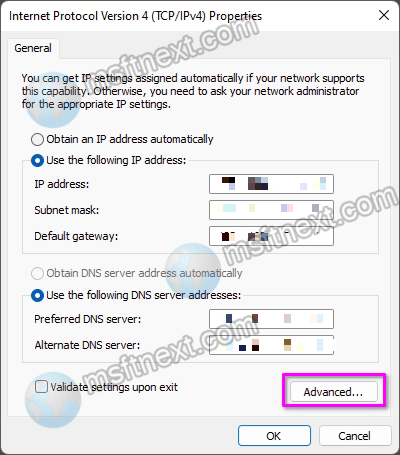
- In the next window that opens, uncheck the “Automatic metric assignment” checkbox.
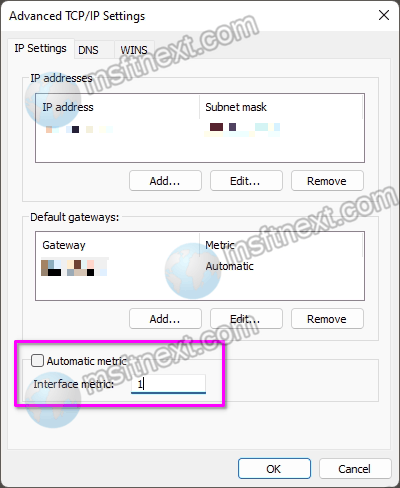
- Set the “Interface metric” field to 1, which means the highest priority.
- Save the settings by clicking the OK button.
Similarly, change the priority of other active network devices by setting the interface metric value to 2, 3, 4, and so on as the priority decreases.
Also, if your computer is running Internet Protocol version 6 (TCP/IPv6), you must configure that as well. if possible, do not change the priority of virtual adapters, this may break the applications that created them.
In PowerShell
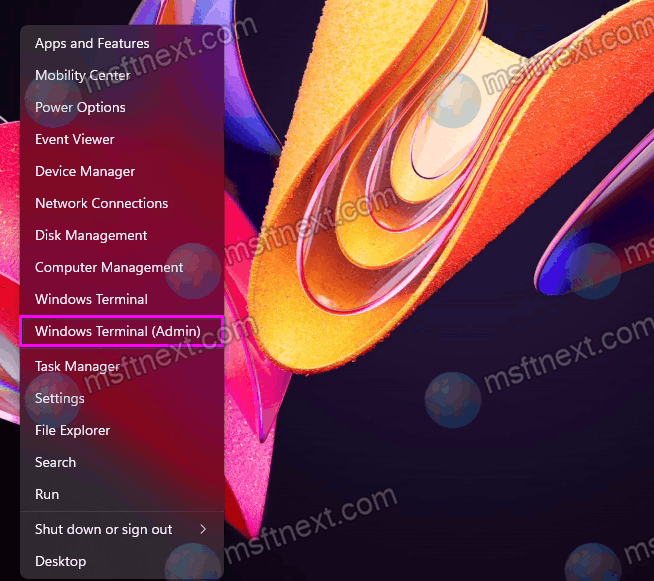
- Right-click the Start icon and select Windows Terminal (Admin).
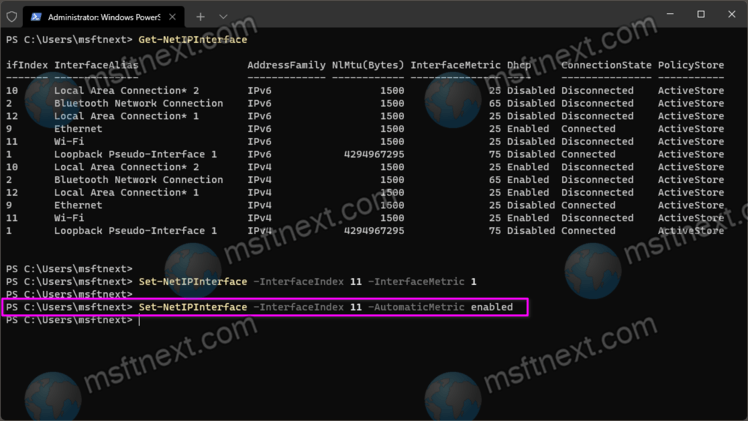
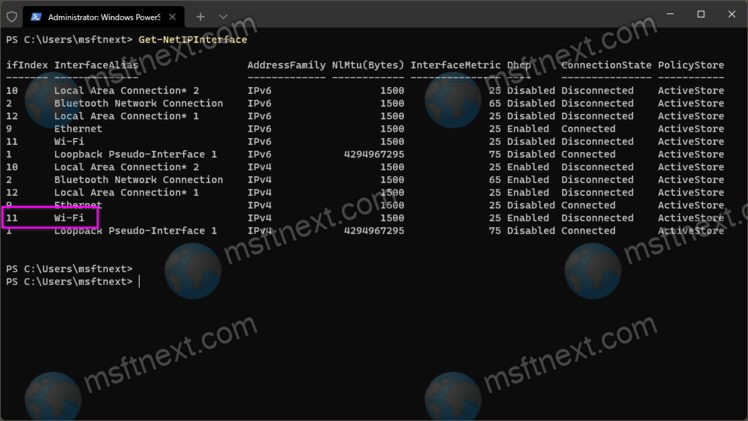
- In the PowerShell tab run the command to get available network interfaces:
Get-NetIPInterface. - Find the adapter you need in the list by its name (InterfaceAlias) and note its ifIndex value.
- Now type and execute the following command:
Set-NetIPInterface -InterfaceIndex 11 -InterfaceMetric 1.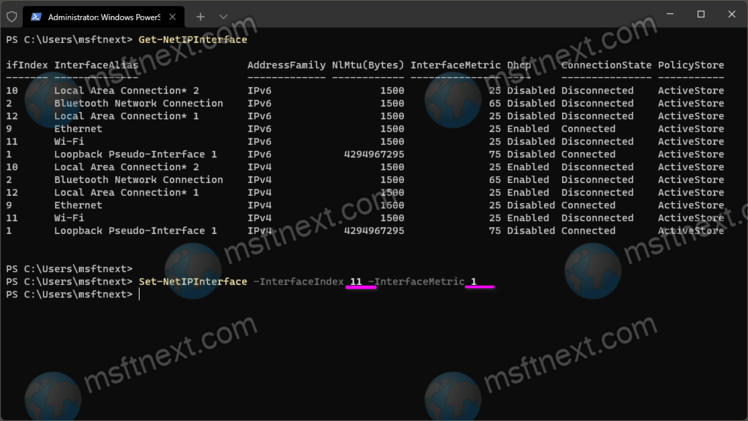
Replace 11 in this example with the ifIndex value of the network device, and 1 with the new priority. If you now check the adapter priority with the Get-NetIPInterface command, you will see that the InterfaceMetrix value has changed.
Finally, to restore the automatic priority assignment for the adapter, run the Set-NetIPInterface -InterfaceIndex 11 -AutomaticMetric enabled command. Remember to replace the index value with your “ifIndex”.