Learn how to delete history in Microsoft Edge if you share your computer with others, and you don’t want to reveal visited sites. This article is about the new Chromium-powered version of the Microsoft Edge browser. You can quickly differentiate the new browser from the old one by the icon. If you have an E-shaped Edge icon, you have the classic version, which is no longer supported and you no longer need to use. If the browser has a blue-green wave icon, you are using the new, up-to-date version.
Also note that by “history” we mean more than just the history of the pages visited. History in Microsoft Edge includes downloads, cookies, cached images, autofill data, passwords, and website permissions. You can delete all of this data at the same time, or you can only clear a specific data type. For example, you can delete only the browsing history in Edge.
There are many ways in Edge browser to get rid of the traces of your searches or visited sites. You can clear the history manually, set up automatic deletion, or even prevent the browser from remembering the sites you visit. In this article, we will cover all the methods.
Tip: if you don’t want Edge to keep a log of the sites you visit, use InPrivate mode, which you can turn on with the Ctrl + Shift + N keyboard shortcut.
How to delete history in Microsoft Edge
- Launch your browser and press the Ctrl + Shift + Delete buttons. This command will immediately open the section for deleting history in Microsoft Edge.
- In a new window, select the items you want to remove. For example, Browser History.
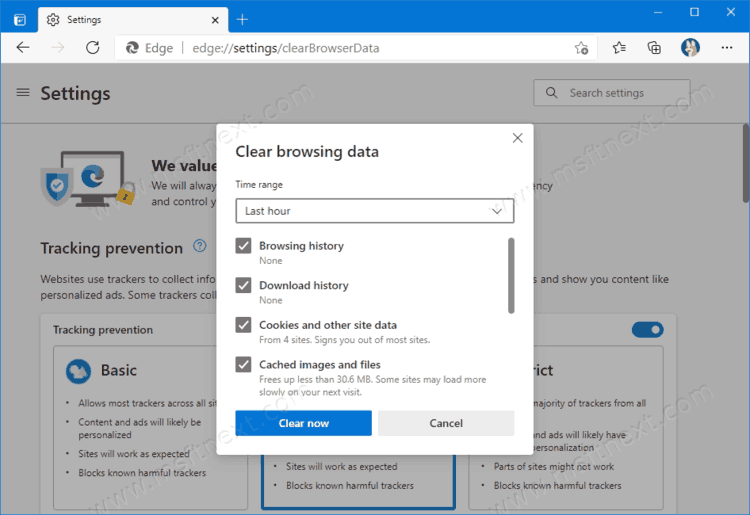
- Then select the time period to remove from the Time Range drop-down menu. Microsoft Edge lets you delete history for the last hour, 24 hours, 7 days, 4 weeks, or all of the time.
- Click Remove Now.
Done.
Note that there are other ways to open the Delete history dialog in Microsoft Edge.
Clear history in Edge using a direct URI
- Open the Edge browser
- Enter
edge://settings/clearbrowsingdatain the address bar. This URI address will work similar to the keyboard shortcut we earlier reviewed.
- Select the items and period to delete, and then click Delete Now.
Done
Remove Microsoft Edge history from settings
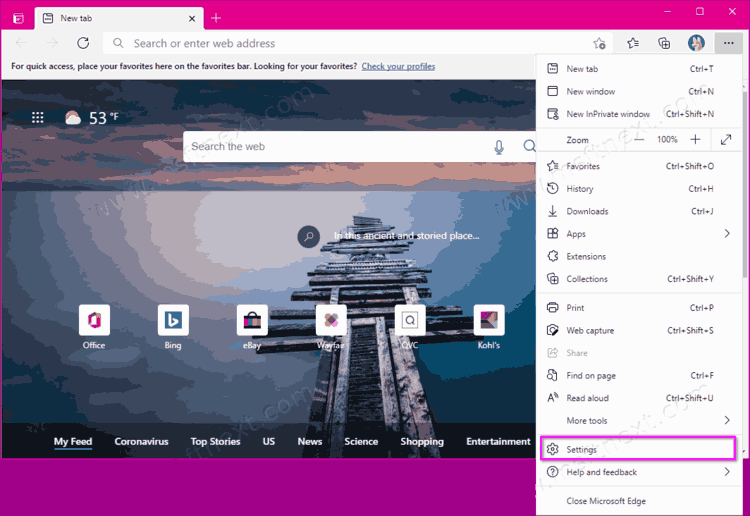
- Launch Microsoft Edge browser and open the main menu. This can be done using the button in the upper right corner or by using the Alt + F key combination.
- Click Settings.
- Go to the Privacy, Search & Services section.
- Locate the Choose what to clear button.
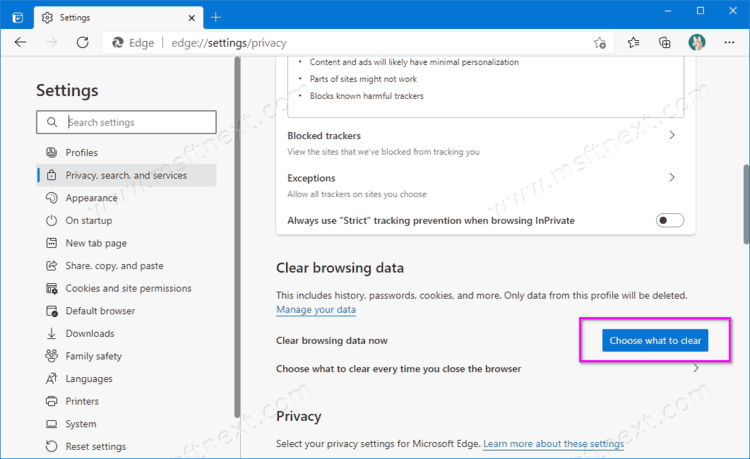
- Specify the items and time range you want, then click Delete Now.

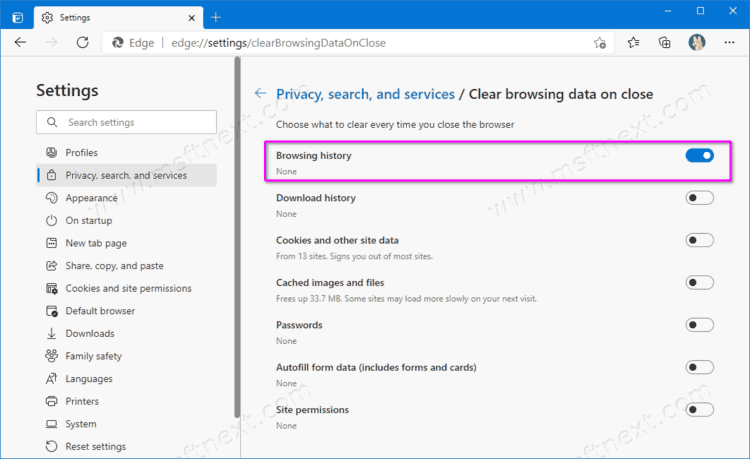
Finally, Edge has a feature that automatically clears your browsing history and other information every time you close your browser. Additionally, you can make Edge ask before closing all tabs. When you close the Edge window, it will remove the items you specified. Here’s how to enable automatic deletion of history in Edge.
How to automatically delete history in Microsoft Edge
- Open Microsoft Edge browser and enter
edge://settings/privacyin the address bar. This link opens the browser privacy settings page. - On the right, look for Clear Browsing Data section.
- Click on Choose what to clear every time you close the browser.
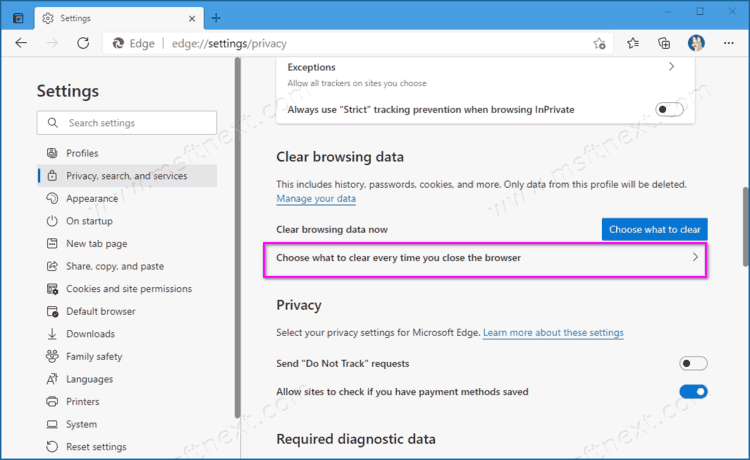
- On the next window, specify what you want to delete every time you close your browser.
Done.
Please note that some of your data affects the performance of Edge and websites. For example, if you choose to delete cookies, you will have to sign back in to your online accounts every time you launch Edge.
