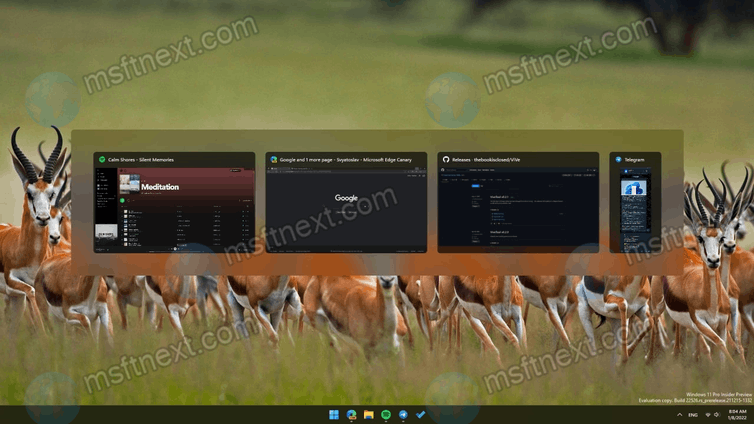
We will show you two ways to enable the classic Alt Tab dialog in Windows 11 if you are not happy this its default style. Windows 11 has a different style of the Alt Tab dialog that fills the whole screen with a background blur effect when showing window thumbnails.
Microsoft has made the updated Alt + Tab menu to a group of users who are on Windows 11 Insider Build 22526 in the Dev Channel. The company plans to ditch the full-screen version of this menu in favor of a more compact version that resembles the Windows 7 Alt Tab style.
Microsoft runs A/B testing, so the feature is activated by default for a small focus group. After collecting feedback, and it may or may not be activated for all users.
If you don’t have the new Alt Tab dialog, don’t be upset. You can enable this feature manually using the ViVeTool utility or a simple registry edit. Also, Windows 11 still support the classic Alt Tab of the Windows XP style. We will also show you how to activate it.
Enable Updated Alt Tab Menu in Windows 11
- Download the ViVeTool app from this GitHub release page.
- Unpack the downloaded archive anywhere on your computer. For example, you can create a C:\ViVeTool folder and extract the files there.
- Open a command prompt as administrator. Press Win + R, type cmd.exe, and hit Ctrl + ⇧ Shift + ↵ Enter .
- Now change the current folder with to the folder with
ViVeTool.exeusing thecd /d <path to folder>command and then press Enter. For example: cd / d “C:\ViVeTool” and press ↵ Enter . - Type the following command:
vivetool addconfig 36226836 2and press ↵ Enter .
You can also use PowerShell to run ViveTool, the command would be.\Vivetool.exe addconfig 36226836 2.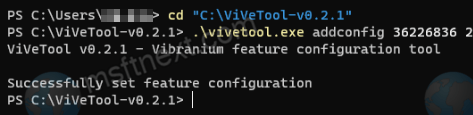
- Make sure that the “Successfully set feature configuration” message appears in the console, and reboot your computer.
You should have the new compact Alt Tab menu. To restore the previous style of the app switcher, use the command vivetool delconfig 36226836 2.
Enable New Alt Tab Menu in Registry
- Download the archive file new_alttab.zip.
- Open it and run the
New_Alt + Tab.regfile. - Agree to merge changes.
- Reboot your computer.
Alternatively, you can manually create a REG file and with the following content:
Windows Registry Editor Version 5.00[HKEY_LOCAL_MACHINE\SYSTEM\ControlSet001\Control\FeatureManagement\Overrides\4\702590604] "EnabledState"=dword:00000002 "EnabledStateOptions"=dword:00000001 "Variant"=dword:00000000 "VariantPayload"=dword:00000000 "VariantPayloadKind"=dword:00000000
If you want to revert to the default style of the Alt Tab menu, then you will need to open the Registry Editor (regedit.exe) and delete the key 702590604 under the following path: HKEY_LOCAL_MACHINE\SYSTEM\ControlSet001\Control\FeatureManagement\Overrides\4. After that, you have to restart your computer.
That’s all about switching between the new and default Alt Tab menu style in Windows 11. But besides them, you can also enable the classic Alt Tab dialog style, which was available in Windows XP.
Enable Classic Alt Tab Dialog in Windows 11
- Run the Registry Editor. Right-click the Start button and select Run, then type
regedit.exe. - Open the
HKEY_CURRENT_USER\Software\Microsoft\Windows\CurrentVersion\Explorerkey. - Right-click the
Explorerkey in the left panel and select “New -> Dword Value (32-bit)” from the menu.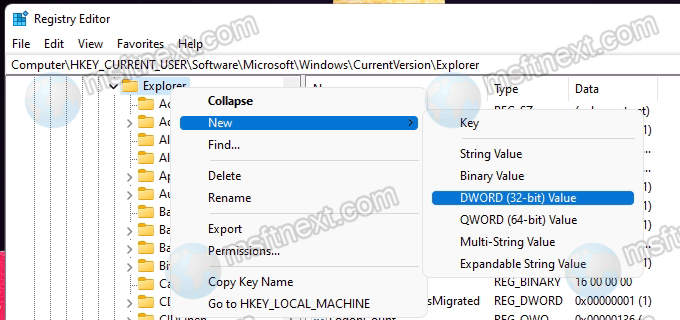
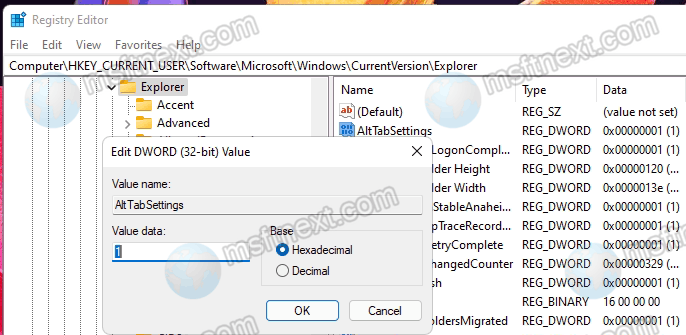
- Rename the new value to AltTabSettings and set it to 1.
- Sign out from Windows 11 and sign in back.
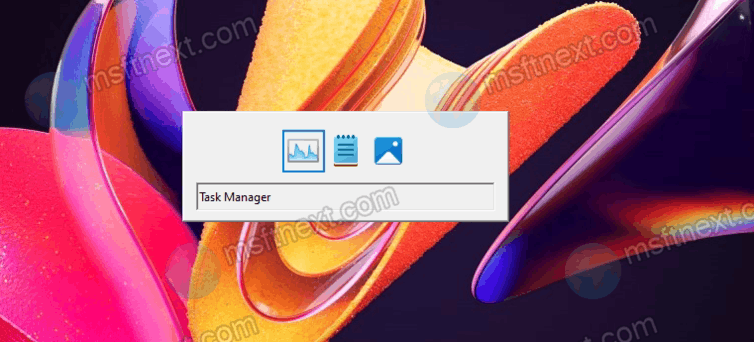
- Press Alt Tab ⇆ . It will now have the classic look.
The steps above permanently enable the classic Alt Tab. If you don’t want to have it all the time you switch between windows, you can make it appear only temporarily. Your keyboard must have two Alt keys to get the trick working.
Temporarily Enable the Classic Alt Tab Dialog
- Press the left Alt key and continue holding it down.
- Press and then release the right Alt key. Don’t hold it, just press and release instantly.
- Press and hold the Tab ⇆ key.
- Windows 11 will show you the classic Alt Tab dialog. But next time you press Alt Tab, you will see the default one.
Using the reviewed methods, you can now choose the alt tab style that works best for your tasks.