In terms of new features, Windows 11 is pretty similar to its predecessor. However, the design of the new system version has undergone significant changes, transforming its core elements. Windows 11 incorporates the Acrylic and Mica effects. The Acrylic effect is something that resembles the look of Windows 7 Aero. On the other hand, the Mica effect is a recent addition, introducing a fresh visual element to the system.
What is Mica?
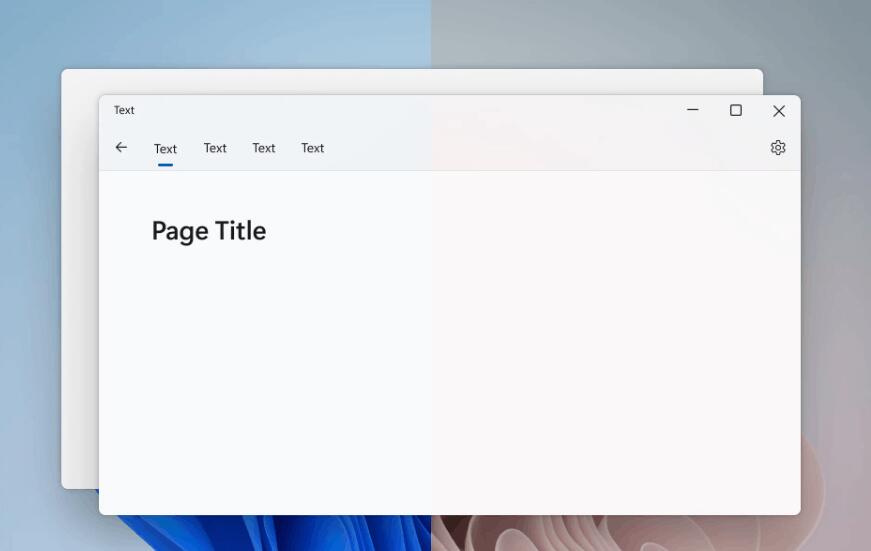
The Mica effect in Windows 11 refers to a visual design element that adds a translucent, frosted glass-like appearance to certain user interface elements, such as the Start menu, taskbar, and app windows. It gives the interface a more modern and sleek look, creating a sense of depth and dimensionality.
Unlike Acrylic, the Mica effect does not imply transparency, it is not as dynamic and demanding on GPU resources . But, like Acrylic, it blends some parts of the system interface with the desktop background.
The key points of the Mica effect include.
- Light shades of the accent color on window frames and its backgrounds.
- Gradual change of the background color of active windows to create a visual hierarchy.
- A focus effect for active elements by slightly blurring the background.
Starting with Windows 11 version 22H2, build 22621 , the Mica effect is available for use by third-party devs. So not only inbox software, but potentially any app may benefit from using the new style.
Microsoft Edge is also uses the Mica effect. Since the implementation is still under development, the effect may not be available for some users. In this case, you can try to activate it manually.
Enable Mica Effect in Microsoft Edge
- Right-click the Edge shortcut on the desktop and open its properties.
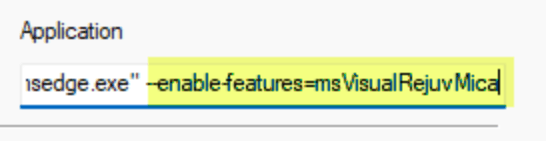
- In the properties dialog, click the Object textbox.
- Now add the –enable-features=msVisualRejuvMica text after msedge.exe prepended by a space.
- Relaunch the Edge browser and open its settings.
- On the left, click Appearance. You will now have the “Show Windows 11 visual effects in the window title …” toggle option in the right panel.
- Enable the option and restart the browser one more time.
You now have the Mica effect enabled in Edge.
How to enable Mica in other applications
The Mica effect is not limited to just Edge. It is also available in certain third-party apps. Currently, the developers of Google Chrome are actively working on implementing support for the Mica effect. It is already available in the Canary version of the browser.
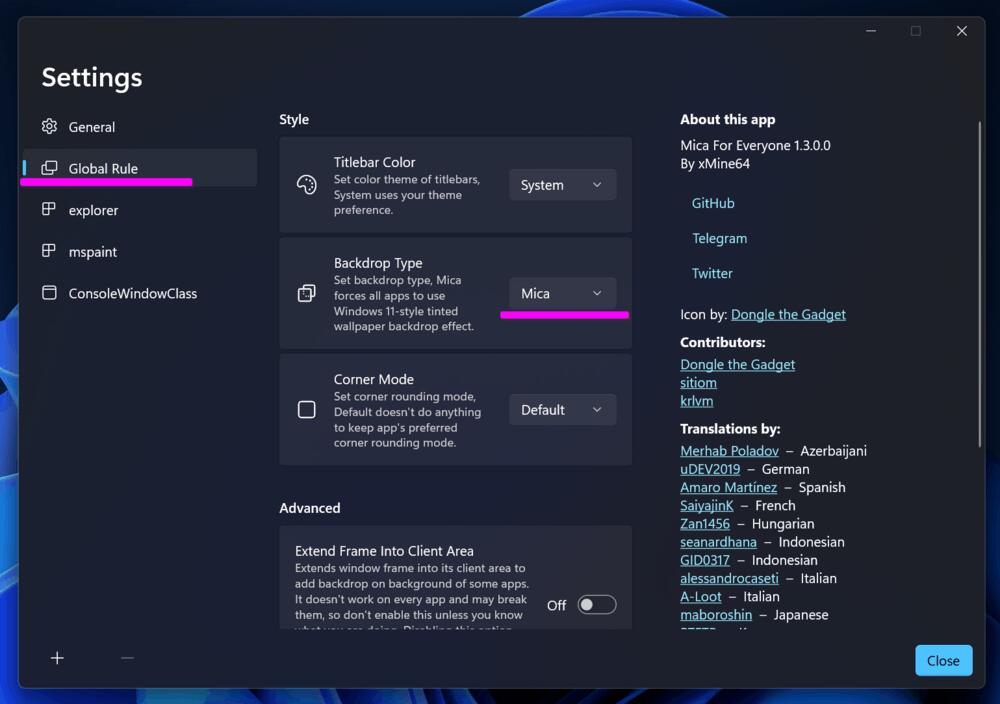
Eventually most apps will support the Mica effect. But if you aren’t happy with the current inconsistent look of apps, there is an alternative solution. The MicaForEveryone application can be utilized to apply both the Acrylic and Mica effects to win32 applications in Windows 11. This allows users to enjoy the visual enhancements of these effects on a wider range of applications while awaiting the official support from developers.
The program is very easy to use. After installing the application, go to its settings. In the “Global rule“> “Style” section, select the “Mica” option in the “Background” drop-down menu.
You can download the application from its GitHub page. For the app to run properly, you may need to install the Microsoft .NET Core component.