The RDP tool on Windows comes with a very convenient feature. It supports the clipboard, allowing you to transfer files and text from the local computer to a remote host and vice versa. However, you may encounter a situation where copying and pasting in an active RDP session may stop working. We will review what can be done in this situation, and how to to restore the clipboard function with minimal time and effort.
Fix RDP clipboard copy and paste doesn’t work
Solution 1. Restart the rdpclip.exe process
If the clipboard was working fine and then suddenly stopped working, the easiest and most obvious way to restore it is to end the current connection session and reconnect. But logging out of the system will terminate all running apps, making this solution not convenient.
So, in order to restore the clipboard, it is not necessary to restart the entire session. Luckily, it is enough to restart the background process rdpclip.exe.
To restart the clipboard for RDP, do the following.
- Open Task Manager (Ctrl + ⇧ Shift + Esc ), and switch to the Details tab.
- Find the
rdpclip.exeprocess and terminate it by right-clicking the process.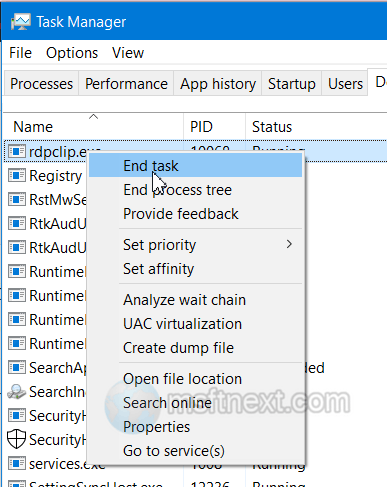
end the rdpclip process - Once you terminate it, click File > New Task in Task Manager’s menu.
- Type the command
rdpclip.exein the dialog box that opens and press ↵ Enter .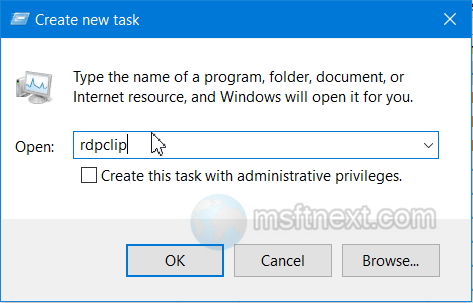
Relaunch the clipboard process for RDP
The clipboard should work now.
Solution 2. Check Remote Desktop Client Settings
Make sure you have the clipboard option enabled in your Windows RDP client settings to allow you to use clipboard capabilities .
Open the client with the mstsc command , switch to the “Local Resources” tab, and check the “Clipboard” checkbox .
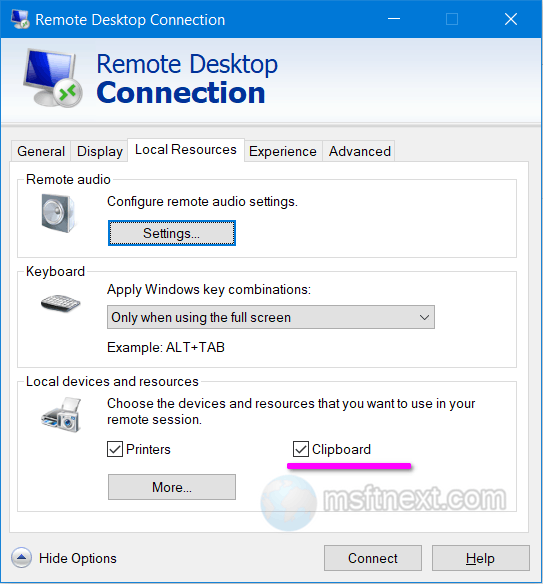
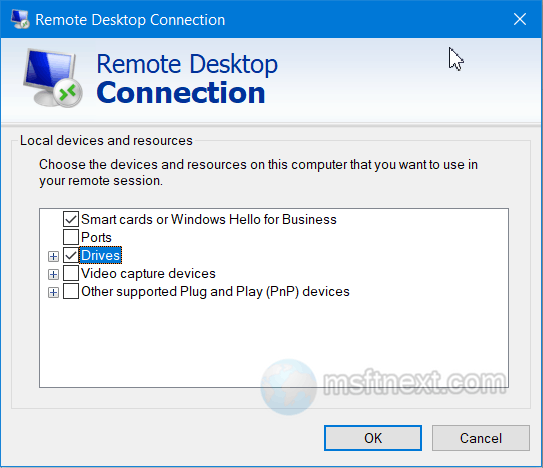
Tip: To be able to share the local files, in the same dialog click the “More…” button and turn on the “Drives” option in the window that opens. This will allow you to copy files through the clipboard, in addition to texts and images.
Solution 3. Modify your RDP file
If you are using a ready-made RDP file to connect to a remote host , open it with Notepad and look for the following lines:
redirectclipboard:i:1redirectdrives:i:1drivestoredirect:s:*
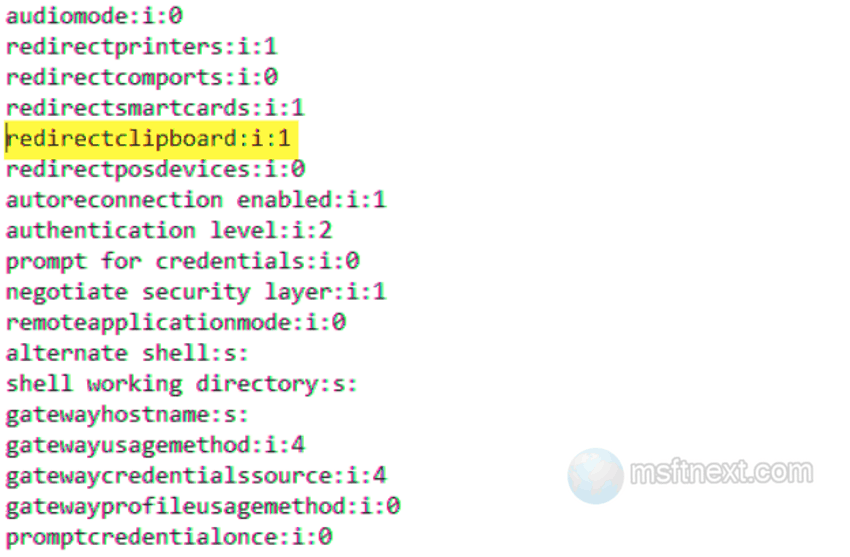
They must have values as noted above. If they are different, change the file accordingly and then save. The first parameter is responsible for transferring text through the clipboard, the second and third values are for files.
Solution 4. Check out Group Policy settings
Make sure clipboard is allowed at the administrator level.
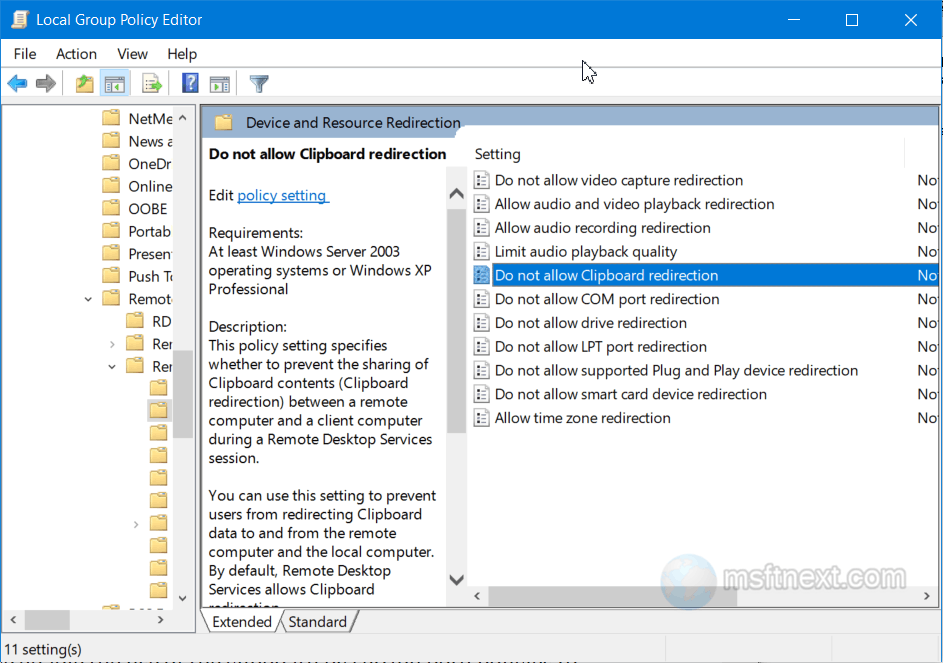
- Run the gpedit.msc command to open the Local Group Policy Editor.
- Now go to Computer Configuration -> Administrative Templates -> Windows Components -> Remote Desktop Services -> Remote Desktop Session Host -> Device and Resource Redirection.
- On the right, find the “Do not allow clipboard redirection” and “Do not allow drive redirection” policies. Make sure they have a status of “Not configured“.
- You can also force enable the use of the clipboard by setting both policies to Disabled.
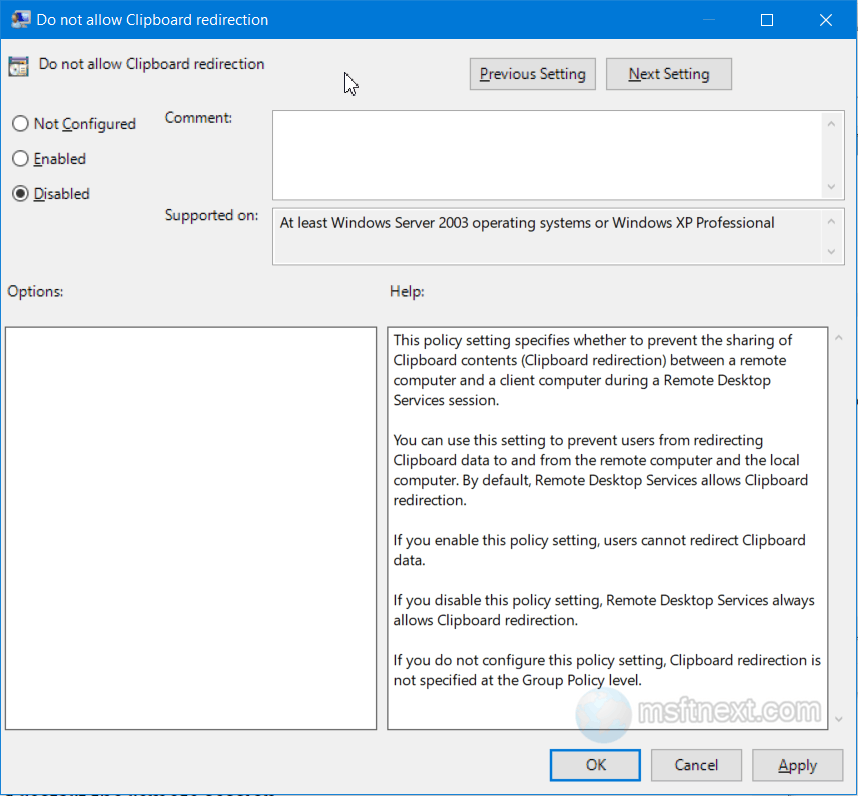
Force enable clipboard for RDP - After changing the settings, update the policies with the
gpupdate /forcecommand, and restart the remote session.