If you see the “WslRegisterDistribution failed with error” message when starting a Linux distro in WSL, try these quick workarounds.
- Restart the computer
- Update the WSL components
- Check the state of the LxssManager service
- Reset the Installed Linux Distribution
- Change the WSL version from 1 to 2.
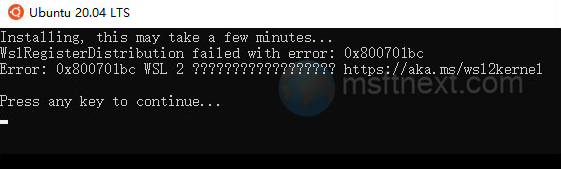
Current versions of Windows 10 and 11 come with a built-in Linux Subsystem component that allows you to work with the Bash console, run Linux programs and work in the environment of various Linux distributions directly from Windows. But sometimes you may run into the “WslRegisterDistribution failed with error” issue, which appears when you start Linux in WSL.
Most often, the cause of the error is a malfunction of the WSL subsystem , incorrect virtualization settings on the computer, less often – damage to the distribution installation files. The error code can be different – 0x800701bc , 0x800706be , 0x8000000d , 0x80370102 , 0x8007019e and so on.
Fix “WslRegisterDistribution failed with error”
However, these are minor details, and in most cases, the error can be resolved by applying general solutions, such as.
Solution 1. Restarting the computer
If you did not restart your computer after installing WSL or the Linux distribution, do so. Click the Start button and select the power icon, then click on the Restart command.

Solution 2. Update the WSL subsystem
Updating the WSL subsystem may be of help.Check for the latest updates to the Linux subsystem as follows.
- Open PowerShell as Administrator,
- Run two commands:
- first wsl –update.

- then wsl –shutdown. Run this one after the updates are installed.

- first wsl –update.
- Open the Windows Subsystem for Linux and see if updates fixed your issue.
Solution 3. Check the LxssManager service
You need now to check the the LxssManager service status. Follow the steps below.
- Open the Services management snap-in with the services.msc command.
- Find the LxssManager service and see its status.
- If the service is running, restart it from the context menu or toolbar. It is in this state while a Linux distribution is running.

- The startup type of this service must be “Manual” , and the same applies to the LxssManagerUser service.
Solution 4. Reset the Installed Linux Distribution
Resetting an Installed Distribution is not different from troubleshooting Store apps.
- Open Settings (⊞ Win + I ) and go to the section “Apps and Features“.
- Find the installed Linux distribution in the list of applications.
- Open its advanced options and click the “Repair” or “Reset” button.
A tougher option is also possible – removing the distribution and reinstalling it from the Microsoft Store.
Other methods to try
If the suggested options do not yield the desired outcome, you can consider trying the following alternative solutions.
Enable hardware virtualization
Check if the hardware virtualization feature has been disabled in the BIOS. This can happen when there is a sudden power outage.
Re-register WSL
Re-register the components of Windows Subsystem for Linux to exclude misconfiguration. To do this, run the following commands in a command prompt or PowerShell running as an administrator :
- dism.exe /online /enable-feature /featurename:Microsoft-Windows-Subsystem-Linux /all /norestart
- dism.exe /online /enable-feature /featurename:VirtualMachinePlatform /all /norestart

Alternatively, you can reinstall the Virtual Machine Platform and Windows Subsystem for Linux components from the Turn Windows features on or off app.
Switch WSL version
If you are using WSL version 1, switch to version 2 by running wsl –set-default-version 2 in PowerShell.

On the other hand, if you are currently utilizing the second version of the subsystem, you can experiment with the first version by executing the identical command, but with set-default-version set to 1. Run wsl –set-default-version 1 in PowerShell.