Microsoft has implemented a new security feature for Windows Defender. With a simple PowerShell command, you can turn on the ability to scan and remove adware and potentially unwanted apps. Follow the instructions in this tutorial to learn how it can be done.
You can enable scanning and elimination of adware, potentially unwanted apps or potentially unwanted software using Windows Defender. The method described below works in Windows 8, Windows 8.1 and Windows 10.
Enable Adware and PUA protection in Windows Defender
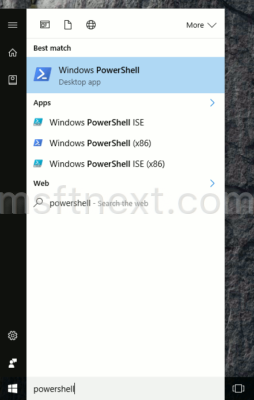
- Type PowerShell in the search box located in the taskbar.
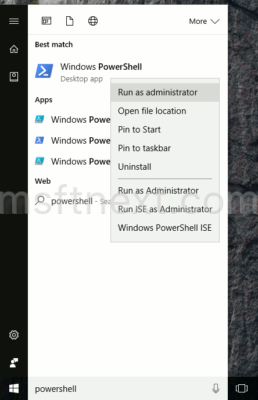
- Right click “Windows PowerShell” and select “Run as administrator”.
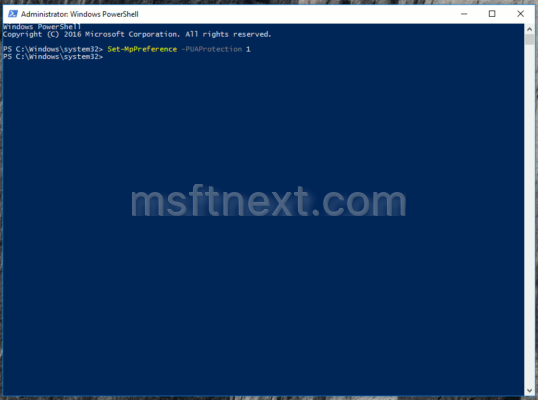
- Type the command below and hit the Enter key to execute it:
Set-MpPreference -PUAProtection 1
- Restart Windows.
After the reboot, Windows Defender PUA scanning will be activated. The application will check all files which were downloaded using a web browser and located the Downloads folder or in the temporary directory (%temp%).
If a malware or some potentially unwanted software will be detected, Windows Defender will show the following notification: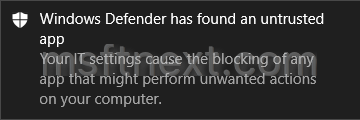
You can turn off this feature using the following command:
Set-MpPreference -PUAProtection 0
Execute it in PowerShell running as Administrator.