Here is how you can enable Live Captions in Google Chrome. After you activate it, the browser will automatically create subtitles for the audio and video played on web pages. It will show text in a floating window that you can expand and drag anywhere on the screen.
The Google company is known not only for its search engine and browser the Chrome. It also has experience in a variety of areas of the digital industry. This includes voice recognition algorithms, and vice versa, conversion of textual information into speech. Google-developed voice input algorithms are widely used in mobile devices, applications and services, and most recently, Google has implemented an automatic voice conversion feature in its Chrome browser. We are talking about the Live Caption feature.
Google officially introduced “Live Caption” in Chrome 85. But the feature was already available prior to this version behind an experimental flag and it was only limited to English.
In Chrome 89, Live Caption became available in the settings, so you can easily enable this interesting feature. Be default, Live Titles are disabled in Chrome as of now.
Enable Live Captions in Google Chrome
- Run Chrome, press Alt + F or click on the menu button.
- Select Settings from the menu.
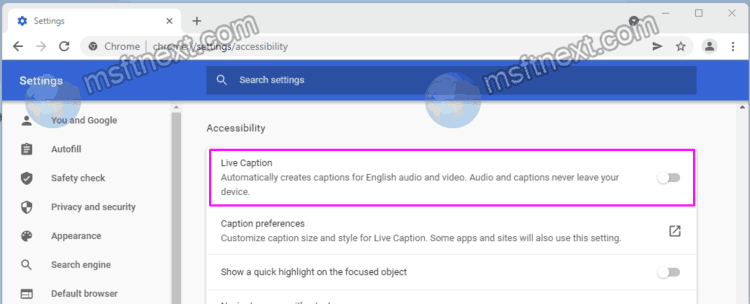
- Go to Advanced Settings -> Accessibility, or simply go to
chrome://settings/accessibilityin the address bar. - Click on Live Caption.
- Chrome will download some speech recognition files. After that, you close its settings.

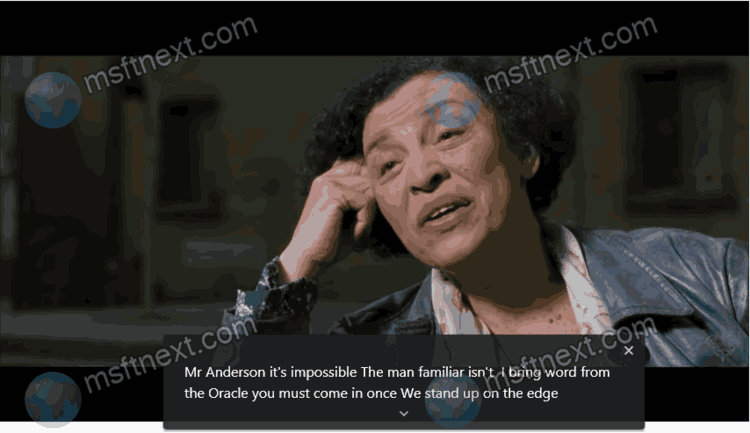
From now on, when playing multimedia, Chrome will display a translucent window with speech converted into text. You can close it at any time.
You can also customize Live Captions. For example, to change their font, open > Settings, and click Advanced. Under Accessibility, click Caption preferences, and configure the font. You can also change the font size, color, and opacity. Finally, you can change the background color and opacity.