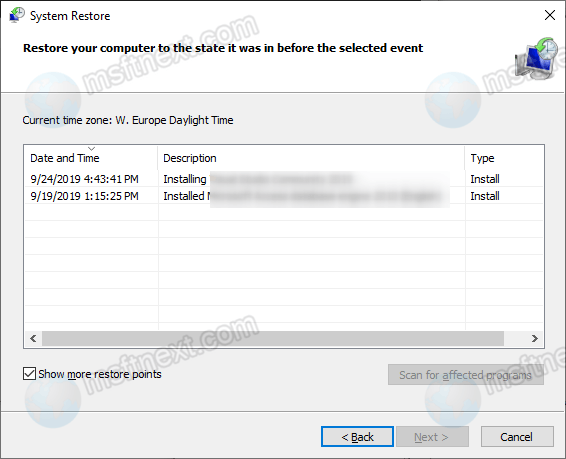
Those who have enabled System Restore may want to view restore point contents on Windows 11 and Windows 10. If you have system protection enabled, after a certain time and before installing software that makes major changes to the system configuration, Windows will create restore points. A restore point is a backup copy of the most important system files. It may include files of installed programs and files that store user account settings. If an issue occurs on the computer, the user can run the Roll Back To Restore Point wizard with the rstrui command and complete the restore procedure.
On the next boot, Windows will compare the contents of the backed up directories and replace the modified files with the files contained in the backup. As a result, this will restore normal operation of the operating system.
This solution is available for over twenty years, but it is not ideal and has its drawbacks.
Firstly, rolling back to a previous restore point can break and often breaks the normal work of programs installed or configured after the restore point was created.
Secondly, if the user knows which file caused the problem, there is no need for him to restore all the files. In such cases, it would be very nice to extract the desired file from the restore point. After that, you could replace the damaged one from the LiveCD or in safe mode with it.
Is this possible and if possible, how to do it and where to find these restore points?
How to View Restore Point Contents
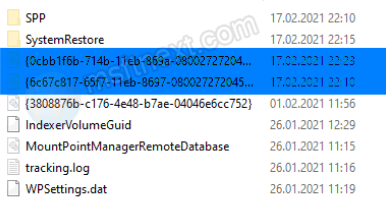
Windows stores restore points in the hidden system folder System Volume Information. These are files without an extension, whose names are 128- bit identifiers. Access to System Volume Information is restricted at the NTFS level. In order to view the contents of this directory, you will have to boot a computer from a live disk. Even a Linux-based one is suitable. But you cannot open the shadow file itself and extract the necessary items from it.
You can partially work around these restrictions by creating a regular symbolic link to the system restore point file.
To do this, you need to first determine the shadow copy number.
Do the following.
- Open a command prompt as administrator.
- Execute the command
vssadmin list shadows.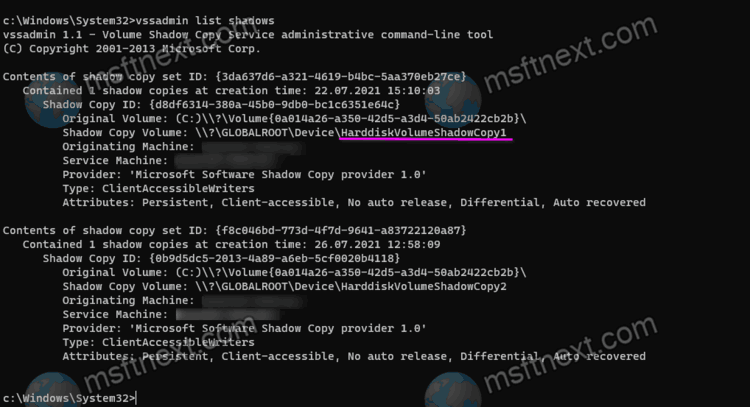
- Find the “Shadow copy volume” value, copy it and run a command like this in the console:
mklink /d %SystemDrive%\shadowcopy \\?\GLOBALROOT\Device\HarddiskVolumeShadowCopy1\. Here, the volume of the shadow copy in the command isHarddiskVolumeShadowCopy1.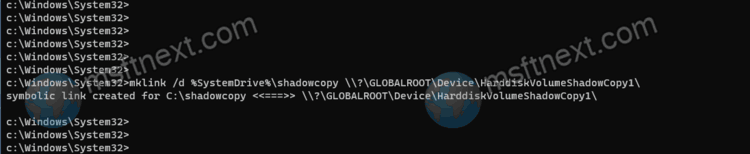
After executing the command in the root of the C drive , you will have a link to the shadow directory . By clicking on the c:\shadowcopy folder, you will be able to browse the selected restore point.
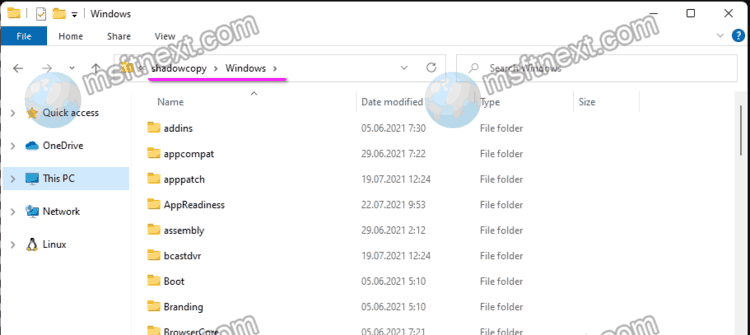
You can work with it as with a regular folder, finding and copying the files and directories you need from it.
What is the disadvantage of this approach? You will not be able to copy some files, since this requires the appropriate access privileges. To access them, you will have to boot the computer in safe mode or from a WinPE- based LiveCD (not Linux-based!).
Using the ShadowExplorer app
There is also an easier way to access system restore points – to use the ShadowExplorer app specially created for viewing them.
The program is no longer developing, so it requires an aged .NET version to work, .NET Framework 3.5. If you decide to use the app on Windows 11 and Windows 10, you will most likely have to install this component.
After starting ShadowExplorer displays the contents of the earliest restore point. If there are two, three or more points, you can select the one you need in the drop-down menu located in the upper left corner of the utility window.
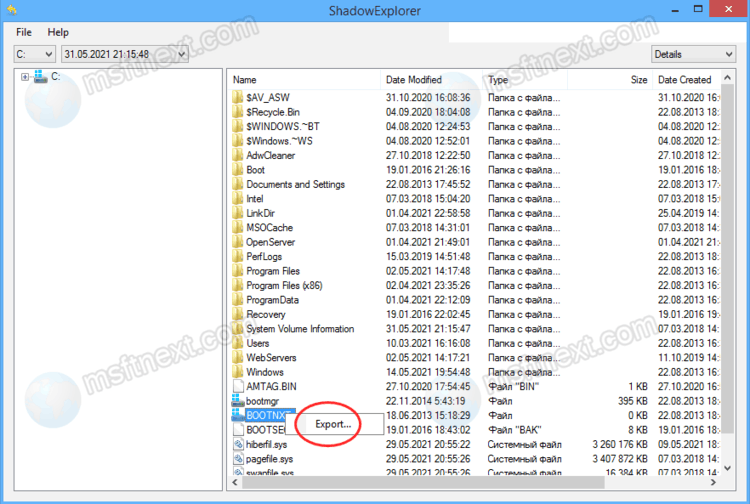
Visually, the ShadowExplorer user interface resembles File Explorer. On the left is a navigation tree with a list of System Volume Information subfolders where Windows stores shadow copies. The larger right column displays the contents of the shadow copy selected in the left column.
There is only one option available in the context menu of the elements of the right column is Export. Without it the program would remain a simple viewer.It allows you to extract individual items from shadow copies, folders and files. Select it, specify the save location in the window that opens, click “OK”. The app will extract the file or directory you need and save it to your hard drive.
You can download ShadowExplorer here: www.shadowexplorer.com/downloads.html