You may want to WSL to another disk in Windows 11 after installing a huge number of apps. Given the number of installed applications, the size of the WSL environment can take up a lot of disk space.
In 2016, Windows 10 introduced a new feature, WSL, which is a compatibility layer that allows you to run applications compiled for Linux from the command line. In subsequent versions of Windows, the functionality of WSL was significantly expanded.
For example, in the Linux subsystem of the second version, it became possible to run GUI Linux applications. By default, all program files in this virtual environment are installed on the system drive.
If the system disk is small, the user may consider moving WSL to another drive, such as from a small SSD to a larger HDD. This ability is present in Windows 10 and Windows 11, and there are several ways to perform the transfer.
How to move WSL to another disk
- Open Windows Terminal and shutdown all wsl distributions using the
wsl --shutdowncommand. - Open File Explorer and go to the
%USERPROFILE%\AppData\Local\Packages\distro_name\LocalStatefolder. For the default ubuntu, the “distro_name” is “CanonicalGroupLimited.UbuntuonWindows_79rhkp1fndgsc”. - Cut the
ext4.vhdfile from that folder and paste it to a folder on a different disk to move it. For example, move it to “d:\wsl\ubuntu”.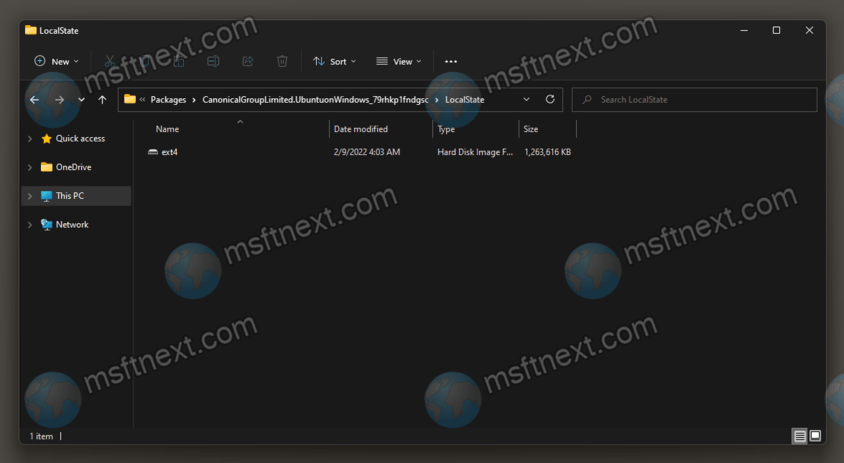
- Right-click the “Start” icon in the taskbar and select “Run”.

- In the Run box, type
regeditto open the Registry editor, and press ↵ Enter .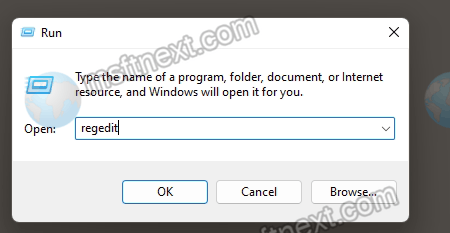
- Navigate to
HKCU\Software\Microsoft\Windows\CurrentVersion\Lxss\{UUID}. Look for theBasePathvalue under each of the{UUID}keys to find one to match theLocalStatefolder path. - Modify the “BasePath” value to point it to the new folder where you moved the ext4.vhd file. In my example, you have to set it to “d:\wsl\ubuntu”.

So you simply move the virtual file system container and set the BasePath parameter to a new path.
Method 2
Using the first method, however, requires you to edit the Registry. If you are not OK with it, LxRunOffline is a free tool to save your time.
Download the app from developer’s web site: github.com/DDoSolitary/LxRunOffline.
After unpacking the archive with the utility, open the folder with the LxRunOffline.exe executable file. Open Windows Terminal or command prompt as Admin to that folder. Shutdown all the running WSLs and run the following command:
Lxrunoffline.exe move -n Ubuntu-20.04 -d d:\wsl\ubuntu
Ubuntu-20.04 in this example is the name of the Linux distribution. The last part of the command is the path to the new Ubuntu folder on the D drive.
If you need to get the names of the distribution, use the LxRunOffline.exe list command, or wsl -l. Both will show the list of the installed distributions.
Once moved, start the distro with the command wsl -d Ubuntu-20.04 or lxrunoffline run -n Ubuntu-20.04 -w.