Windows 11, and all its predecessors since Windows Vista, includes User Account Control or UAC which limits the user’s rights even if he is a member of the Administrators group so that malicious apps or malware can’t make unauthorized changes to your PC.
However, there are a number of apps that don’t work properly in Windows 10 unless they are run as administrator. Some of your own automation scenarios like batch files or PowerShell scripts may require administrative privileges.
While it is possible to disable UAC entirely, it is a bad idea from a security standpoint. The right way is to run certain apps as Administrator as and when it is required. Here are some methods you can use to launch a desktop app as administrator.
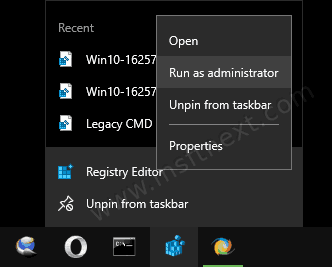
The easiest way to run an application as Administrator is to right click its executable file or shortcut in the Start menu/Start screen and pick “Run as Administrator” from the context menu.
How to Run an App as Administrator
- Open the Start menu (Press ⊞ Win or Ctrl +Esc on the keyboard).
- Right click on the app shortcut. If you don’t see the needed one, click on “All apps” to get the full list of installed apps.
- Select “Run as Administrator” from the context menu.
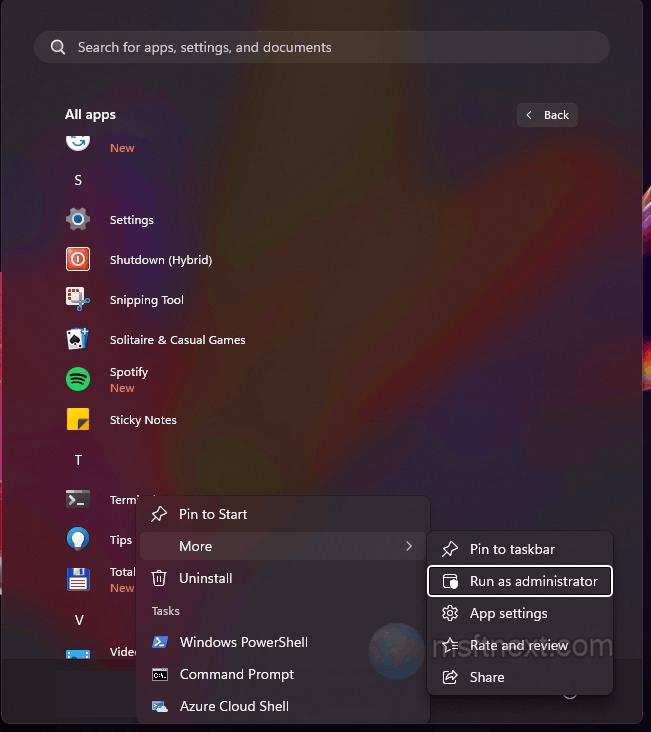
Run apps as administrator from start menu
The same method can be used to launch an app as Administrator from File Explorer.
From File Explorer
- Locate the executable file for the app you want to start elevated.
- Right-click on it.
- Select ‘Run as Administrator’ from the context menu.
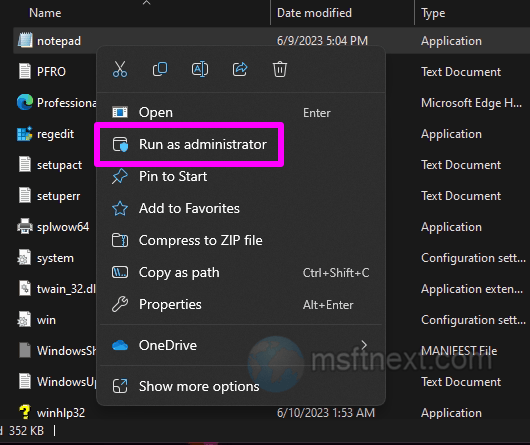
from file explorer
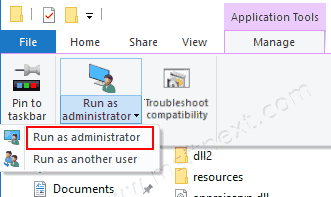
- Open File Explorer to the folder that contains the target app.
- Select an app in the file listing.
- Click the
Run as administratorbutton on the Manage tab.
For shortcuts and apps pinned to the taskbar and the Start menu, you can use a keyboard shortcut.
Using a Keyboard Shortcut
- Select an app in the Start menu to highlight it.
- Press and hold the Ctrl + Shift keys.
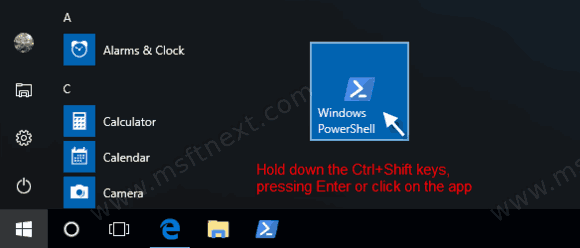
- Press Enter or click on the app to run it as Administrator.
- Release the Ctrl + Shift keys. The app will be started elevated.
- For the taskbar icons, you can right click the pinned app to show its context menu. Right click the program’s name inside the menu, and select the appropriate command.
In case you need to always run the application as administrator, you can modify or create a shortcut which will start it always elevated.
Always Run as Administrator using Shortcut Advanced Properties
- Right-click the app shortcut.
- Select Properties from the context menu.
- On the Shortcut tab, click the Advanced button.
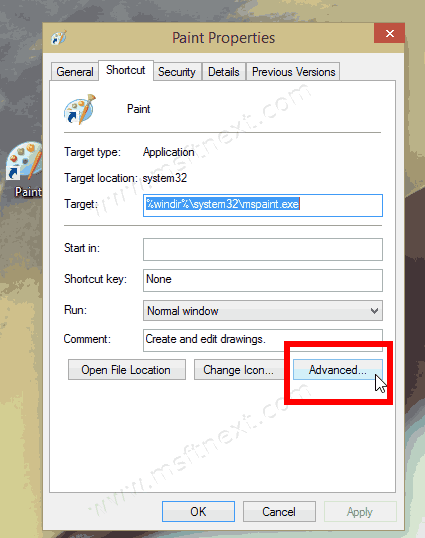
- Perform one of the following steps for what you would like to do.
- To always run the shortcut as administrator when opened, place a check mark the Run as administrator box, then click OK.
- To stop running the shortcut as administrator, uncheck the Run as administrator box, then click on OK.
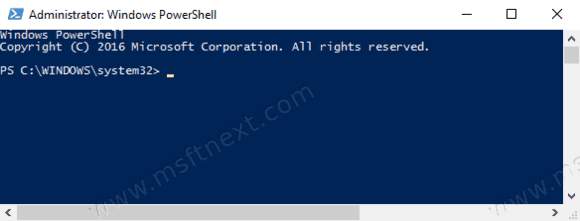
This is the native way to elevate a program’s privileges automatically every time you launch it. You will still get a UAC prompt when using this method.
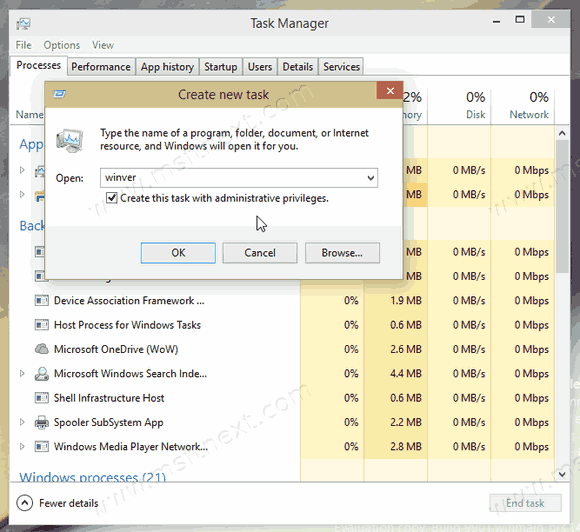
Run apps as administrator with Task Manager in Windows 10
- Open Task Manager by pressing Ctrl + ⇧ Shift + Esc .
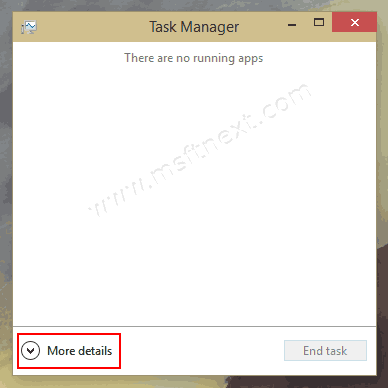
- In Windows 10, click the “More details” link if it opens in compact mode.
- Open the File > Run new task menu.
- Type the full path to the .exe file, or browse to and select the program’s .exe file or shortcut.
- Now check the option Create this task with administrative privileges and click the OK button.
In Windows 11
- Press Ctrl + ⇧ Shift + Esc to start Task Manager
- On the Processes tab, click the Run new task button above the list of processes.
- In the Create new task dialog box, place a check mark for the Create this task with administrative privileges option.
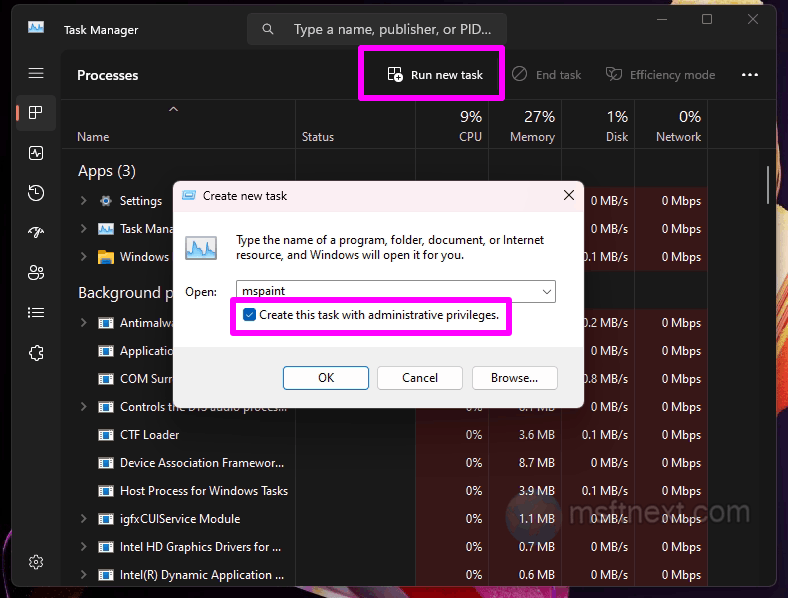
Windows 11 task manager - The app will start elevated.
Changing an option in the compatibility Properties
- Right click the shortcut.
- Select Properties from the context menu.
- In Properties, switch to the Compatibility tab.
- In the Settings section, turn on the Run this program as an administrator option, and click on OK.
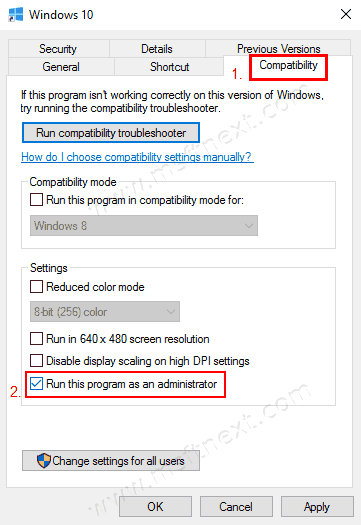
- Note: If the setting is grayed out, then you will need to click on the Change settings for all users button. Then enable the Run as administrator option for all users.
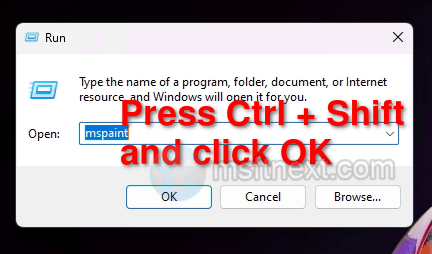
Using the Run dialog box
Aside from the shortcuts added to the desktop, Start menu, and taskbar, Windows makes frequent use of the Run dialog box to launch system tools quickly. Typically, all commands entered into the Run window are executed with standard user privileges, unless the user is operating under the built-in Administrator account or in safe mode.
But the Run window allows starting apps elevated if you press special hotkeys.
Open the “Run” window by pressing Win+ R or in any other way known to you, enter the desired command into it and press the key combination Ctrl + ⇧ Shift + ↵ Enter . The command will be executed with administrator rights.

Alternatively, you can type the command, press and hold Ctrl + ⇧ Shift, and click on OK. The result will be the same.