For security reasons, Windows does not expose tools and options to take a screenshot of the login screen and the lock screen. This is understandable, since there are certain restrictions on capture when the screen is locked and the user logs out.
In order to prevent the theft of passwords and other data by malicious programs, Windows prevents third-party apps from taking screenshots on the initial screen. Many of those programs support the delayed snapshot function. But if you try to use it, you may get a black or white blank image instead of the screenshot.
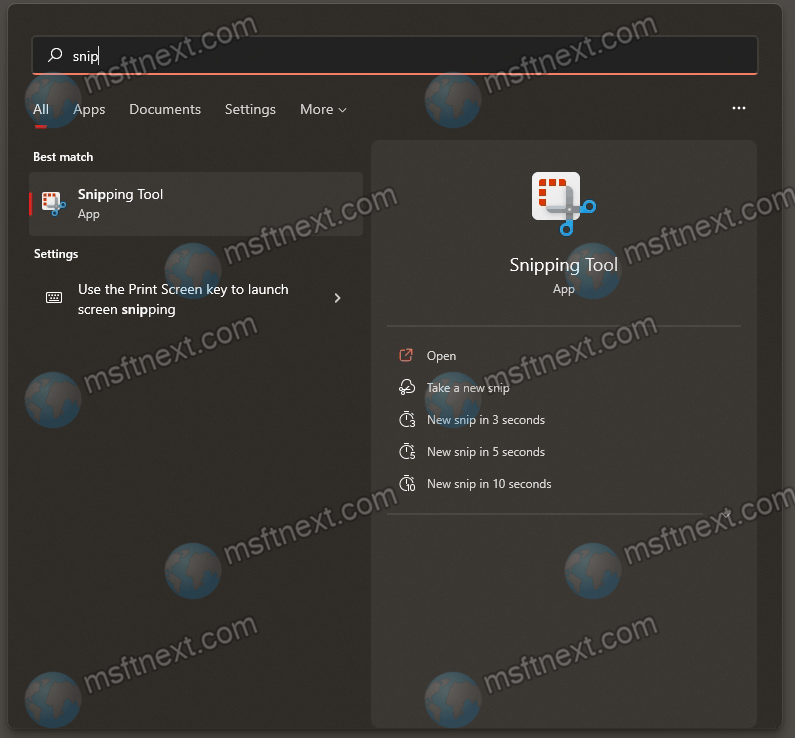
Anyway, you can create a screenshot of a login screen by using the built-in Snipping Tool on Windows 11, and the Snip & Sketch tool on Windows 10.
Like many other screen capture tools, Snipping Tool / Snip & Sketch supports delayed screenshots. But it also automatically copies them to the clipboard.
Take a screenshot of the login screen
- Launch Snipping Tool on Windows 11 (Snip & Sketch tool on Windows 10) from the Start menu.
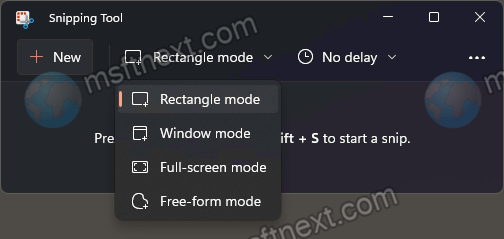
- Select Rectangle mode for the capture mode.
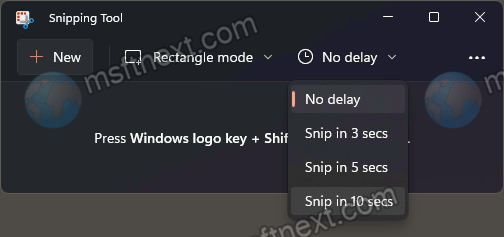
- Set the capture delay to 10 seconds.
- Click on the New button to take a screenshot, and immediately press ⊞ Win + L .
- After 10 seconds, a thin stroke will appear along the screen borders, indicating that the capture mode is active. Select the login screen area to capture.
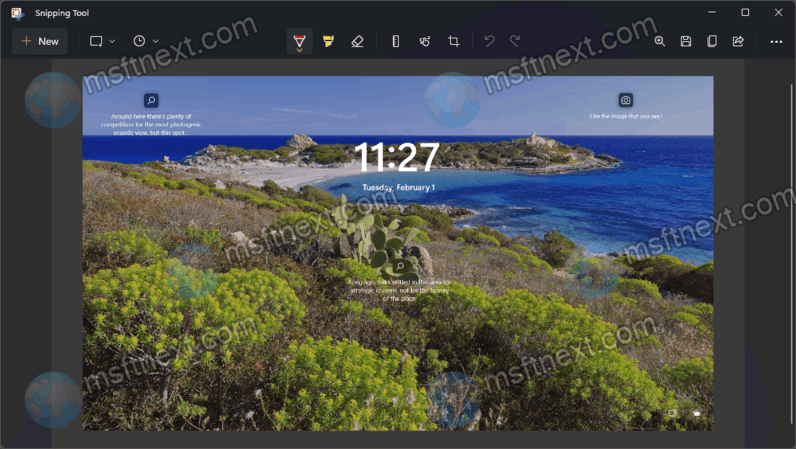
But in order to see the captured image, you still have to unlock the desktop, i.e. type the password on the login screen. After that, the Sketch on Screen Snip application will appear on the screen, with the captured area.
If suddenly the Snipping Tool gives an error or crashed, the screenshot won’t be lost. Simply open Microsoft Paint or another image editor and paste the screenshot from the clipboard. Snipping Tool copies the capture automatically, so you don’t need to use its annotation tool. You can directly process the screenshot with your favorite image editor.