This post explains how to set your network as Public or Private. When you are signing in to your account for the very first time, the OS asks you to set your network location type to either Public or Private. You can change the current network profile to Public or Private at any moment.
The Public profile should be set when you are connected to a network you don’t trust. Usually, it is public hotspots in an airport, hotel and so on. In case of the Public network profile, Windows will disable network discovery, so other devices on the same network won’t find your PC and will be not able to connect to your PC.
When you choose the Private network profile, the OS will configure your connection as a Home network and turn on network discovery. Use this network profile for networks your can trust. Other devices on the same network can establish connections to your PC and use its shared resources when the network profile is set to Private.
Read on to learn how to change your network profile in Windows 10 to Public or Private.
Set Network Location To Public Or Private In Windows 10
- Open Settings (Press the Win+I keys).
- Go to ‘Network and Internet’.
- If you are using a wired connection, click on’Ethernet’ on the left. If you have connected via a wireless connection, navigate to ‘Network & Internet’ > ‘Wi-Fi’.
- On the right, please click on the network name that your PC is currently connected to.
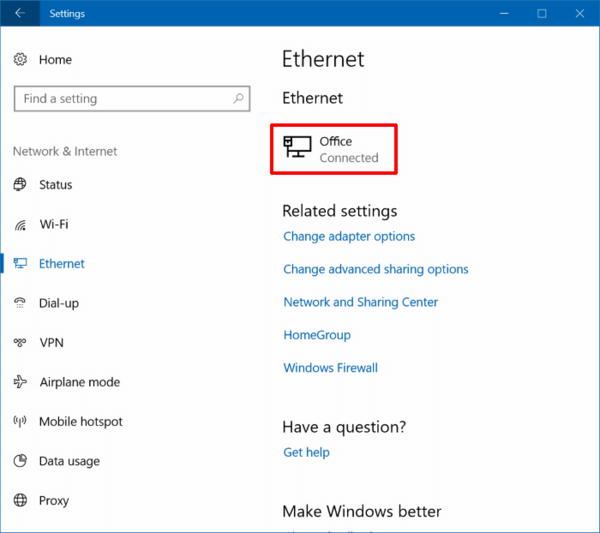
- This will open an extra page with your network details. You will see the ‘Network profile’ section. There, choose either ‘Public’ or ‘Private’ to set the network profile for your connection.
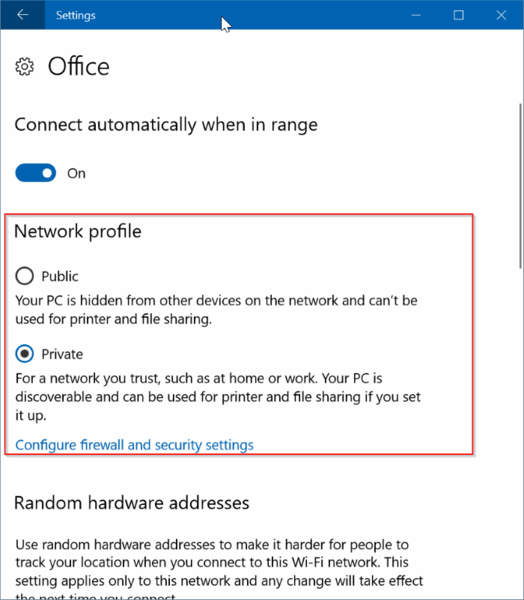
Windows 10 will apply the changes you made instantly.
You are running an older version of Windows 10, e.g. you are on Windows 10 Creators Update or earlier versions, you will see another option. The toggle switch button is called ‘Make this PC discoverable’. Enabling it will change the network connection type to Private. If you disable it, the network profile will be set to Public.