Windows 10 includes a new Mail app which is simplistic and allows you to send and receive e-mail from multiple accounts. It allows adding multiple email accounts so you can view and manage all your email accounts using the single app. This post explains how to remove an email account from the Mail app in Windows 10.
The Mail app brings improved performance and a familiar three-pane email UI, with a toggle to quickly move between your email and calendar. For touch screen users, Mail includes customizable Swipe Gestures, letting you swipe right or left to take actions like delete, flag, move or mark as read/unread. Mail allows you to easily insert tables, add pictures and use bullets and color to your text. It supports Office 365, Exchange, Outlook.com, Gmail, IMAP, POP and other popular accounts.
Adding and removing an email account to and from the Mail app is easy. There are two methods which you can use.
Remove an Email Account from the Mail App
- Open the Mail app.
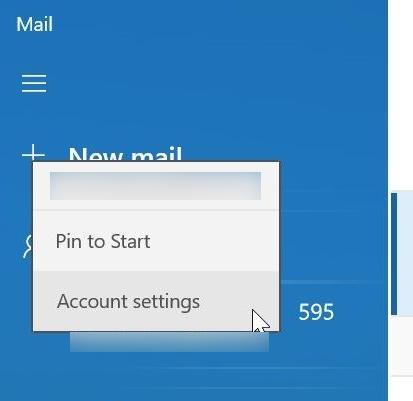
- On the left, right-click on the email account that you want to remove, and then click ‘Account settings’ in the menu.
- On the ‘Account Settings’ page, click ‘Delete account from this device’.
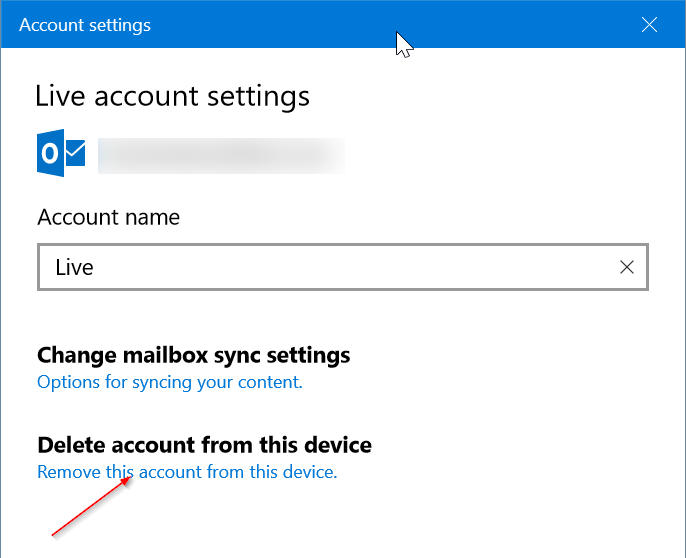
- A confirmation box will open with the following text. ‘If you delete this account, all content associated with it will be removed from this device. Are you sure you want to continue?’. Click on the ‘Delete’ button to remove the account from the Mail app.
You will see ‘Your account has been successfully deleted’ message.
The account is now removed.
Remove an Email Account in the Mail App’s Settings
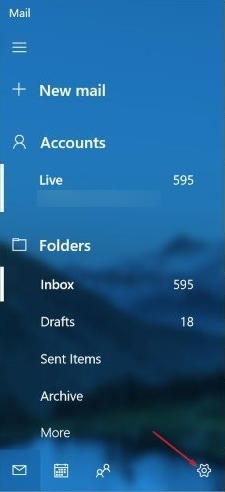
- In the Mail app, click on the gear (settings) icon on the left pane to open settings.
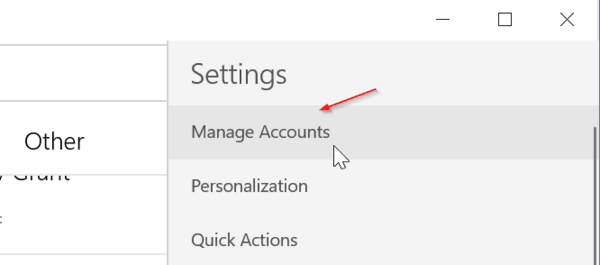
- In Settings, click ‘Manage Accounts’.
- Click on the email account that you want to remove. This will open ‘Account settings’.
- Click on the link ‘Click Delete account from this device’.
- Click on the ‘Delete’ button when prompted. You will get the message ‘Your account has been successfully deleted’ message.
Unfortunately, though, once you remove all your accounts, it STILL has all the emails it’s already loaded in it. How am I supposed to delete those, without deleting them anywhere else?
Surprise me – respond.
Reset the Mail app. This will erase its data
I can’t get the pop up box in order to delete my account. I have reset the account and it is still there