Registry Editor is a tool for advanced users who need to change Windows settings which are not available in the GUI. The main purpose of the Registry Editor is to view and change the settings in the system registry. Some Registry keys cannot be accessed due to their permissions. To get access to such a registry key, you’ll need to take ownership and grant full access permissions to your user account. This post explains the required procedure.
Just like permissions and ownership concepts exist for objects in the NTFS file system, they exist for Registry keys as well. Starting with Windows Vista, in fact, a large number of OS-specific registry keys which store Windows settings as protected by Windows Resource Protection so that they can’t be easily deleted or modified. You may need to modify these keys in certain situations. For that, you need to take ownership as well as set permissions (access rights) on them. Usually, the protected keys have ownership set to TrustedInstaller, a special built-in user account which exists for advanced security.
Taking ownership is quite simple and can be performed with the following steps.
Take ownership of a Registry key
- Run
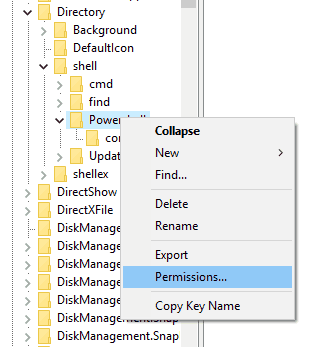
regedit.exefrom the ‘Run’ dialog (Win + R) and go to the branch for which you need to change permissions. - Right-click on it and select the ‘Permissions…’ option from the context menu.
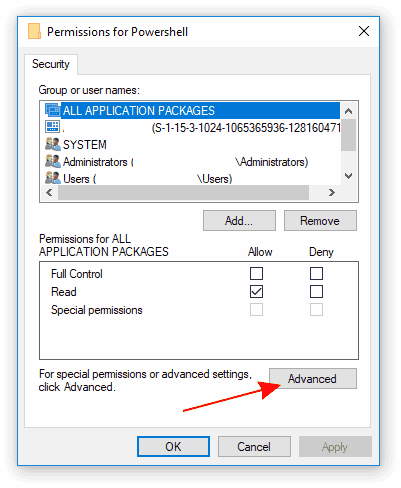
- Click the ‘Advanced’ button to open the ‘Advanced Security Settings dialog’.
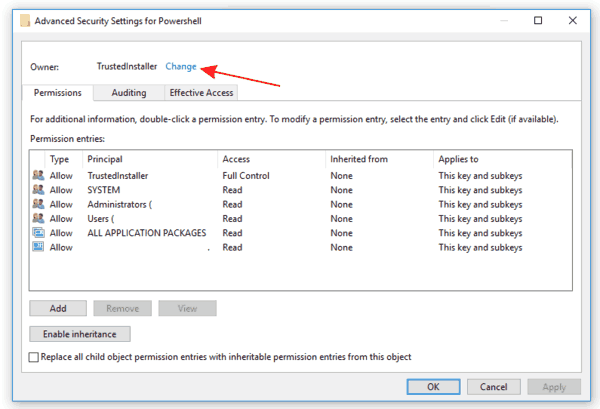
- If your user account isn’t the current owner, click on the link ‘Change’.
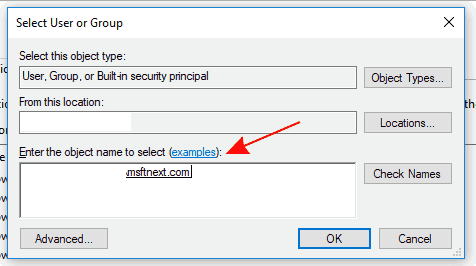
- Enter your user name to the text box and click OK.
- Click on the ‘Apply’ button to replace the owner of the current branch.
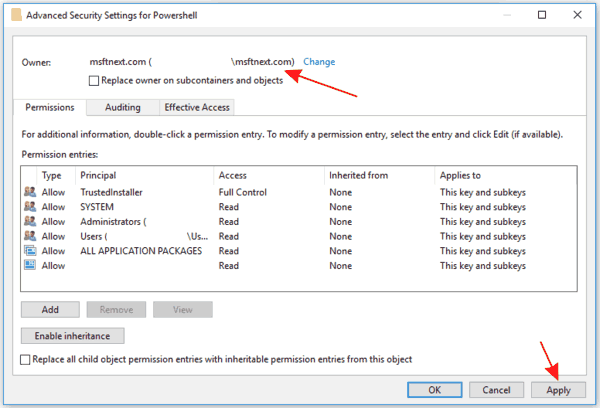
If the current key has subkeys, you may need to replace their owner too. For that, turn on the option ‘Replace owner on subcontainers and objects’ , and then click ‘Apply’.
After you change the owner of a registry key, you almost always need to change its permissions before you can actually modify the key. You have to switch to the ‘Permissions’ tab in the ‘Advanced Security Settings’ dialog to do so.
Get full access permissions to a Registry key
- Open the ‘Advanced Security Settings’ dialog for the registry branch.
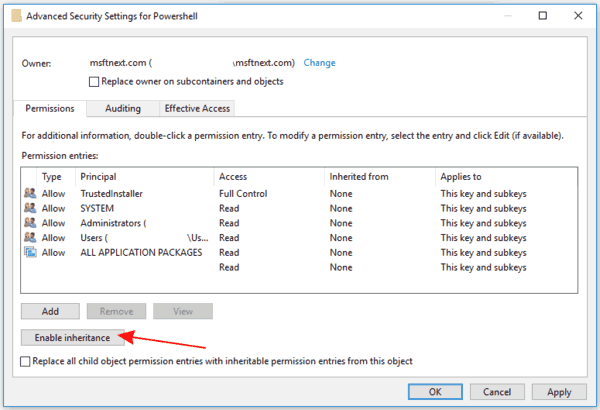
- If the current key has inherited permissions from its parent key, you may need to disable inheritance to remove all the restrictions (if they exist). Click ‘Disable inheritance’.
- Click on the ‘Add’ button.
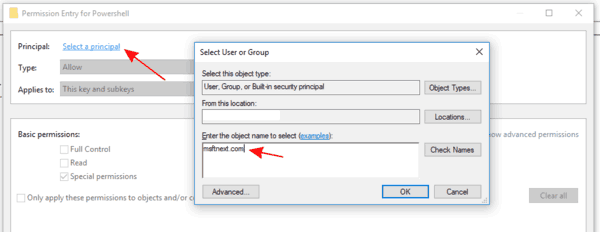
- Click ‘Select a principal’.
- Fill in your user account, and click ‘OK’.
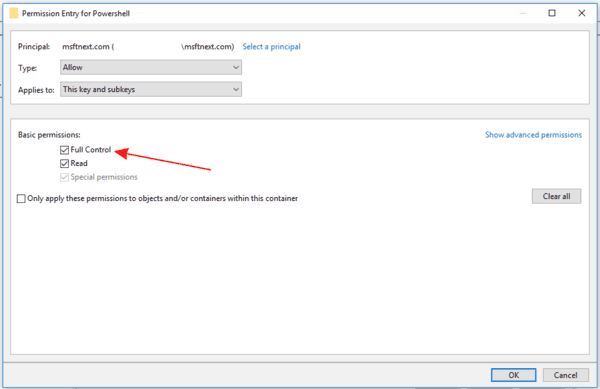
- Enable the option ‘Full Control’.
Permissions can be set both ways. You can set them only on the required sub key after disabling inheritance. Or you can set permissions on the parent key and all its subkeys. To do so, enable the ‘Replace all child object permissions with inheritable permissions from this object’ option. This will push permissions down the keys hierarchy to all child objects.
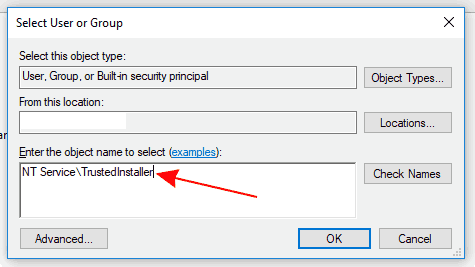
How to restore the TrustedInstaller ownership
- Open the ‘Advanced Security Settings’ dialog for the registry branch.
- Click on the link ‘Change’.
- Type ‘NT Service\TrustedInstaller’ as new owner name.
I am using Windows 10. If you are using Windows XP, Vista, Windows 7 or 8, the dialogs would look different, but it’s not that difficult to find the required options and change them.
I followed all the steps outlined but still cannot Expand the key in question. Expand is grayed out on the context menu and double-clicking does nothing. There is no error message. Can you assist?
Can you share the full path?
How to Disable inheritance? Since when I click on that option 2 choices are shown to me in a pop-up window>
1) Convert inherited permissions into explicit permissions on this object
2) Remove all inherited permissions from this object.
p.s. when I chose 2nd option, then everyone from the list is completely deleted
So what to do?
Go with the 1) option, and then edit the copied permissions manually.