The appearance of an average picture on a computer display is influenced not only by the monitor’s characteristics and the video card’s capabilities. It also depends on the software. Recently, the Windows Settings app received a new feature called “Automatic Color Management” (ACM). It enhances the transfer of more realistic color shades. This feature is designed to improve the color quality of images in the interface and all Windows 11 applications.
Auto Color Management is effective at reducing color artifacts in gradients and shadows, and it enhances overall image detail. This feature is optimal for monitors that support 10-16-bit color. But even displays that support only 8-bit color can benefit from the new feature due to anti-aliasing, according to Microsoft.
Auto Color Management is a hardware-accelerated color management system at the system level for select qualifying and specially provisioned SDR displays. On supported hardware, ACM can now be enabled through a new option in the Settings app. This feature ensures that all colors across all Windows apps, regardless of whether they are color-managed, appear accurately and consistently on every supported display.
To use ACM , your computer must meet the following requirements.
- Run Windows 11 build 22621 or later;
- Have an Intel DG1 / 12th generation Intel / AMD RX 400 / NVIDIA GTX 10xx or higher / AMD Ryzen GPU with Radeon graphics ;
- Have WDDM driver version 3.0 or higher installed.
There are no special requirements for monitors, but it would be better if the display device is not limited to sRGB .
How to enable “Auto Color Management”
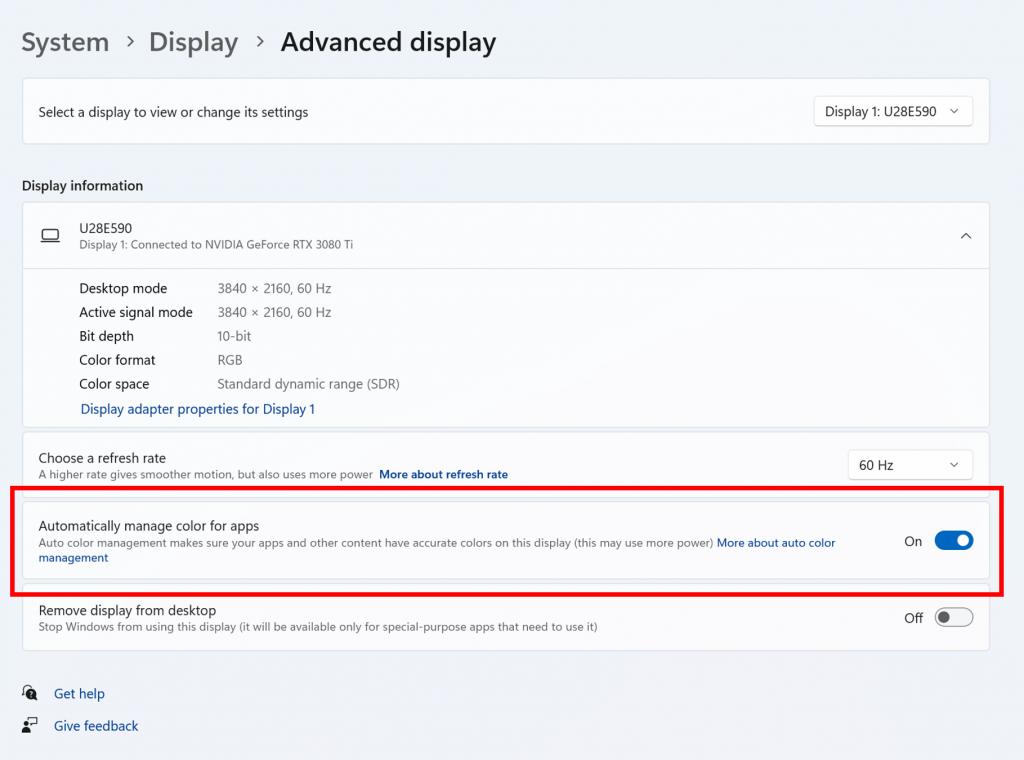
- Open Settings (⊞ Win + I ) and go to Settings > Display > Advanced display,
- Select your display and turn on Automatically manage color for apps. It is located under the setting for changing the monitor refresh rate.
- If the option is missing, activate it using the ViVeTool tool.
- Then open a command prompt as Administrator, navigate to the location of the utility executable file, and run the command:
vivetool.exe /enable /id:36371531.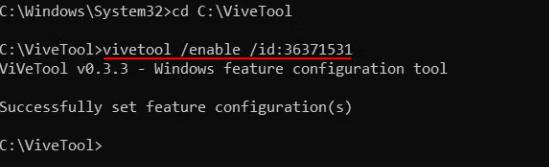
- The option will become available after restarting the computer .If you use PowerShell, don’t forget to add a backslash dot in front of the tool executable, like this:
.\vivetool /enable /id:36371531