In this tutorial you will learn how to show hidden files in Windows 11 File Explorer. Microsoft updated the File Explorer software with a new style. The new look doesn’t include the Ribbon. The new toolbar works well for both mouse+keyboard and touch-based devices.
On the other hand, some users find it a bit confusing. Some options are now moved to new places. So, this tutorial will show you several methods of showing hidden files.
All the methods below work for your current user only. You cannot make Windows 10 display hidden items in Explorer for other users with steps noted below.
Show Hidden Files in Windows 11
- Open File Explorer and click the Layout and View Options button to the left of the three-dots button on the toolbar. See the screenshot below screenshot for reference.
- In a drop-down menu, click Show > Hidden items. That command shows hidden files and folders in Windows 11.
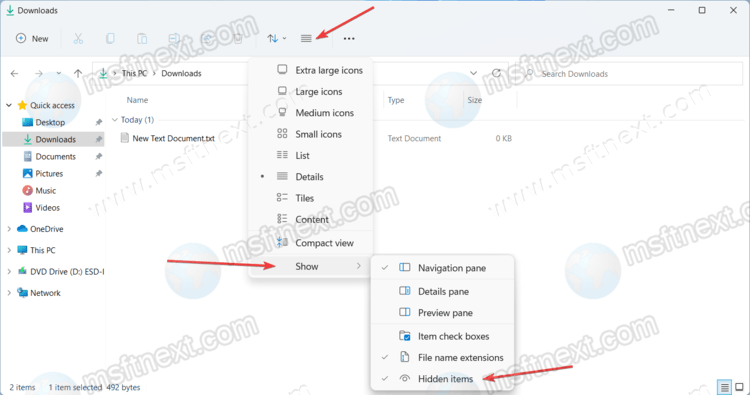
- File Explorer now displays hidden items.
Alternatively, you can use the Folder Options dialog to show or hide hidden item.
Using the Folder Options window
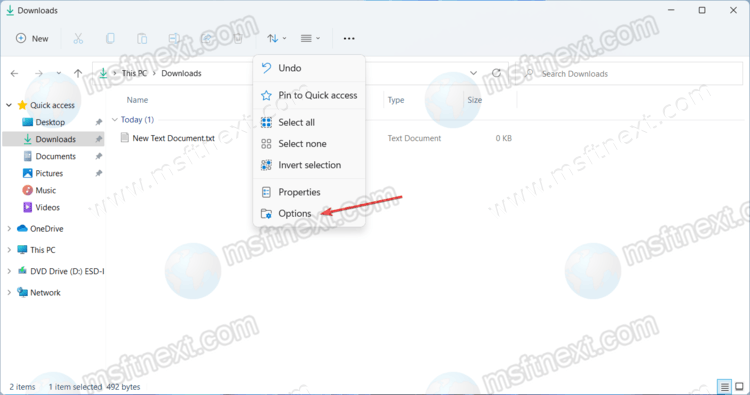
- Open File Explorer, then click the three-dots button on the toolbar.
- In a drop-down menu, select Options.
- In the Folder Options window, click the View tab.
- Find the Hidden Files and Folders section, then place a check mark next to the Show hidden files, folders, and drives checkbox.
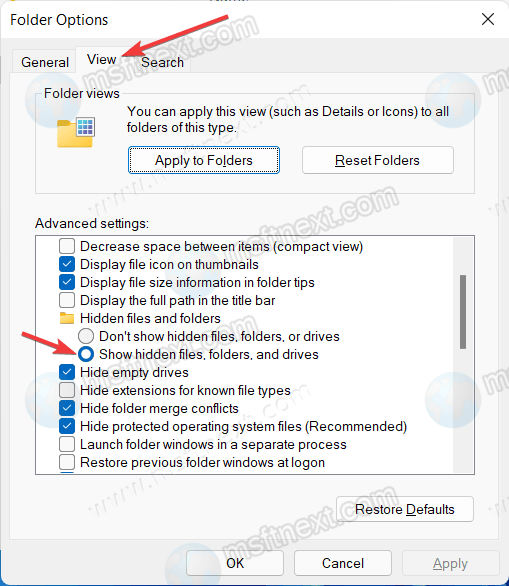
- Click OK.
In the Registry
As it is with almost any setting in Windows 11, you can make the OS display hidden folders and files by editing the registry.
- Press ⊞ Win + R and enter the
regeditcommand to open the Registry editor. - Go to the
HKEY_CURRENT_USER\SOFTWARE\Microsoft\Windows\CurrentVersion\Explorer\Advancedkey. You can copy and paste the path into the address bar.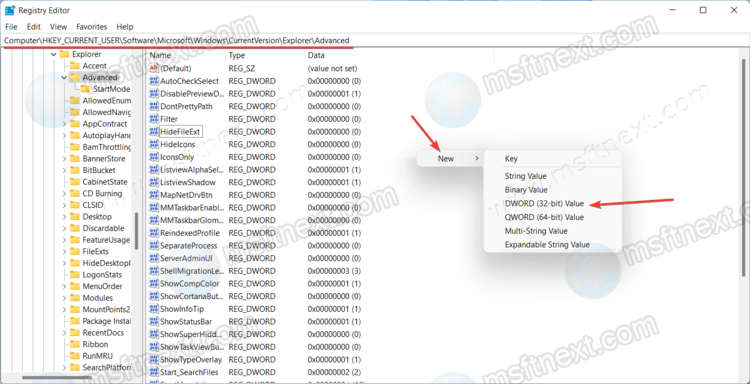
- In the right part of the window, right-click and select New > DWORD (32-bit).
- Name it Hidden.
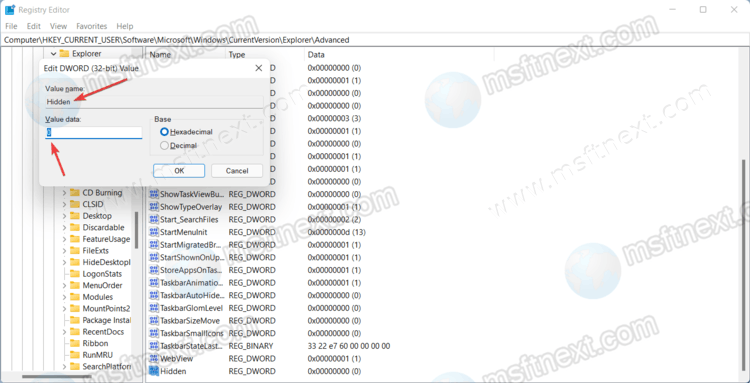
- Change the Hidden value data to show hidden files and folders in Windows 11.
Show protected system files in Windows 11
It is worth mentioning that Windows hides two types of files: one is regular objects, such as a text file, image, video. Other hidden files are system files. Windows hides them to prevent unintentional damage by the user or software. When you show regular hidden files in Windows 11 using one of the earlier reviewed methods, Windows will continue to hide system protected files. if needed, you can change that.
To show hidden protected system files in Windows 11, do the following.
- Open File Explorer (⊞ Win + E), then press the three-dots button and select Options.
- Go to the View tab, and find Hide protected operating system files. Check it to enable.

- Click OK. Windows will show a message warning you about the potential risks of harming your computer. Click Yes.
- Open Registry Editor (⊞ Win +R ->
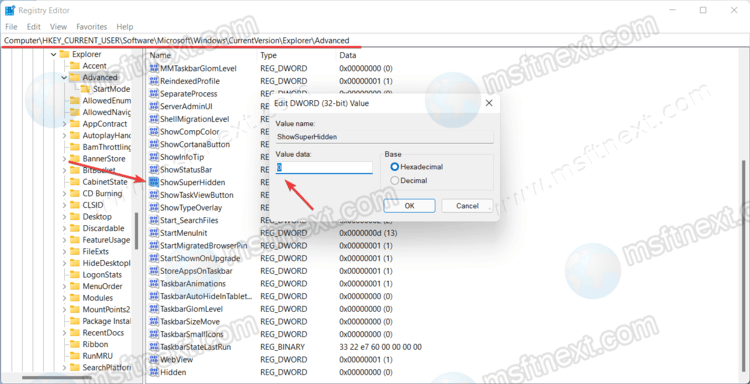
regedit) and go toHKEY_CURRENT_USER\SOFTWARE\Microsoft\Windows\CurrentVersion\Explorer\Advanced. - In the right part of the window, right-click and select New > DWORD (32-bit).
- Rename the new value to ShowSuperHidden.
- Double click ShowSuperHidden and change its value to 1.
That is how you show hidden system files in Windows 11 using Registry Editor.