The Mica effect in Windows 11 adapts the colors of windows and interface elements to the desktop background and makes them more transparent and blurry when they are active. Unlike Acrylic, the Mica effect does not create transparent areas. This allows Mica to be light on GPU resources, but, like Acrylic, it blends windows titles with the desktop background. Obviously, for this effect to work in third-party apps, those apps must support it.
Previously, we reviewed in detail how to enable the Mica effect in the Microsoft Edge, now it’s time for another popular browser, Google Chrome . Previously, you could only enable the mica effect in the canary version of this browser.
But now it is available in stable version 115 and higher. By default, it is inactive. To activate it, you must either enable the corresponding flag in the its experimental settings , or use a special key in the shortcut properties.
Enable Mica in Google Chrome
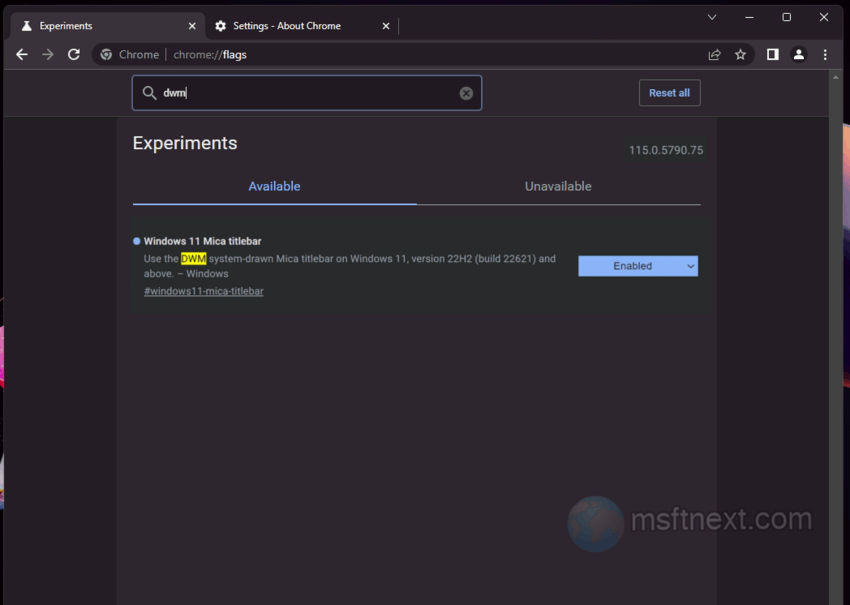
- With the Chrome browser open, enter the chrome://flags internal URL.
- On the experimental settings page, find the Windows 11 Mica Titlebar flag using the search box.
- Enable it by selecting the “Enabled” option in the drop-down menu located on the right .

Google Chrome Enable Mica - Restart your browser for the settings to take effect .
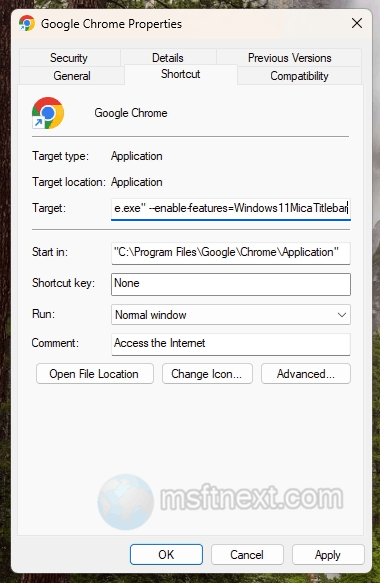
There is also an alternative way to enable Mica – by editing the shortcut and adding the –enable-features=Windows11MicaTitlebar command line switch.
Editing the shortcut
- Open the properties of the Chrome shortcut on the desktop.
- Change the content of the Target field by adding
--enable-features=Windows11MicaTitlebarline to the path to the browser executable file separated by a space.
modify the shortcut - If the browser was running when the changes were made, close it and reopen it.
But keep in mind that this effect is only available in the latest builds of Windows 11. Also, if you use the second method, then the effect will only work when launching the browser from the edited shortcut.
