Ventoy is one of the most convenient tools available for creating multiboot flash drives. Unlike other programs, Ventoy allows users to swap the OS images on the flash drive with ease. Its developers have now created another program called iVentoy. It focuses on booting computers over a local network rather than from a flash drive.
iVentoy works as a server-client software. It uses a PXE environment. The app enables computers to boot using network cards and utilizes IP, UDP, BOOTP, and TFTP protocols. This means that you can use iVentoy to install Windows or Linux on multiple computers connected to the same local network simultaneously.
Using iVentoy to install Windows
Step 1. Prepare the files
Using iVentoy is relatively straightforward. Begin by extracting the application archive to the root of the disk or any folder with an English name (this is important). Then, place the ISO images intended for network booting into a folder named “iso“. You will use these images with iVentoy to install Windows or any other OS you are intended to install.

Step 2. Access iVentoy user interface
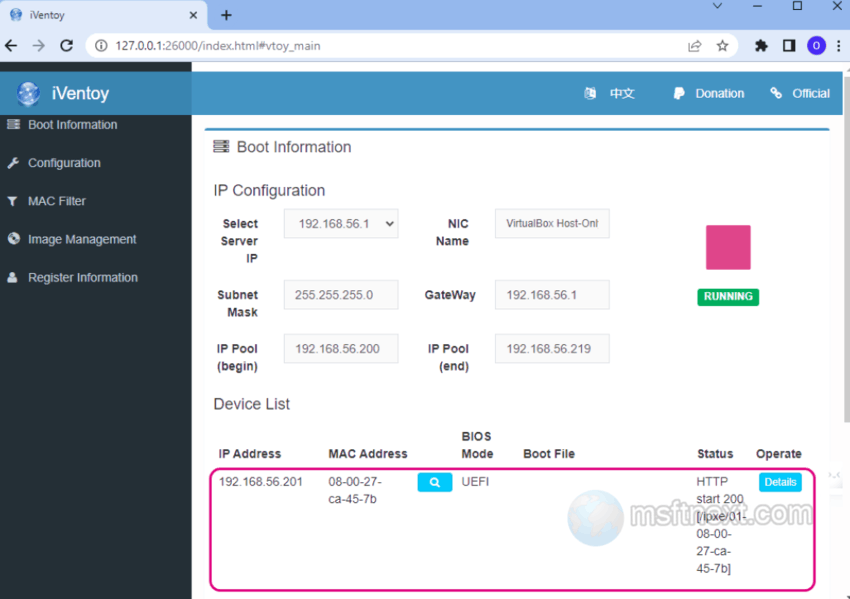
Next, run the iVentoy executable, which will open a tab in the default browser with the local URL 127.0.0.1:26000. If this doesn’t happen automatically, you can manually enter the address in your browser. It will show you the “Boot information” page.
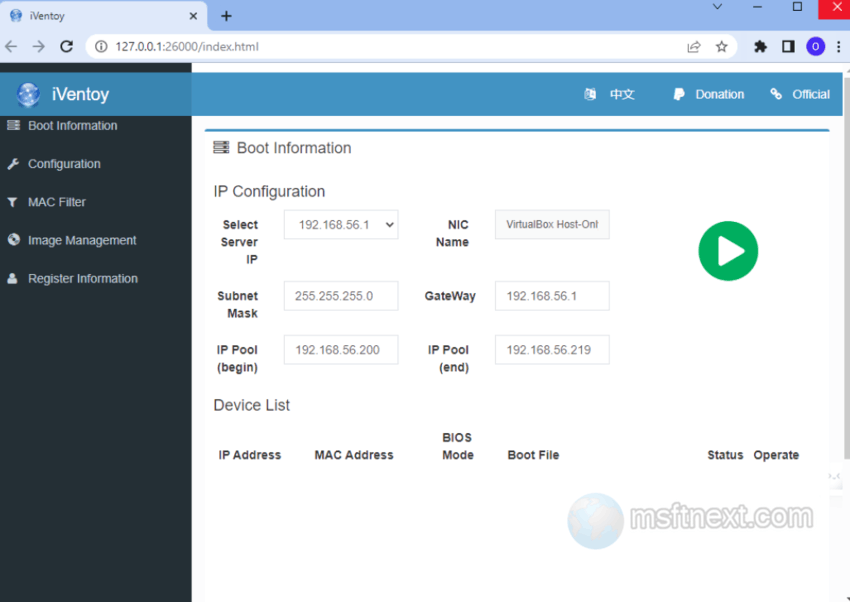
The web interface of iVentoy consists of four main tabs and one additional tab. The “Boot Information” tab displays the server’s current network settings (IP Configuration block) and the local addresses of connected network computers (Device List block). It will be empty until you connect a PC to the iVentoy service.
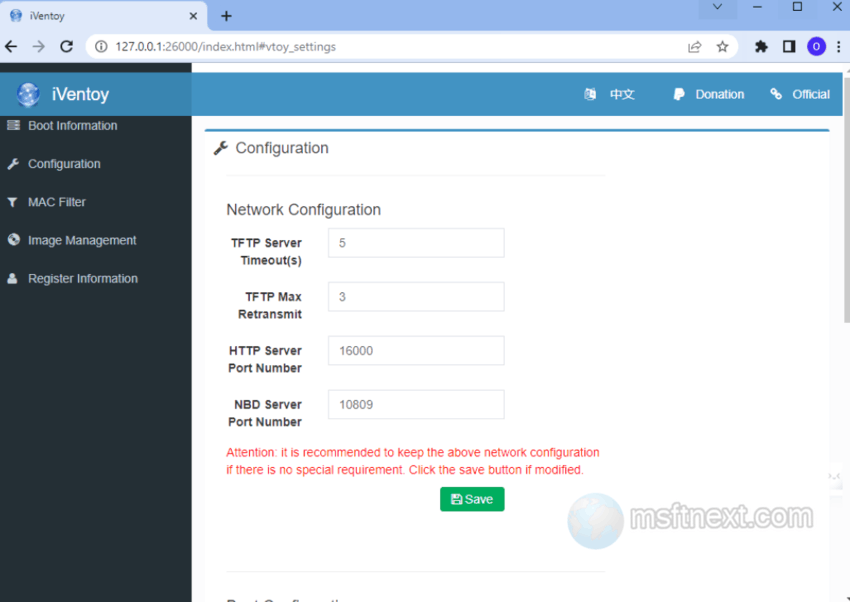
The “Configuration” tab allows users to modify network settings and EFI boot options, although they can be left unchanged if desired.
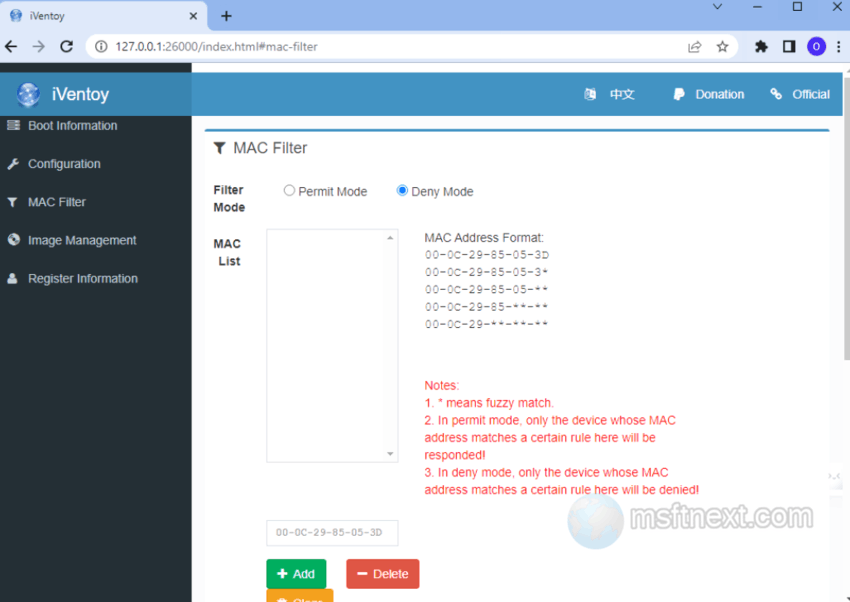
In the “MAC Filter” section, it is possible to block downloads for specific computers based on their MAC addresses. By default, this feature is enabled for all network devices detected by iVentoy.
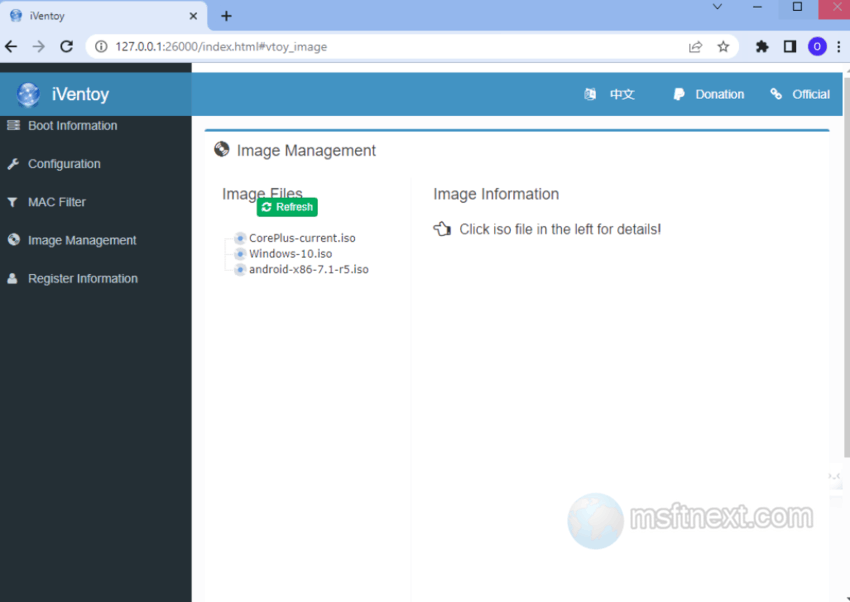
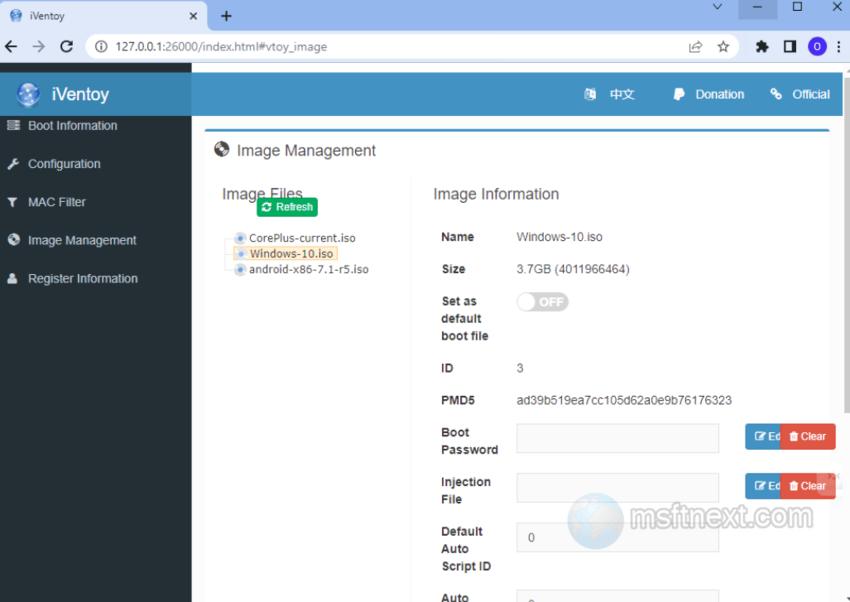
Step 3. Configure ISO Images
The “Image Management” section contains a list of bootable ISO images. Here, users can view information about available images, set a selected image as the default boot option, and even integrate drivers or scripts to automate the installation process if needed.
Step 5. Start iVentoy
To start the iVentoy server, simply click the green Start button on the “Boot Information” tab.
Before launching iVentoy, ensure that the client computer is connected to the server PC, and that network boot is enabled on the client computer. In the BIOS or UEFI settings, select Network Boot or PXE mode (the name may vary). If necessary, enable LAN/PXE boot support. It is recommended to disable Secure Boot.
Once these settings are in place, start the iVentoy server and restart the client computer. If everything goes smoothly, you will see the iVentoy boot menu on the screen of the networked PC.

Additionally, in the iVentoy control panel, you will now see the IP and other parameters of the connected device in the “Device List” section.
iVentoy performs mostly well, except for Legacy mode booting in a virtual mahcine. In UEFI boot mode, everything worked as expected, albeit without the option for secure boot enabled. The issue with bootable virtual PCs not detecting the network device is likely due to the peculiarities of VirtualBox. However, on physical hardware, this problem should not be observed.
For more information about iVentoy, you can visit the developer’s official website.