If you want you can enable text labels for running apps in the Windows 10 taskbar. In previous versions of Windows, taskbar displays the running apps as rectangular items with captions which show the title of the corresponding window of the app. In Windows 10, text labels are disabled by default, so the user see a highlighted square button with the app icon.
This simple guide will show you how to revert to the previous behavior and enable text labels for open programs in the Windows 10 taskbar. This can be especially useful for those who use vertical layout of the taskbar.
![]()
In order for the taskbar button captions for running programs to start to appear again, you should follow these simple steps.
Enable text labels for running apps in Windows 10 taskbar
- Right-click the empty space on the taskbar and select Taskbar Options. You can also go to Settings – Personalization – Taskbar.
- Find the Combine taskbar buttons option. If this item is grayed out or missing, you can do the same in the registry (see below).
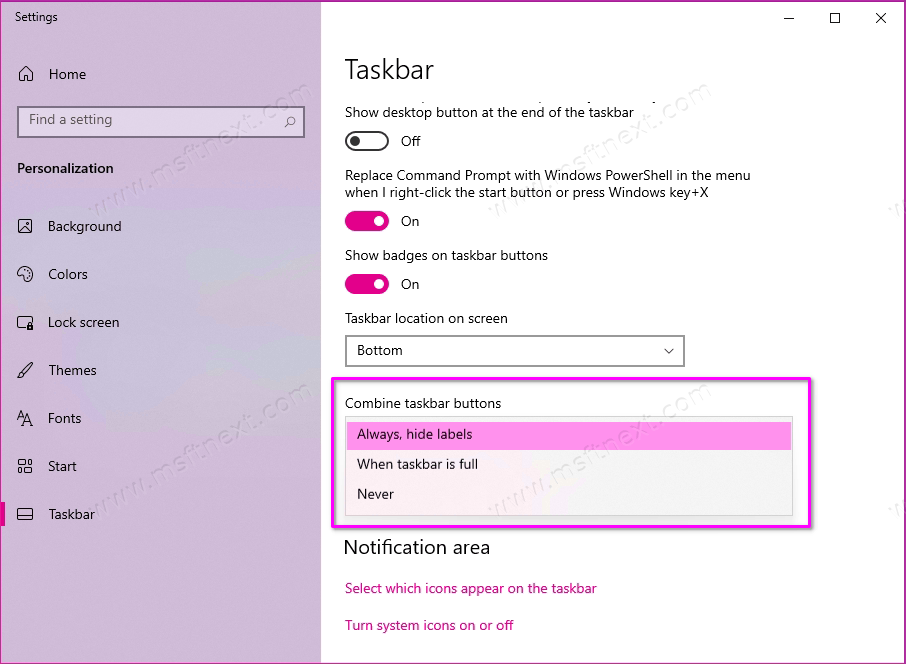
- You can set option can “Never”. This will disable grouping of window buttons of one program (for example, browser tabs) and enable text labels. The “When the taskbar is full” option will also enable captions. However, the taskbar will group its buttons if there is a large the number of open windows.
- Finally, you can see the result of applying the settings in the screenshot below.

Please note that you should activate Windows 10 to access the personalization options in Windows 10. If you didn’t activate the operating system, you can use the registry editor instead.
- Press Win+R and type
regeditin the Run box. - Go to the
HKEY_CURRENT_USER\Software\Microsoft\Windows\CurrentVersion\Policies\Explorerkey. - Create a DWORD parameter named
NoTaskGrouping, set it to 1. - Restart Explorer or restart your computer.