If you want to install Windows Subsystem for Android on Windows 11, we will show you to get it working on any Dev, Beta or Stable build. A few days ago, Microsoft began testing the Windows Subsystem for Android (WSA), which allows you to run Android apps on Windows 11.
Currently, the feature is only available to members of the Windows Insider program on the Beta channel. But even if you are using the Beta channel, then to install the subsystem from the Microsoft Store, you will need to live in the USA and run Windows 11 there.
Microsoft promises that Insiders on the Dev Channel will also soon have access to Windows Subsystem for Android. The company didn’t mention when exactly that will happen. If you don’t want to wait, you can install the subsystem manually. All you need is just a little PowerShell skill.
Install Windows Subsystem for Android on any Windows 11 build and channel
While it is only one click to get WSA from the Microsoft Store, you still need to configure your computer accessing and installing Windows Subsystem for Android.
Prerequisites
To install and run Android apps from Amazon Appstore, you device must have at least 8GB of RAM (16GB recommended), a solid-state drive (SSD), and a supported processor, such as Intel Core i3 8th Generation or above, AMD Ryzen 3000 +, Qualcomm Snapdragon 8c or above.
Also, make sure your computer supports virtualization. To do this, open the “Task Manager“, go to the “Performance” tab, select the CPU and look at the text under the graph. It should have said “Virtualization: Enabled.”.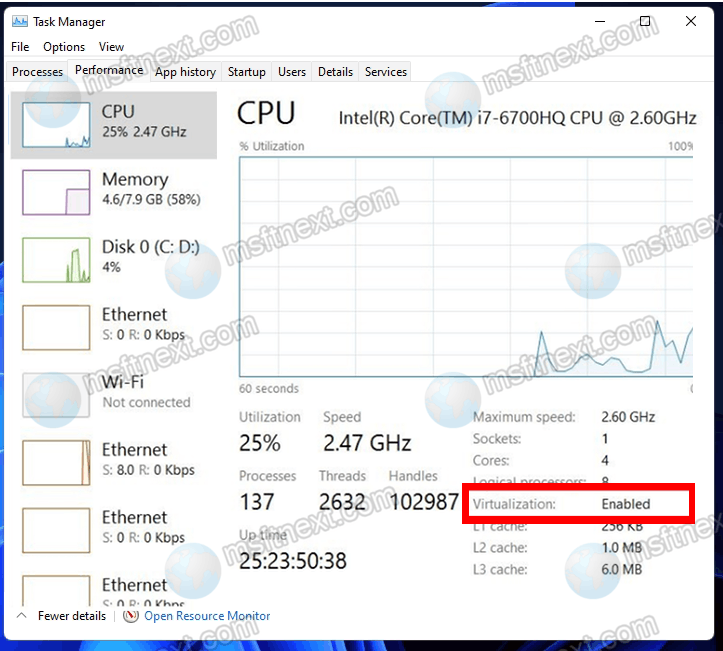
Add support for Virtual Machine Platform
- Open the “Start” menu.
- Type “Turn Windows features on or off” in the search box.
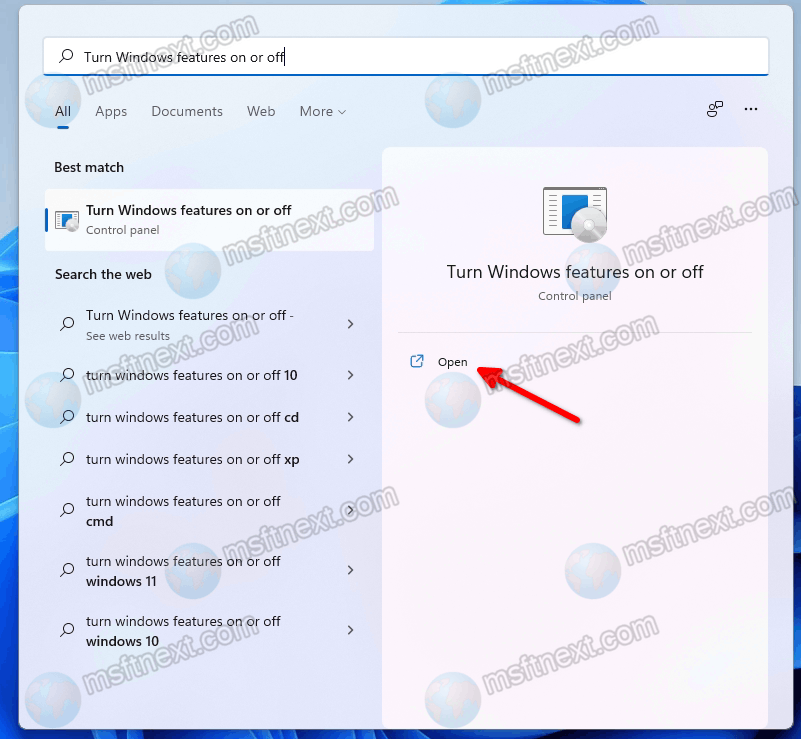
- Select the appropriate result.
- Check the Virtual Machine Platform option.
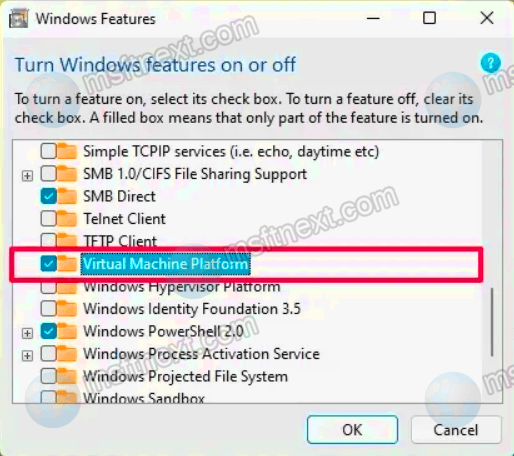
- Click the OK button and restart Windows 11.
Finally, after completing these steps, you can download the WSA bundle file and install it within the Microsoft Store. Here’s how.
Install Windows Subsystem for Android
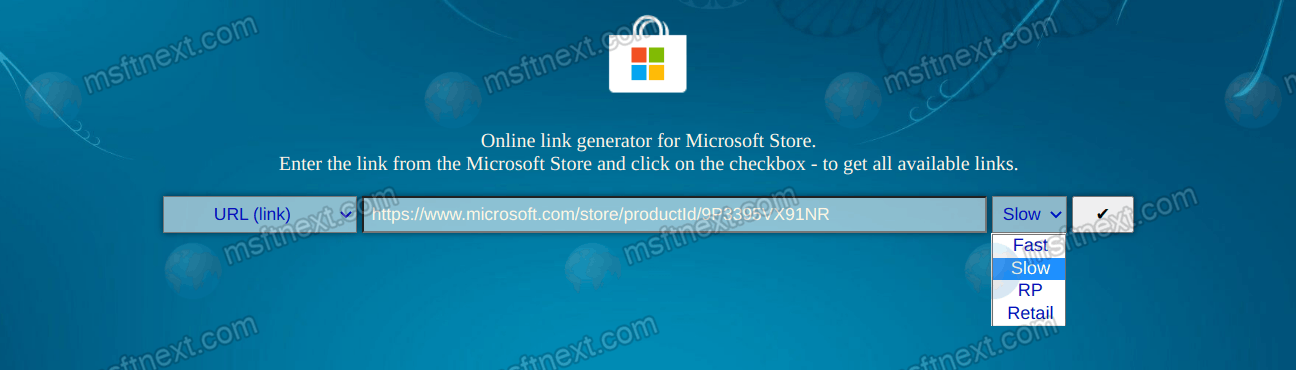
- Open the rg-adguard.net website.
- In the text box on the site, paste the following link:
https://www.microsoft.com/store/productId/9P3395VX91NR. - To the right of the textbox in the drop-down menu, select Slow and click on the checkmark.
- In the file list that appears, find a file with the following name. The version number may differ:
MicrosoftCorporationII.WindowsSubsystemForAndroid_1.7.32815.0_neutral_~_8wekyb3d8bbwe.msixbundle.
- Click on the name of this file and save the file to any folder on your computer. Please note that the file must be in .MSIXBUNDLE format.
- Run PowerShell or Windows Terminal (you need a PowerShell tab) as administrator.
- Execute the following command
Add-AppxPackage -Path "C:\Users\your user name\Desktop\MicrosoftCorporationII.WindowsSubsystemForAndroid_1.7.32815.0_neutral_~_8wekyb3d8bbwe.msixbundle". Modify the path and the file name if needed.
- Press Enter and wait for the installation to complete.
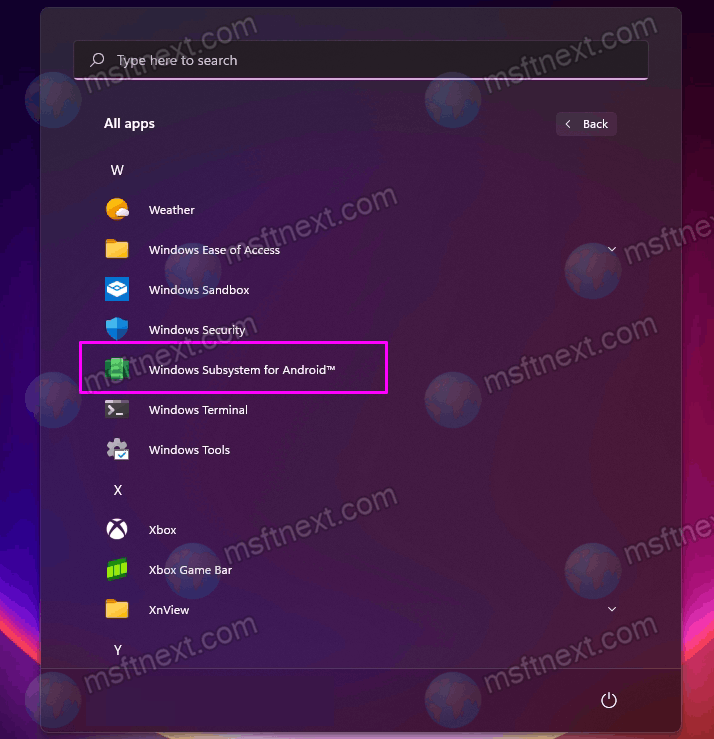
If everything went successful, an application called Windows Subsystem for Android will appear in the Start menu.
The Windows Subsystem for Android is now working, but there are some complications with installing applications. As you already know, Amazon Appstore is used here instead of Google Play. Moreover, it only lists applications that Microsoft and Amazon have tested for compatibility with the subsystem.
To bypass the limits, you can sideload APKs of any app, as described in our next tutorial: How to Sideload APK in Windows 11 Subsystem for Android.