How to Rearrange or Delete Win + X Menu Items in Windows 10
Windows 10, you can right-click on the Start button to open a special menu that provides faster access to most popular built-in utilities. This menu has shortcuts to useful administrative tools and system functions. It is called the Win+X menu, as it opens with the eponymous keyboard shortcut. This menu is not a customizable part of Windows 10. However, you can re-arrange the menu items and delete ones you never use.
So, to open the Win+X menu, you can use of the following methods.
- Right click the Start button. Instead of the context menu of the taskbar, Windows 10 shows Win + X menu.
- Or, press Win + X shortcut keys on the keyboard.
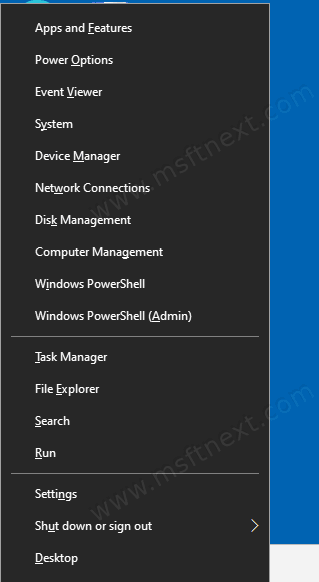
The Win+X menu commands are populated from the shortcut files (.LNK) stored in the %LocalAppdata%\Microsoft\Windows\WinX folder, organized by three subfolders, Group 1, Group 2, and Group 3. Each of the subfolders represent a section of Win + X menu.
- Group1 – the bottom section,
- Group2 – middle,
- Group3 – top.
Customizing the Win+X menu is not an easy task because it a layer of protection in order to prevent third party apps from abusing it and putting their own shortcuts there. The shortcuts are all special and specially ‘approved’. User created shortcuts it will be ignored.
However, you can move or re-arrange them.
This post will show you how to move, rearrange, and delete the Win+X menu entries in Windows 10.
To Re-arrange Win + X Menu Items in Windows 10
- Open File Explorer.
- Go to the folder
%LocalAppdata%\Microsoft\Windows\WinX. Paste this path to the address bar of File Explorer and hit the Enter key. - Open the
Group 2folder and cut (Ctrl + X) the Control Panel item. It represents the Settings command in the menu.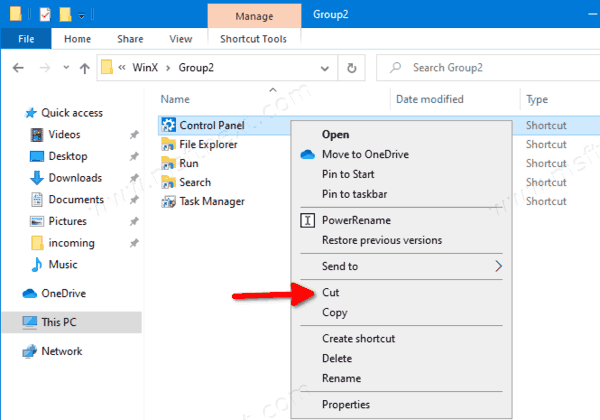
- Paste it into the
Group 1folder.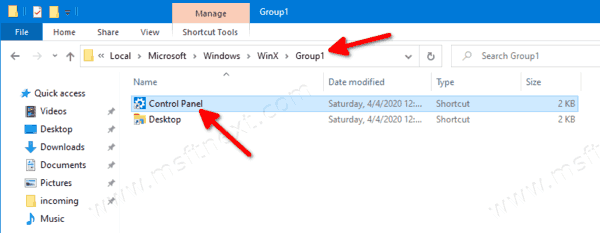
- The Settings item is now appear at the bottom.
Tip: If see duplicate entries, just restart Explorer.
Similarly, you can easily remove an entry from the Win + X menu.
To Delete a Win+X Menu Item in Windows 10
- Open File Explorer.
- Go to the folder
%LocalAppdata%\Microsoft\Windows\WinX. Paste this path to the address bar of File Explorer and hit the Enter key. - Open the folder Group1 (bottom), Group2 (middle), or Group3 (top) to find the required shortcut.
- Cut (Ctrl + X) the item you want to remove. For example, Group3\System.
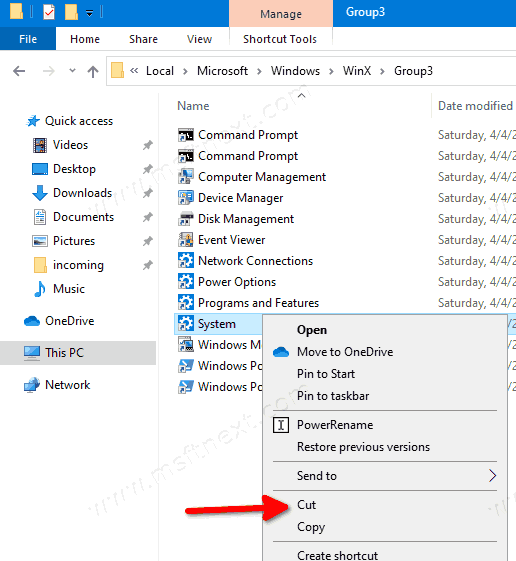
- Paste to the root folder,
%LocalAppdata%\Microsoft\Windows\WinX.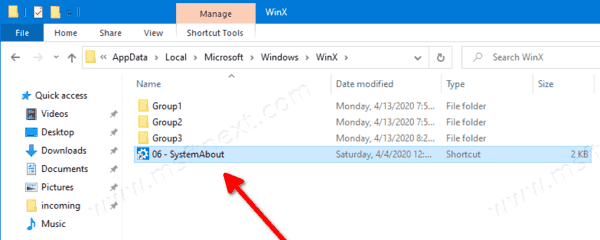
- The entry has gone from the Win+X menu.
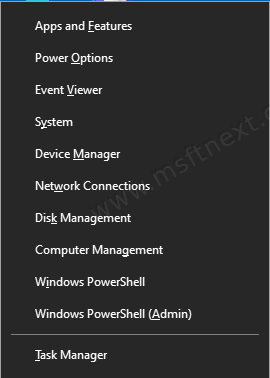
Before:
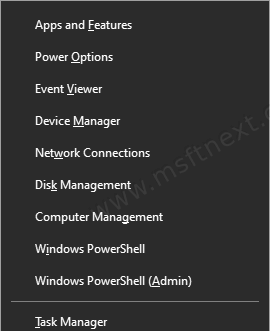
After:
We advise you not to * delete * any shortcuts using the Delete command. Otherwise, you won’t be able to quickly restore them if you change your mind later.
Restore deleted items
To restore any deleted item, just move it from the %LocalAppdata%\Microsoft\Windows\WinX folder back to its original location under the Group 1 .. Group 3 subfolder.